Tag: local auto repair shop

  • The Cost of Guessing & Why Professional Diagnosis is Your Best Friend

    We live in the age of information. Between YouTube tutorials and those little code readers you can buy for the price of a tank of gas, it has never been easier to feel like you’ve solved your car’s mystery before you even pull into the shop.

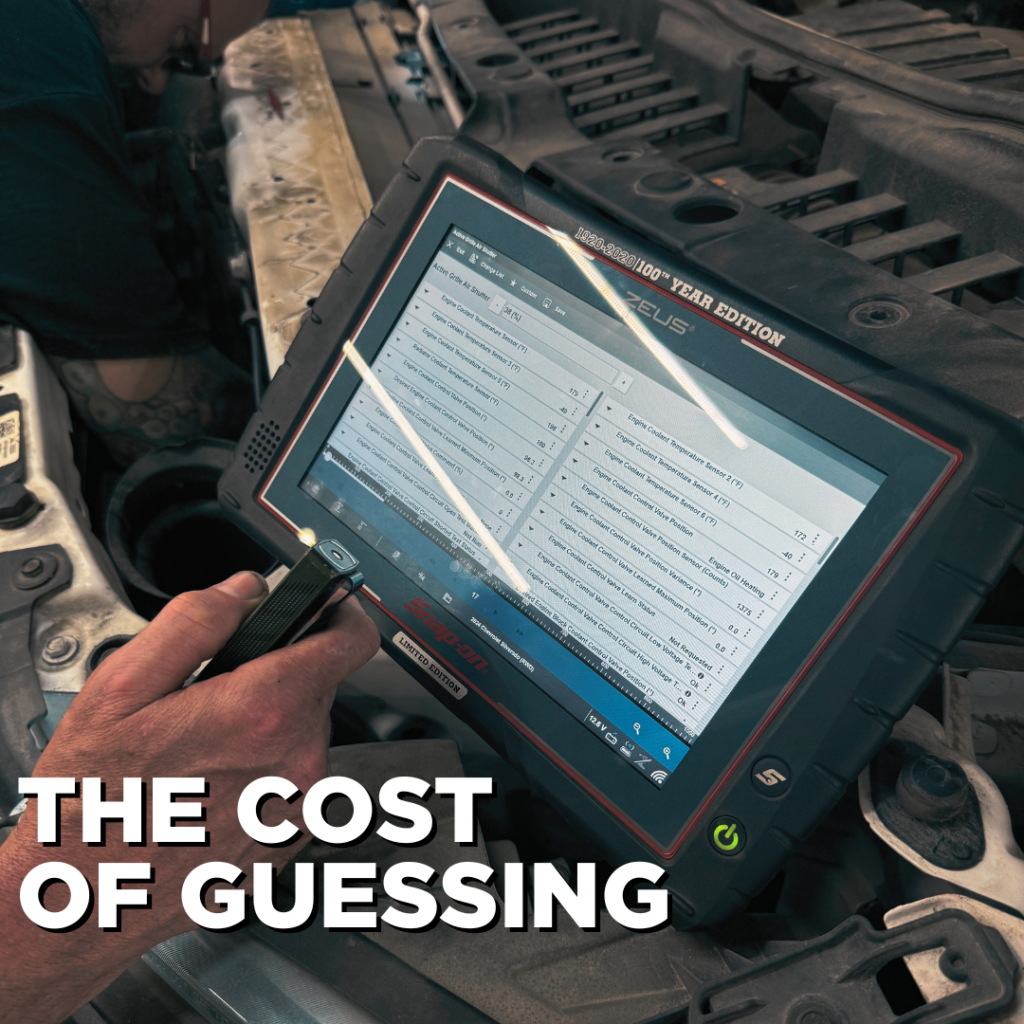
    But here’s the truth we see every day: A code is a symptom, not a solution. When you skip the diagnostic process and ask for a specific part to be replaced on a hunch or a “free scan”, you’re essentially asking us to perform surgery based on a self-diagnosis. If the diagnosis is wrong, you’ve spent money on a “cure” that doesn’t fix the disease.

    Here are three stories from our shop where a proper diagnosis saved the day (and the customer’s wallet).


    1. The “Misfire” That Was Actually a Heat Wave

    A customer came in with a vehicle that was shaking and running incredibly rough. They were certain it was a misfire and requested a full tune-up: new plugs, wires, and coils.

    However, our team noticed the temperature gauge was creeping up. It turns out the engine wasn’t “missing” because of bad spark plugs; it was struggling because the cooling fan had failed.
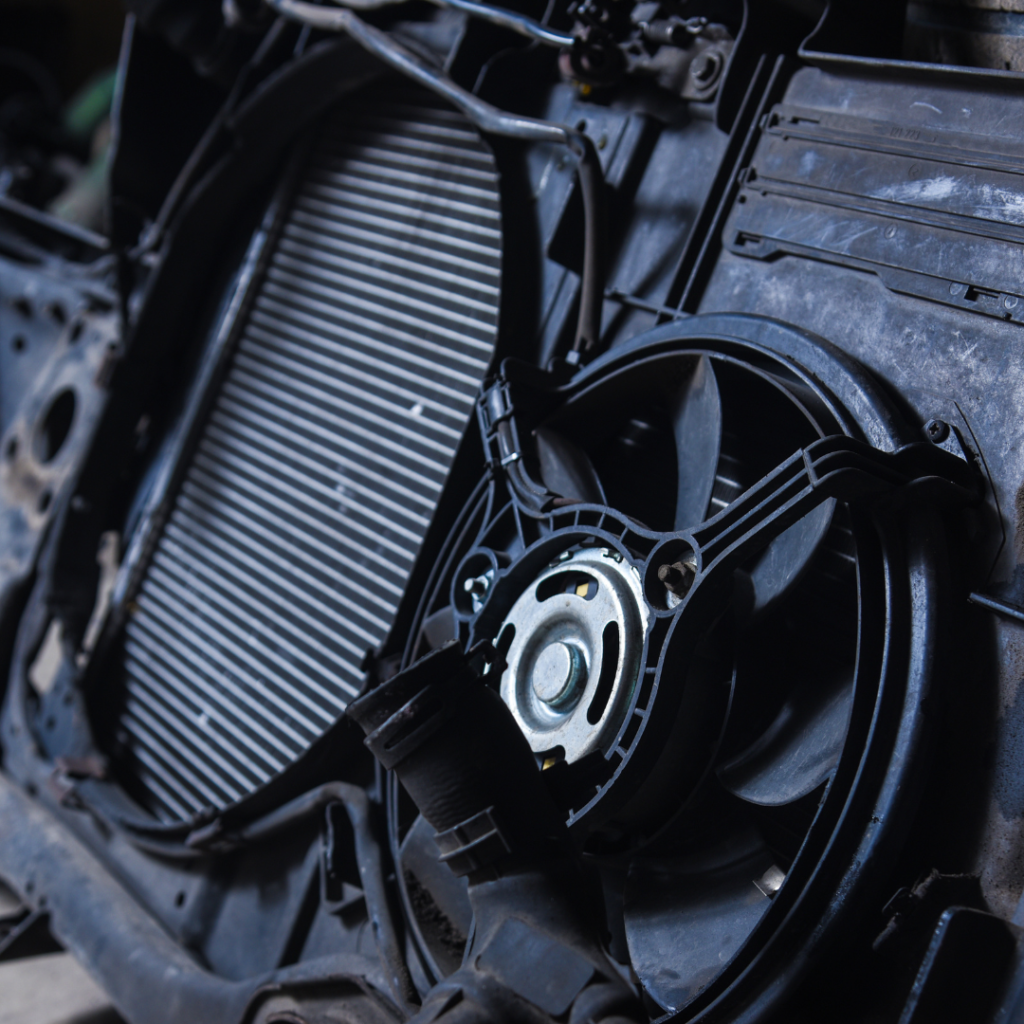
    The engine was getting so hot that it began to stumble, mimicking misfire symptoms. A tune-up would have cost hundreds of dollars, yet the car would have still overheated— potentially leading to total engine failure.


    2. The A/C Mystery: It’s Not Always the Freon

    We had a request for a “standard evac and recharge” for an A/C system that wasn’t cooling. The customer didn’t want a diagnosis; they just wanted more Freon.
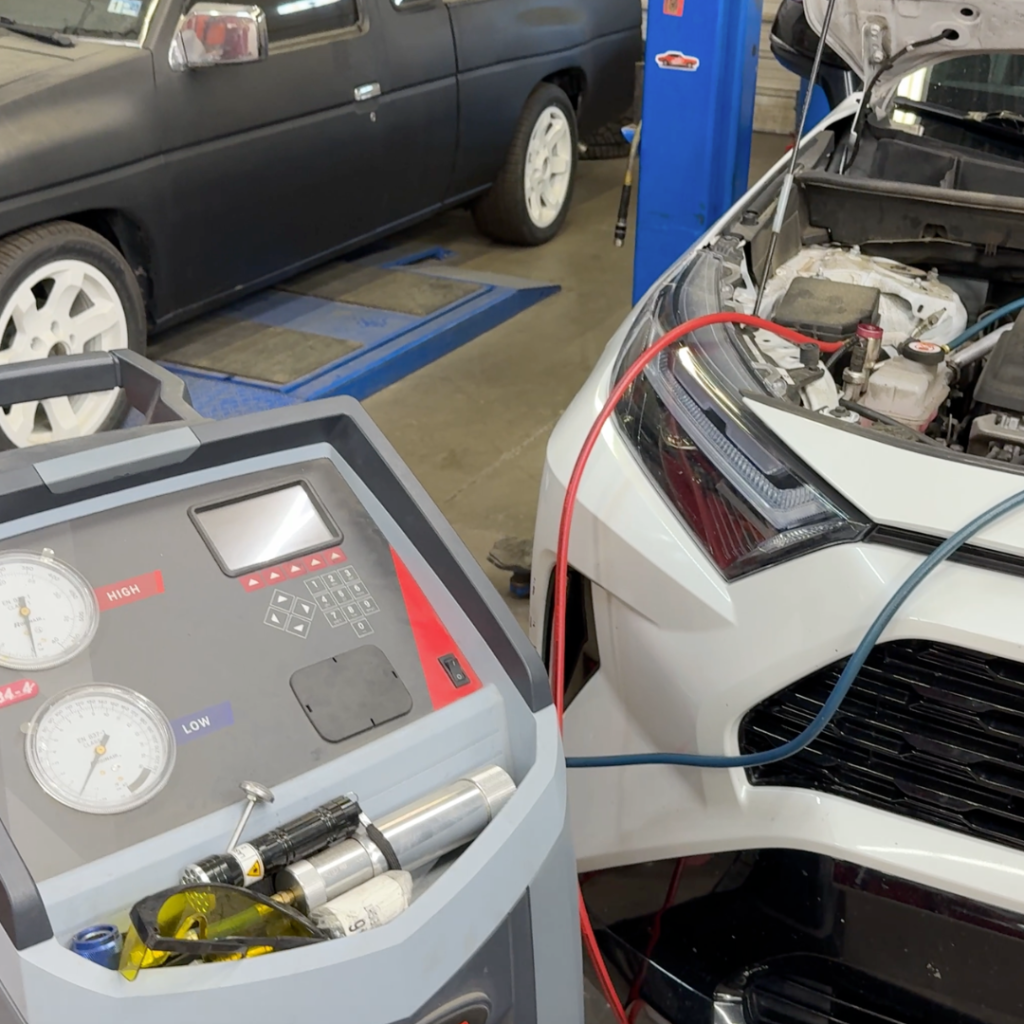
    When we hooked it up to our equipment, the system held a perfect vacuum and the refrigerant levels were actually spot on.

    By digging deeper, we found the real culprit: the driver’s side was ice cold, but the passenger side was blowing warm.

    The issue wasn’t the gas; it was a faulty HVAC blend door actuator—a small motor that redirects air.
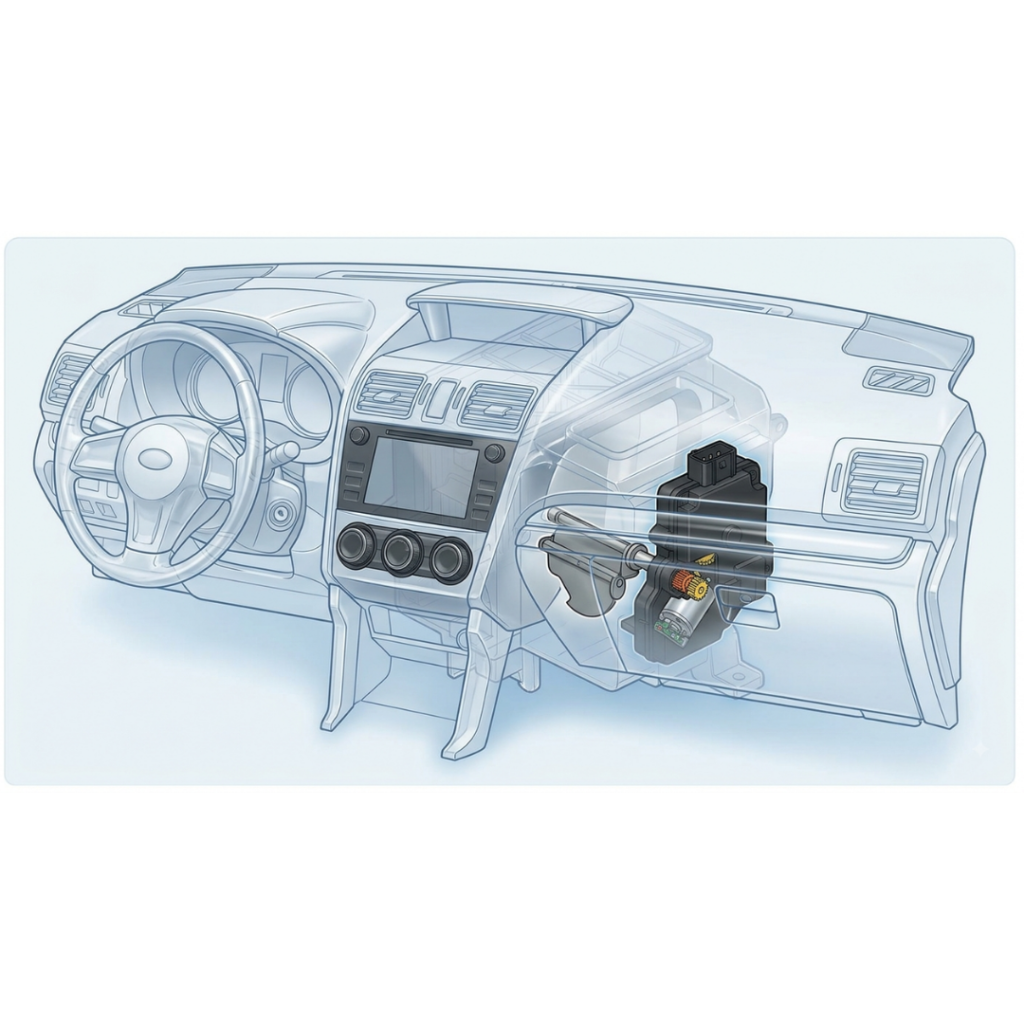
    If we had simply performed the recharge as requested, the customer would have paid for a service they didn’t need and left with the exact same warm air on the passenger side.


    3. The $120 Mistake

    This one was a tough lesson in “part-hanging.” A customer requested we install a new neutral safety switch they had already purchased, convinced it was the reason their car wouldn’t start. We installed it as requested, but the car still sat silent in the bay.

    Once we were authorized to perform a proper diagnosis, we found a faulty brake light switch. The car’s computer didn’t know the brake pedal was being pressed, so it wouldn’t allow the engine to fire up.
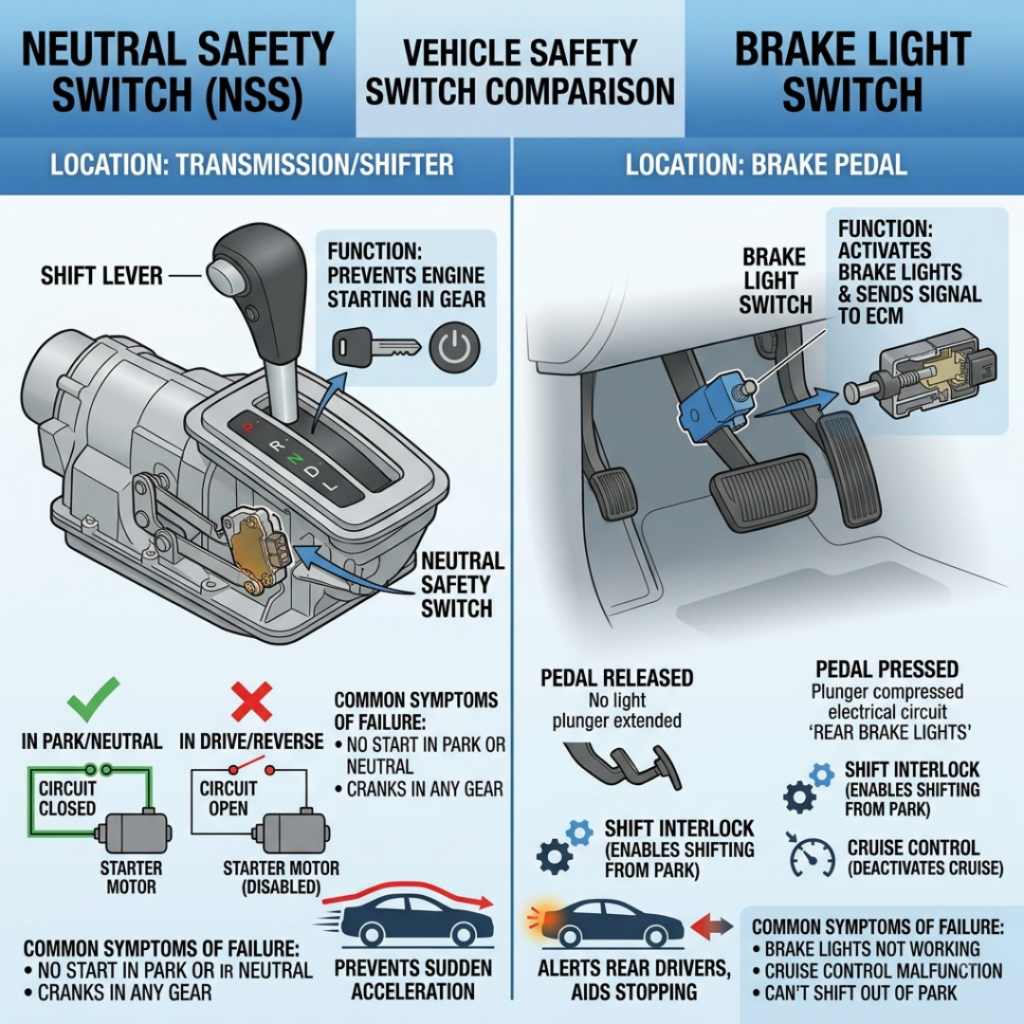
    The price difference? The brake switch was $120 cheaper than the part the customer insisted on replacing. Between the cost of the wrong part and the second trip to the shop, the “self-diagnosis” cost them significant time and money.


    Why we value the deep dive

    We understand that a diagnostic fee can feel like an extra hurdle when you just want your car back.

    We get it—paying for a diagnostic fee can feel like an extra expense, when you just want the car fixed.

    But as these stories show, a professional diagnosis is an investment that:

    • Saves Money: You stop paying for parts & labor your car doesn’t need.
    • Saves Time: We fix it right the first time, preventing a “Round 2” at the shop.
    • Reduces Stress: You leave with the peace of mind that the actual root cause has been addressed.
    • Provides Support: Most importantly, when we perform the diagnosis, we stand behind our work. When you tell us what part to change, we are simply technicians following an order. When you ask us to find the problem, we become your partners in keeping your vehicle safe and reliable.

    Our goal isn’t just to clear a code; it’s to provide a solution we can be proud of and you can rely on. Next time your dash lights up, don’t guess—let us help you get the facts.


    Sandston Automotive

    SMALL TOWN FEEL, BIG TIME SERVICE

    804-737-7206

  • Breathe Easy: The Ultimate Guide to Vehicle Air Filters (And What Happens When You Ignore Them)

    Think of your car’s filters like a pair of high-quality masks. One protects the “heart” of your vehicle—the internal combustion engine—while the other protects you and your passengers inside the cabin. When these critical barrier elements get clogged, your car starts to get stuffy, sluggish, and potentially very expensive to repair.


    1. The Engine Air Filter: Your Vehicle’s “Lungs”

    Located under the hood inside a sealed plastic airbox, the engine air filter serves as the primary defense system for your engine’s internal combustion process. To burn gasoline or diesel efficiently, an engine requires a massive volume of air—roughly 10,000 gallons of air for every single gallon of fuel burned!

    The Vital Job

    The engine filter traps environmental contaminants—such as road dust, dirt, leaves, sand, insects, and fine particulate matter—before they can enter the intake manifold and cylinder chambers. Without this filter, microscopic abrasive particles would scour precision-machined cylinder walls, pistons, and valves, leading to rapid mechanical wear and premature engine failure.

    What Happens When It’s Ignored?

    When an engine air filter reaches its dust-holding capacity, the pleats become choked with grime, drastically restricting airflow:

    • Sluggish Acceleration & Throttle Lag: Deprived of clean oxygen, the engine struggles to achieve the optimal air-fuel combustion ratio, resulting in noticeable power loss when passing or merging.
    • Decreased Fuel Economy: Modern Engine Control Units (ECUs) attempt to adjust fuel mixture ratios to compensate for restricted airflow, often burning extra fuel unnecessarily.
    • Engine Misfires & Black Exhaust Smoke: Severely restricted airflow causes incomplete combustion, which fouls spark plugs and sends raw, unburnt fuel into the exhaust system.
    • Illuminated “Check Engine” Light: Mass Air Flow (MAF) sensor fault codes (such as P0101) will trigger when expected air volume deviates from real-time readings.

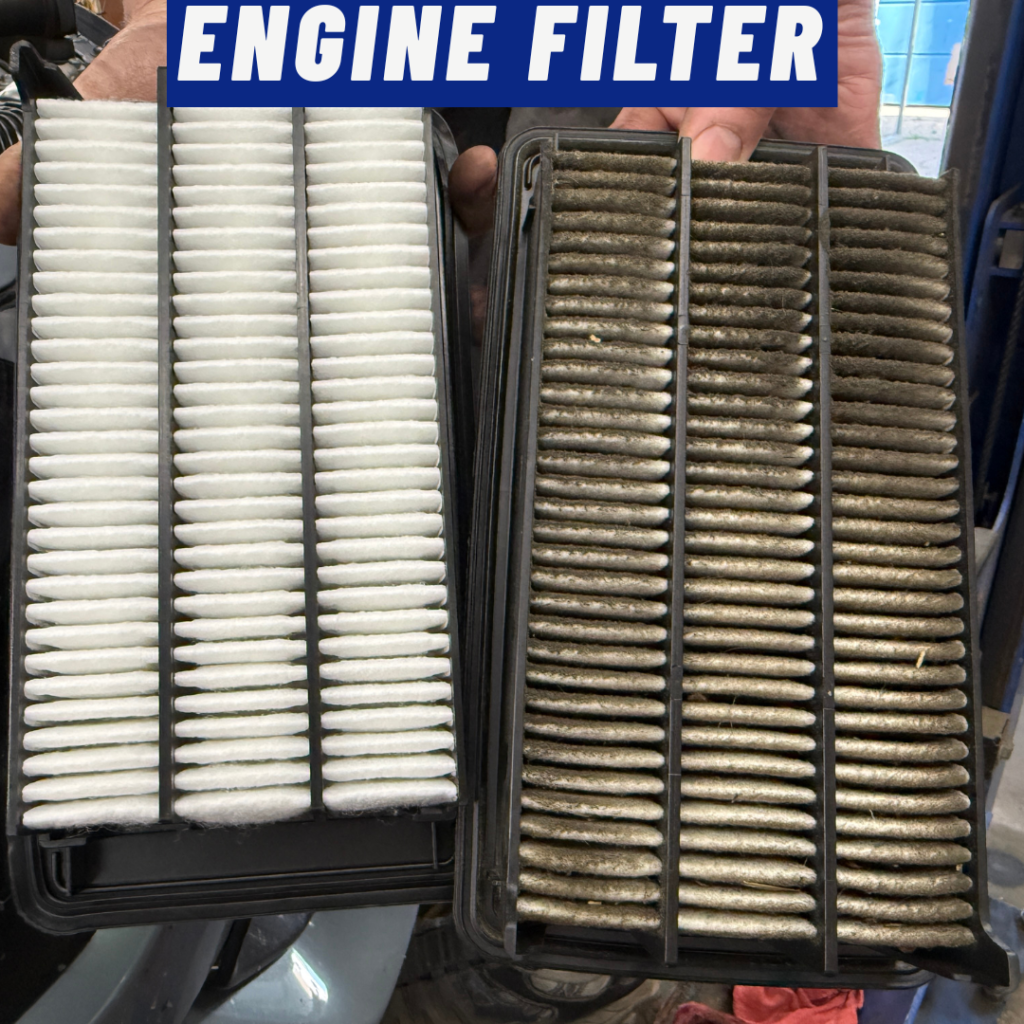
    Bright white pleated media with maximum  airflow and zero restriction

    VS.

    Heavy dirt coating, trapped insects and 30,000+ miles of road grime.        


    2. The Cabin Air Filter: Your HVAC Respiratory Shield

    While the engine air filter protects the machine under the hood, the cabin air filter is dedicated entirely to driver and passenger health. Tucked behind the glovebox or near the windshield cowl, this filter scrubs all ambient air pulled into your heating, ventilation, and air conditioning (HVAC) system.

    The Vital Job

    As you drive through city traffic, highway corridors, or dusty rural roads, your vehicle passes through dense plumes of airborne contaminants. The cabin air filter traps:

    • Fine pollen, ragweed, and environmental allergens
    • Mold spores and fungal spores
    • Industrial soot, silica dust, and brake dust
    • Microscopic particulate matter ($PM_{2.5}$) down to sub-micron sizes

    What Happens When It’s Ignored?

    • Musty “Old Gym Bag” Odors: Trapped moisture and organic debris inside dark filter pleats create the ideal breeding ground for mold, mildew, and bacteria—filling your car with persistent bad smells every time the fan turns on.
    • Weakened A/C & Heating Airflow: Clogged filter media creates high static pressure resistance. Your blower motor works double-time, but only a weak trickle of air emerges from the vents.
    • Dangerous Window Fogging: Restricted HVAC airflow prevents the defroster from clearing cabin moisture quickly in humid, cold, or rainy weather, dangerously impairing driver visibility.
    • Premature Blower Motor Burnout: Restricting airflow starves the fan motor of cooling, leading to electrical overheating and blown fuses or motor failure.

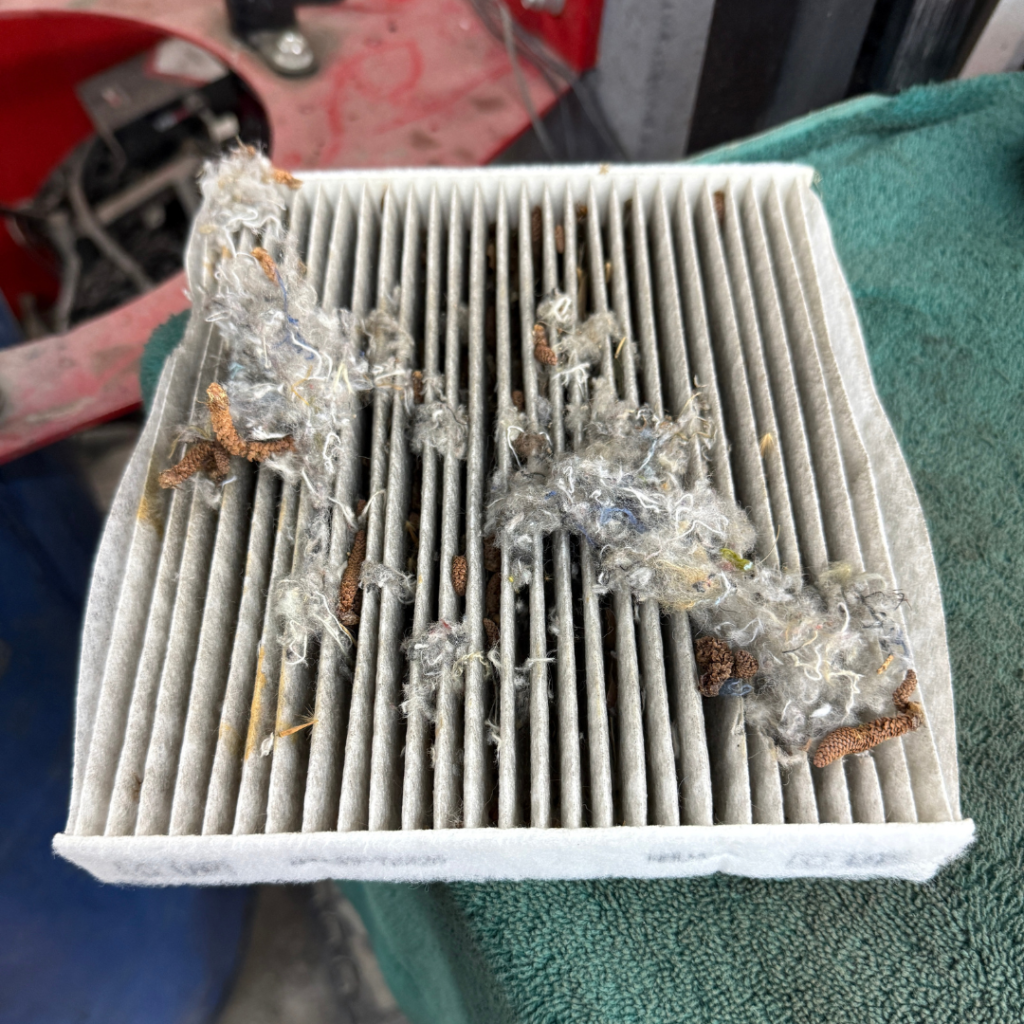
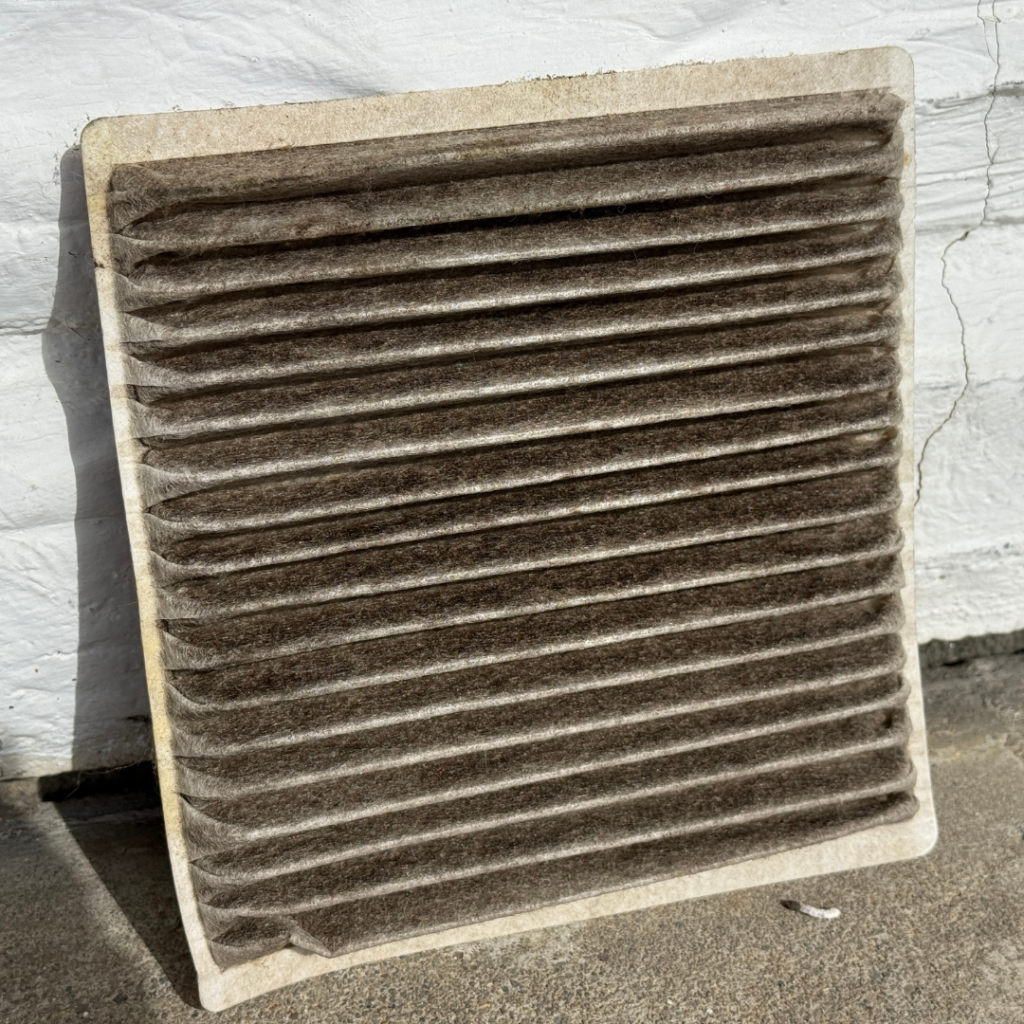
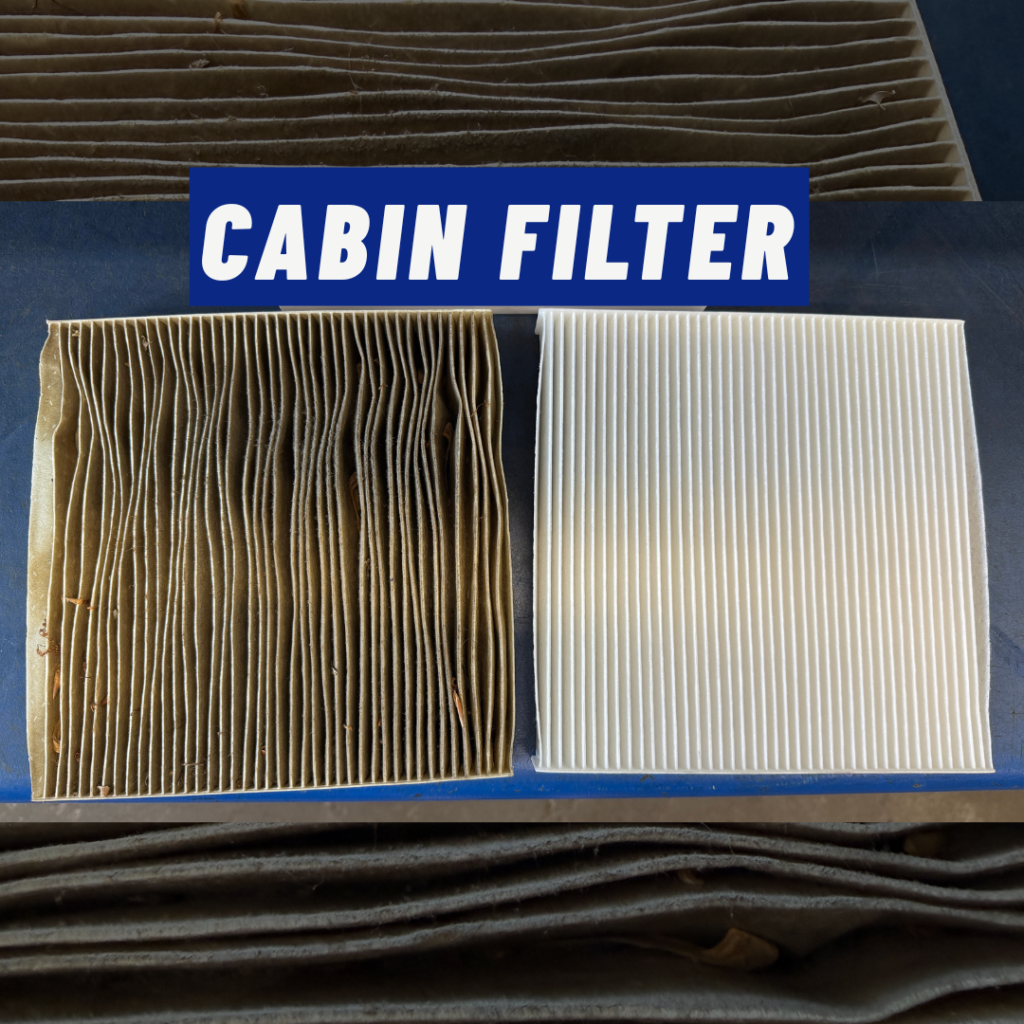
    Dark soot layer, embedded leaves, pollen matting and moisture accumulation  

    VS

    Clean synthetic layers for peak air purification & pollen defense.  


    3. Bonus Nightmare Fuel: The Rodent Nest & Blower Motor Destruction

    ⚠️ Critter Contamination Warning

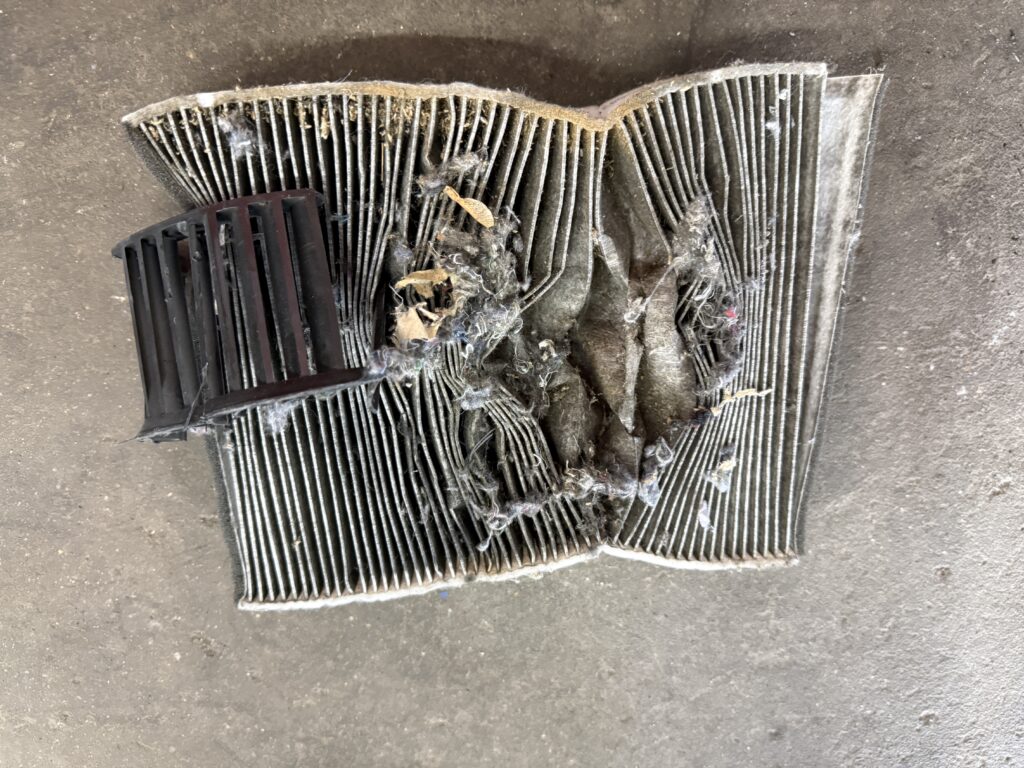
    Leaving a vehicle parked outdoors, near wooded areas, or unused for extended periods invites unwanted roommates. The enclosed cabin filter housing is warm, dry, and sheltered—making it prime real estate for mice, squirrels, and chipmunks.

    Critters routinely chew through intake screens and shred the soft accordion paper of the cabin filter to build cozy nests. However, the destruction doesn’t stop at the filter itself:

    The Chain Reaction of Damage:

    1. Chewed Filter Media: Mice shred the filter, destroying its ability to trap dust or allergens.
    2. Debris Falling into the Blower Motor: Shredded insulation, acorn hulls, and nesting materials fall directly into the fast-spinning fan cage below.
    3. Out-of-Balance Fan & Broken Cage: The heavy, off-center nest causes violent vibration when the fan is turned on, snapping delicate plastic fan fins.
    4. Expensive Mechanical Repairs: What should have been a simple $20–$30 preventive filter swap turns into a $500 to $1,000+ emergency repair requiring dashboard teardown, HVAC duct sanitization, and fan replacement.


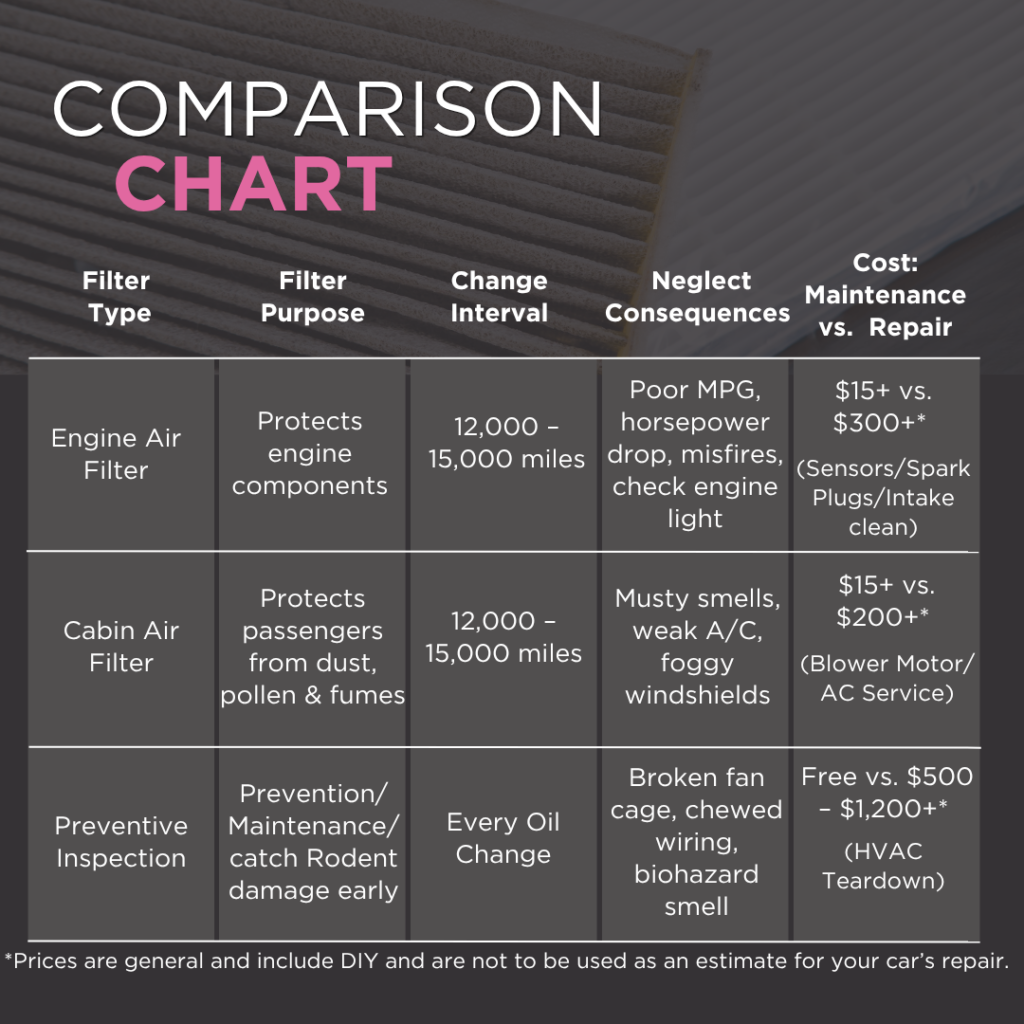
    4. Filter Comparison & Cost Breakdown


    5. Maintenance Schedule & Professional Best Practices

    The Pro Standard: Check at Every Oil Change

    As a general rule of thumb, professional auto technicians check both air filters during every routine oil change service. This simple 2-minute visual check catches contamination early before fuel economy drops or rodents make themselves at home.

    Conditions That Require More Frequent Replacement:

    • Driving on Gravel or Unpaved Roads: Heavy airborne dust clouds saturate filter media up to 3x faster than normal highway driving.
    • High Pollen Seasons & Wildfire Smoke: Organic particulates and sticky sap residues quickly clog microscopic filter pores.
    • Urban Stop-and-Go Smog: High concentrations of industrial soot and diesel exhaust darken filter media prematurely.
    • Frequent Outdoor Parking: Exposure to falling leaves, pine needles, and rodent activity near engine bays.


    Air Filters: Small Part, Huge Impact

    Air filters are among the simplest and most cost-effective maintenance items on your vehicle, but neglecting them can trigger a domino effect of poor performance, foul odors, and expensive repairs.

    Whether you’re noticing weak airflow from your dashboard vents, a dip in fuel mileage, or that dreaded musty smell every time you turn on the heater, don’t wait for a warning light. Have both filters inspected during your next routine service—your engine, your lungs, and your wallet will thank you.


    Sandston Automotive

    SMALL TOWN FEEL, BIG TIME SERVICE

    804-737-7206
  • Beyond the Code: Why Your “Check Engine” Light is Just the Start

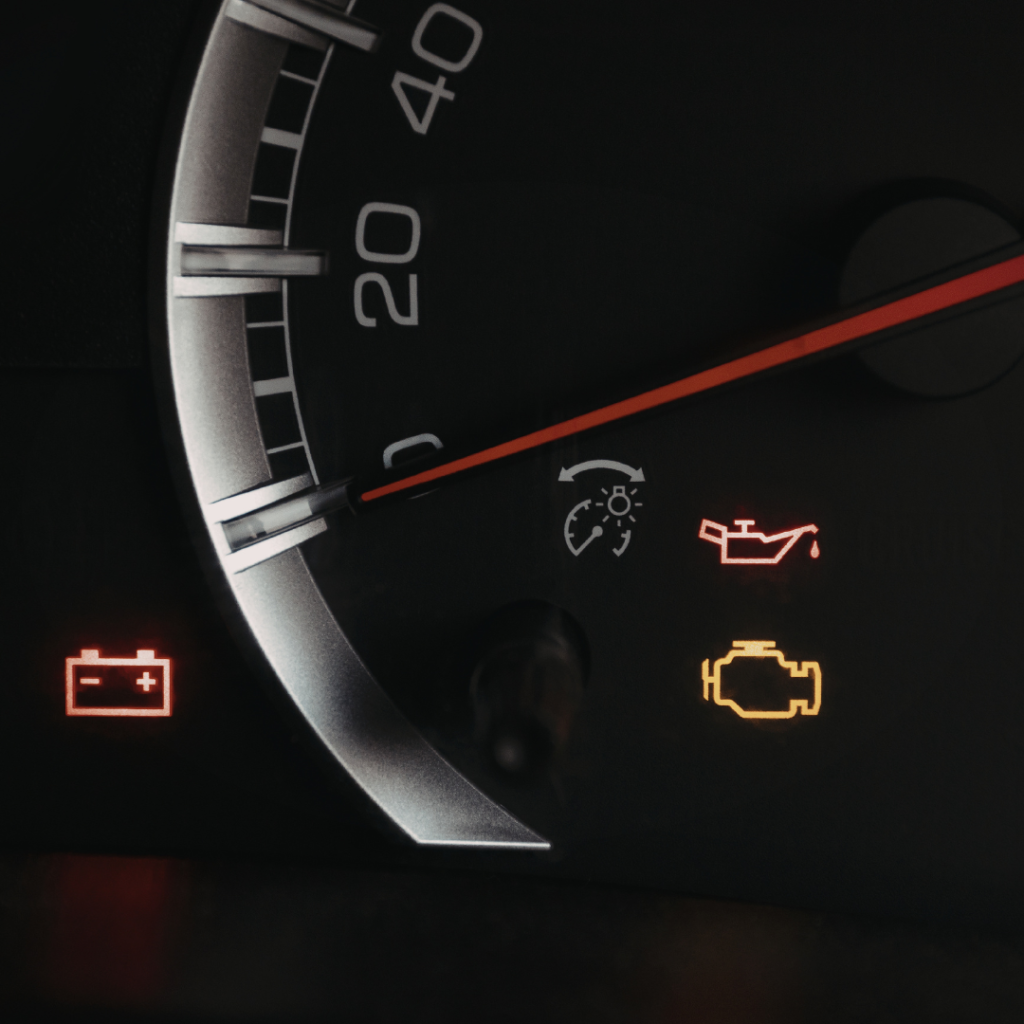
    We’ve all been there: you’re driving along when that glowing amber engine icon pops up on your dashboard. It’s an instant hit of stress. Naturally, many drivers head to a local parts store for a “free code pull,” thinking the scanner will tell them exactly what to fix.

    But here is the truth from the shop floor: A code is a starting point, not a solution.


    The “Doctor” Analogy

    Think of a diagnostic code like a human symptom. If you tell a doctor you have a fever, the fever isn’t the disease—it’s just the body’s way of saying something is wrong. The doctor then has to perform tests to see if it’s the flu, an infection, or something else entirely. 

    In your car, a code like P0300 (Random Misfire) tells us the engine isn’t firing correctly. However, it doesn’t tell us why. Is it a worn-out spark plug? A failing fuel injector? A vacuum leak? Or perhaps a deeper mechanical issue?


    The Diagnostic Process: How We Find the Truth

    When you bring your vehicle to us for a diagnostic service, we follow a rigorous process to ensure we aren’t just “parts cannoning” (guessing and replacing parts) your car.

    1. The Digital Scan: We use professional-grade scanners to pull component data. This scan shows us exactly what the car and component is doing (pressure, temperature, engine load) .
    2. Visual Inspection: We look for the obvious. Are there cracked hoses? Frayed wires? Evidence of rodents? The “Check Engine” light can often triggered by a simple $10 hose rather than a $500 sensor.
    3. Active Testing: This is where the real work happens. We use tools like multimeters, fuel pressure gauges, and smoke machines to test specific components. If a code says a sensor is “out of range,” we test the wiring to that sensor to make sure the sensor itself isn’t perfectly fine while the wire is broken.
    4. Verification: Once we identify the culprit, we explain the “why” to you, perform the repair, and then test-drive the vehicle to ensure the code stays clear and the “monitor” resets.


    Why Quality Diagnostics Save You Money

    It’s tempting to see a “Bank 1 Sensor 1” code and go buy a new Oxygen sensor. But if the real problem is a leak in your intake manifold, that new sensor won’t fix a thing—and you’ll be out the money for the part and the time it took to install it.

    Our goal is to provide accurate answers, not just code readings. By investing in a proper diagnostic hour, you ensure that the repair is done once, done right, and that you aren’t paying for parts your car doesn’t actually need.

    Next time your dashboard lights up, don’t guess—get the facts.


    Sandston Automotive

    SMALL TOWN FEEL, BIG TIME SERVICE

    804-737-7206
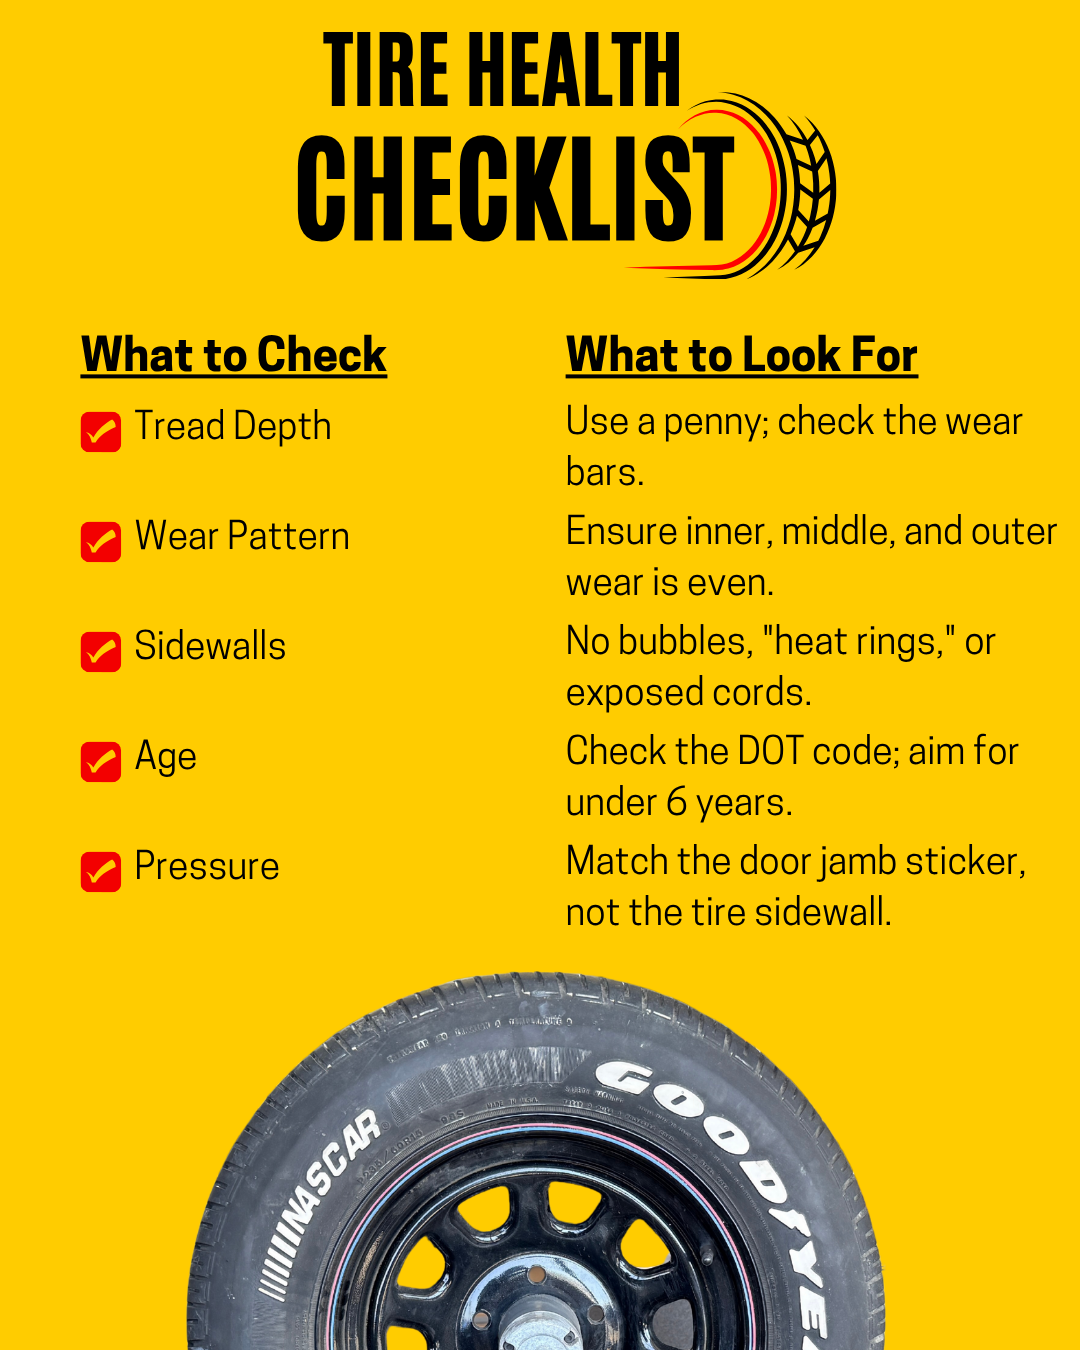
  • The Penny Test and Beyond: How to Inspect (& Maintain!) Your Tires Like a Pro

    Tires are the only point of contact between your vehicle and the road. Whether you’re commuting to work or heading out on a road trip, knowing how to “read” your rubber is essential for both your safety and your wallet. Being able to spot potential issues early is a valuable skill that provides peace of mind and ensures you aren’t left stranded.

    Here is everything you need to know to inspect your tires with confidence.


    1. The Tread: More Than Just Grooves

    Tread is designed to divert water away so your tires can maintain grip. When the tread disappears, so does your control in the rain.

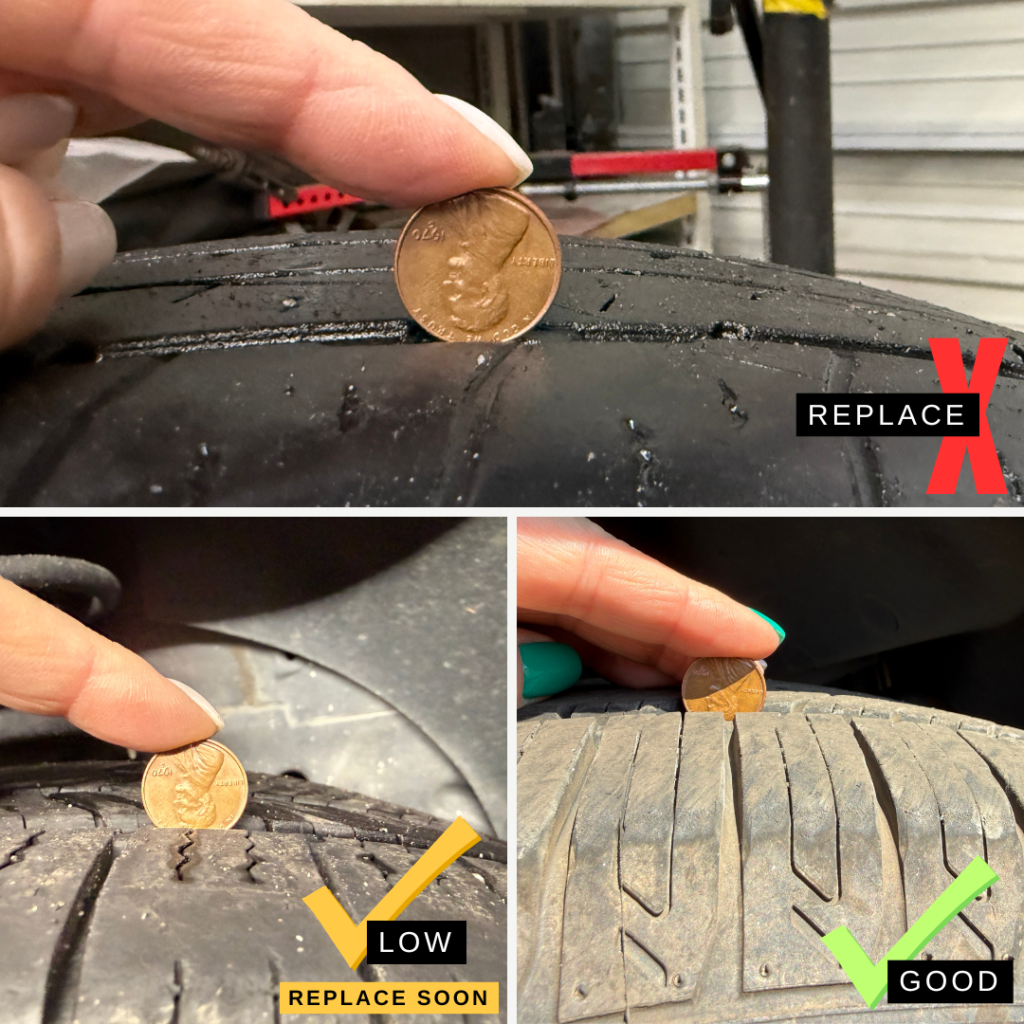
    • Tread Depth: New tires typically start at 10/32″ to 12/32″. Once you hit 2/32″, the tire is legally bald and a serious safety risk.
    • The Stopping Gap: Physics doesn’t lie. On wet pavement, a car with 2/32″ of tread can take up to 100 feet longer to stop from 60 mph than a car with 10/32″. That is nearly seven car lengths—often the difference between a close call and a collision.
    • Wear Bars: Look deep inside the grooves for small, raised bridges of rubber running across the tread. If the tread is flush with these bars, your tires have reached their legal limit and need immediate replacement.

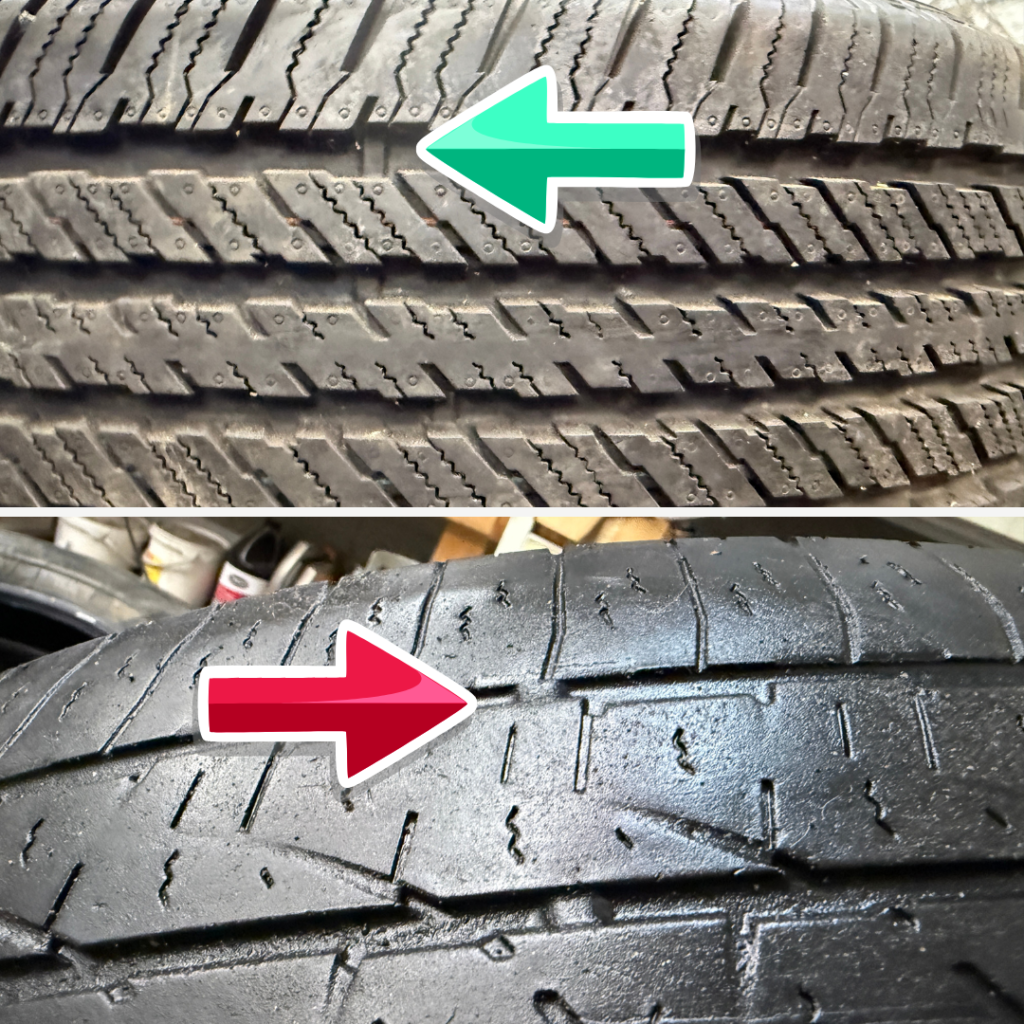
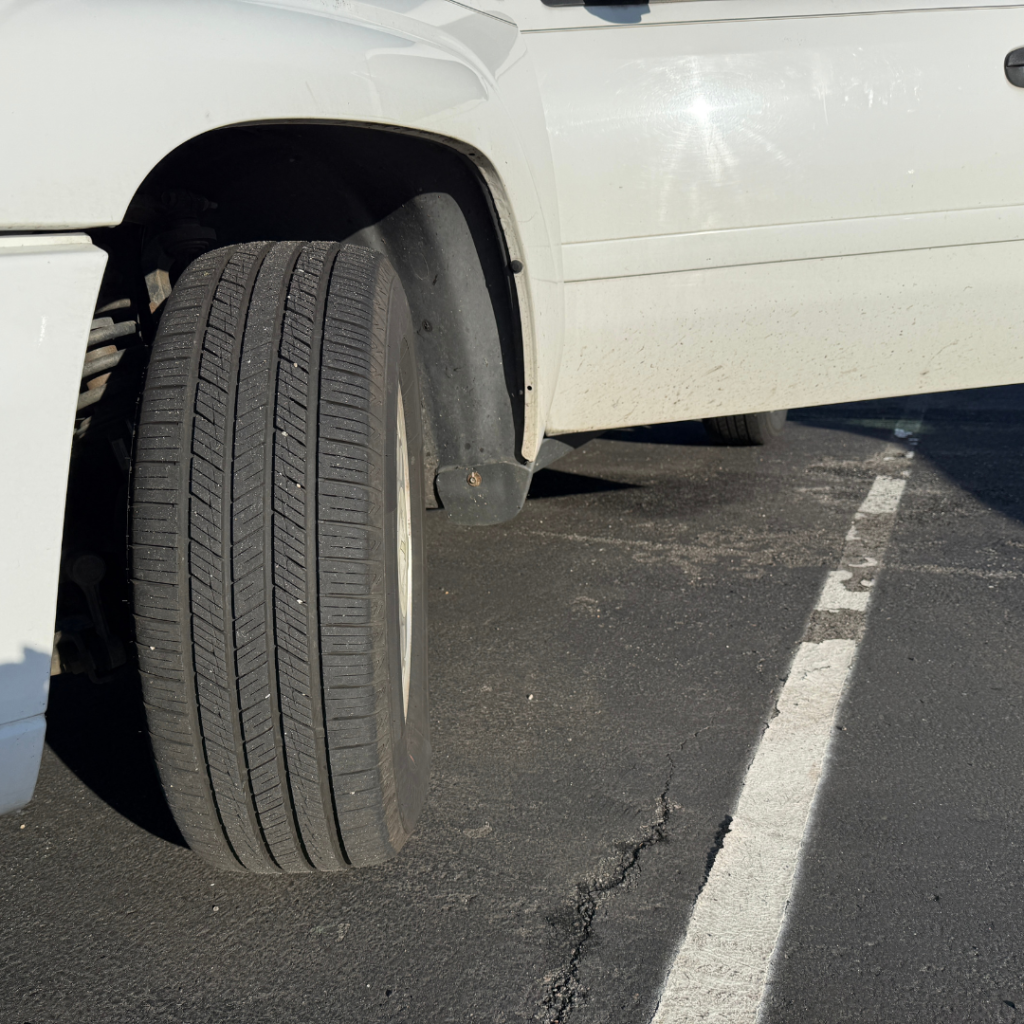
    • The Full Scan: Don’t just look at the outside edge! Turn your steering wheel all the way to one side so you can see the inner, middle, and outer tread. Tires often wear unevenly due to alignment or suspension issues.

    • The DIY Penny Test: Insert a penny into the tread with Lincoln’s head upside down. If you can see the top of his head, your tread is below 2/32″ and you need a replacement.

    Pro Tip: Temperature Matters

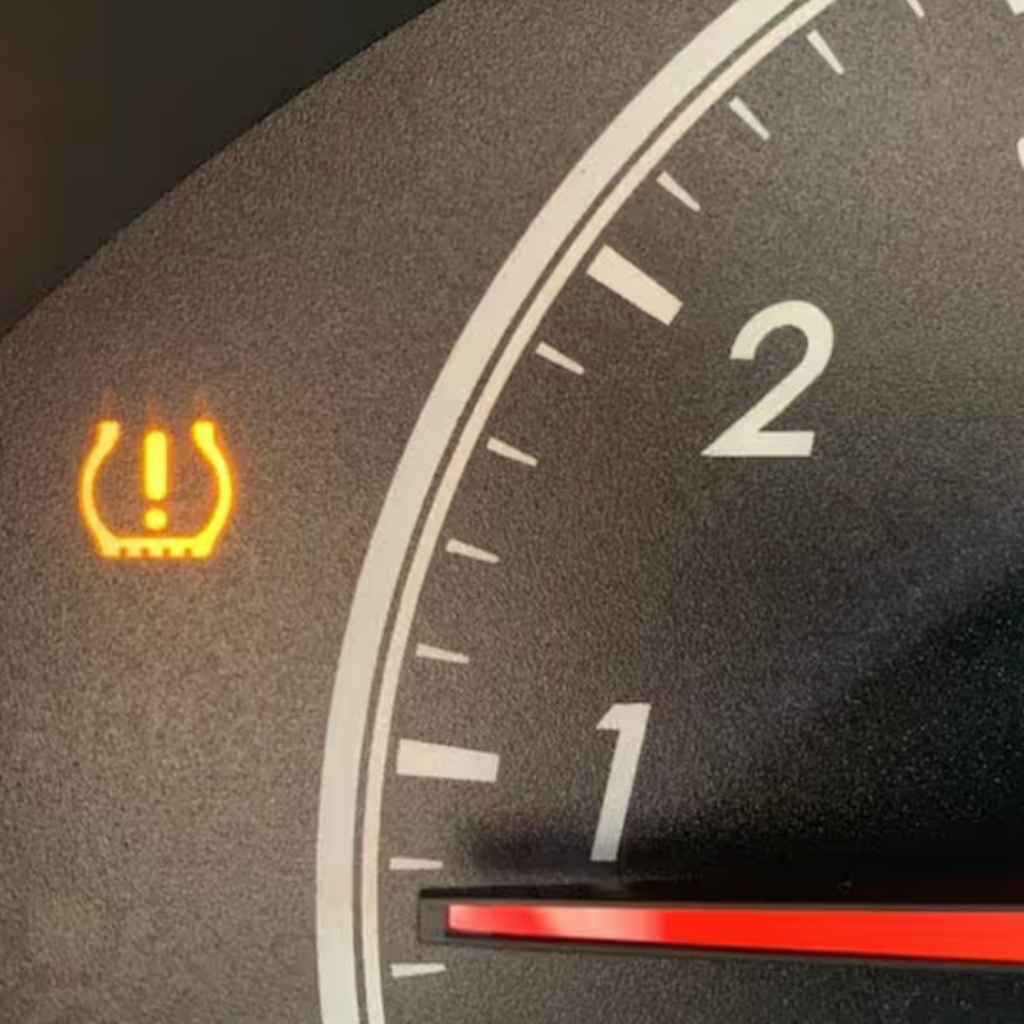
    Your tire pressure changes about 1 PSI for every 10°F change in temperature. When the first cold snap hits, your “Low Tire Pressure” light may come on as the air inside compresses. Conversely, tires gain pressure on blistering summer days. Checking your levels at the start of every season is a great habit to form.


    2. Spotting Unusual Wear Patterns

    Tires tell a story about your car’s suspension and alignment.

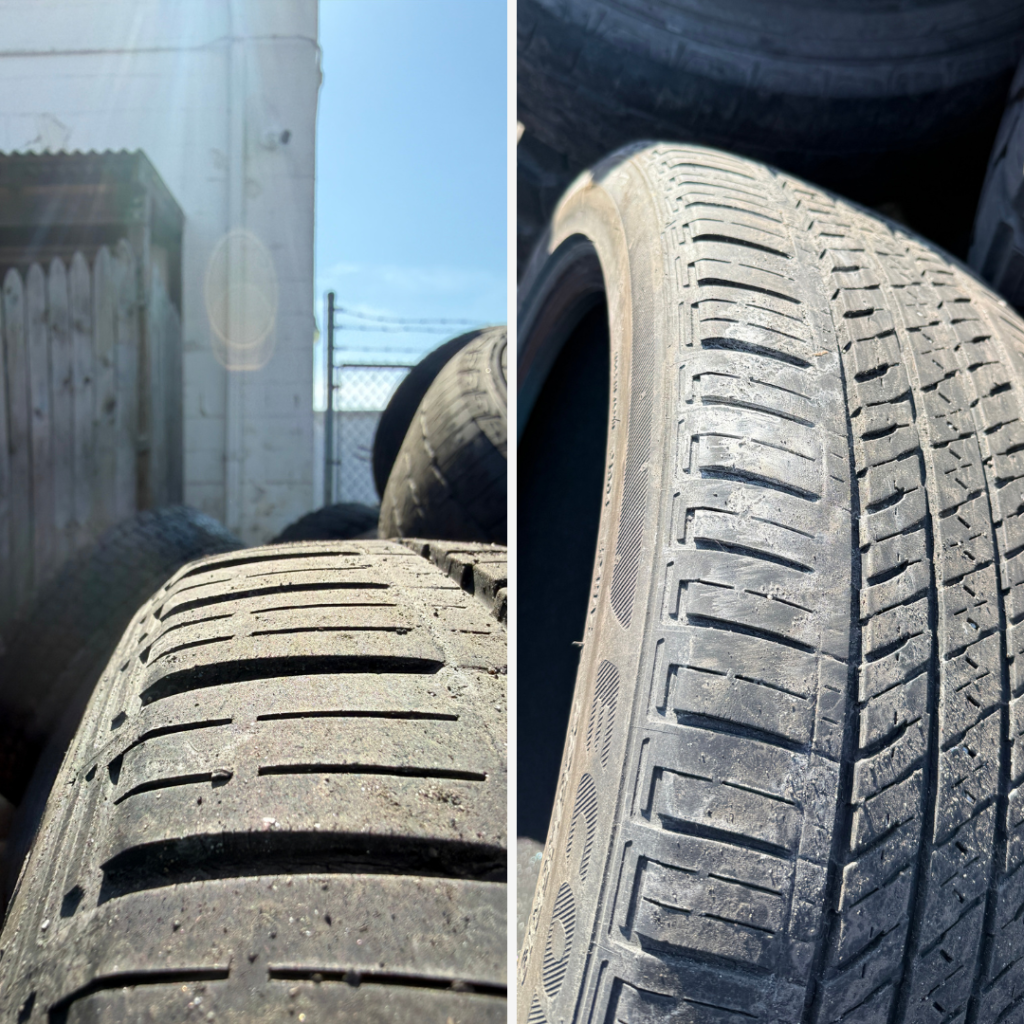
    • Chopping (Cupping): If the tread feels “wavy” or like a saw blade when you run your hand over it, your shocks or struts might be worn out.

    *Harder to see than feel; Look at the outer tread to see the height difference on every other tread, and the difference between the outer tread and middle tread on the left photo.

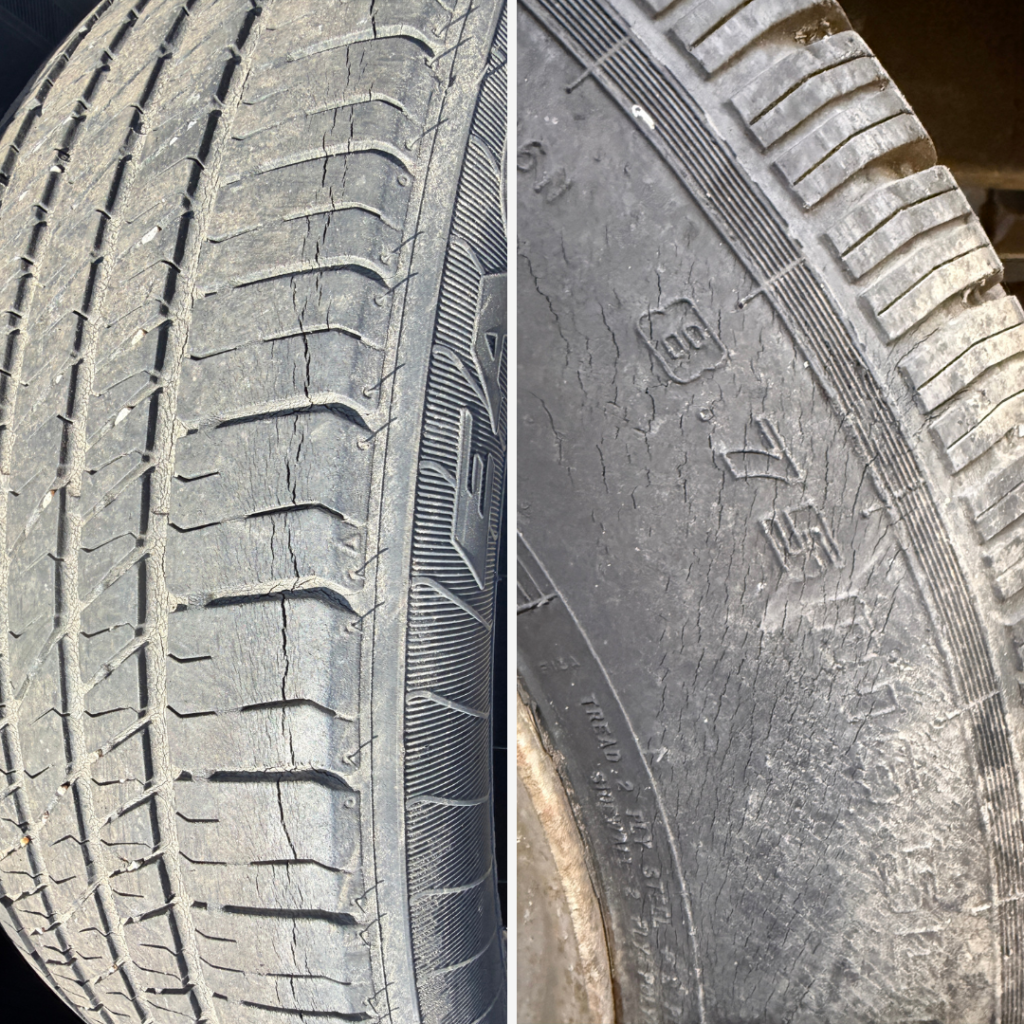
    • Dry Rotting: Look for tiny cracks in the sidewall or between the tread blocks. This happens as rubber compounds break down over time. If these cracks are deep, the tire is at risk of a blowout.


    3. Sidewall Damage: The Danger Zone

    The sidewall supports the weight of your vehicle. Unlike the tread, it cannot be patched or repaired.

    Tires at this stage are unsafe to drive on and should be replaced asap.

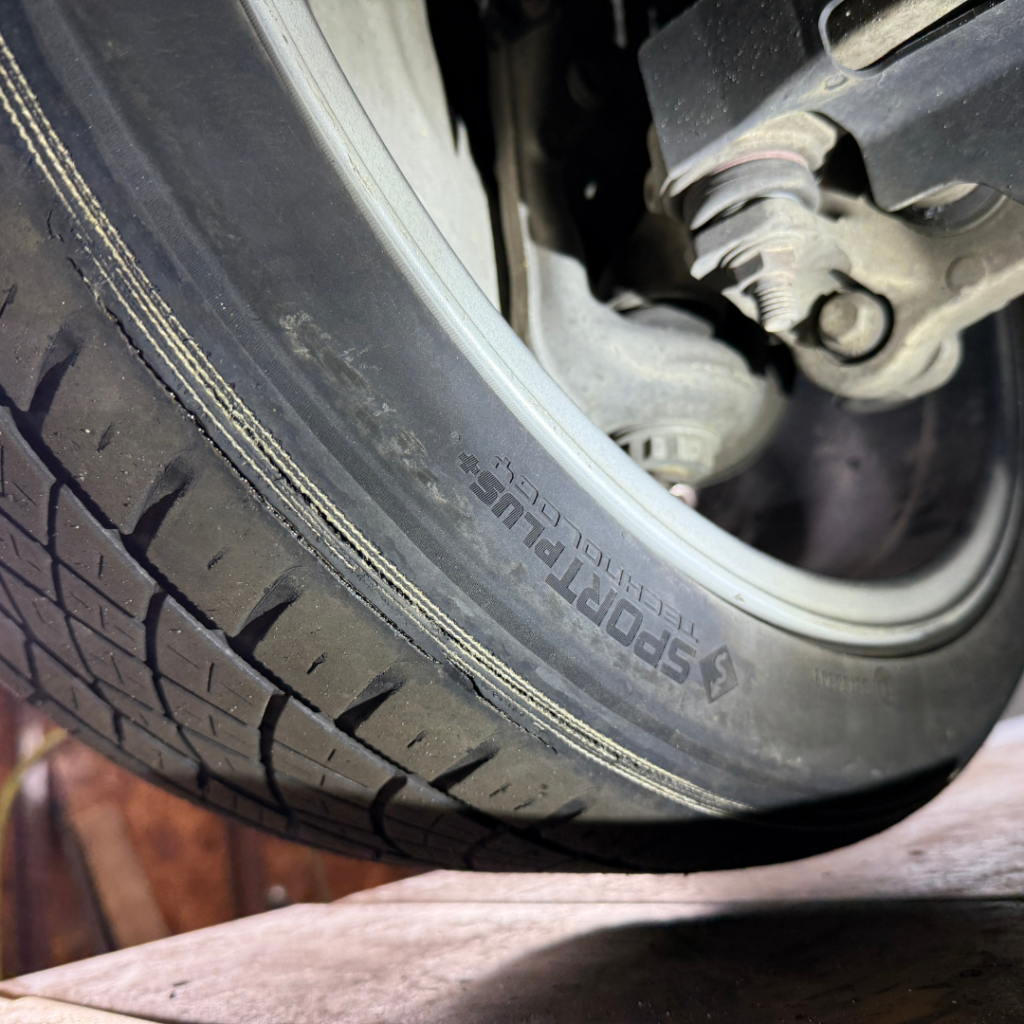
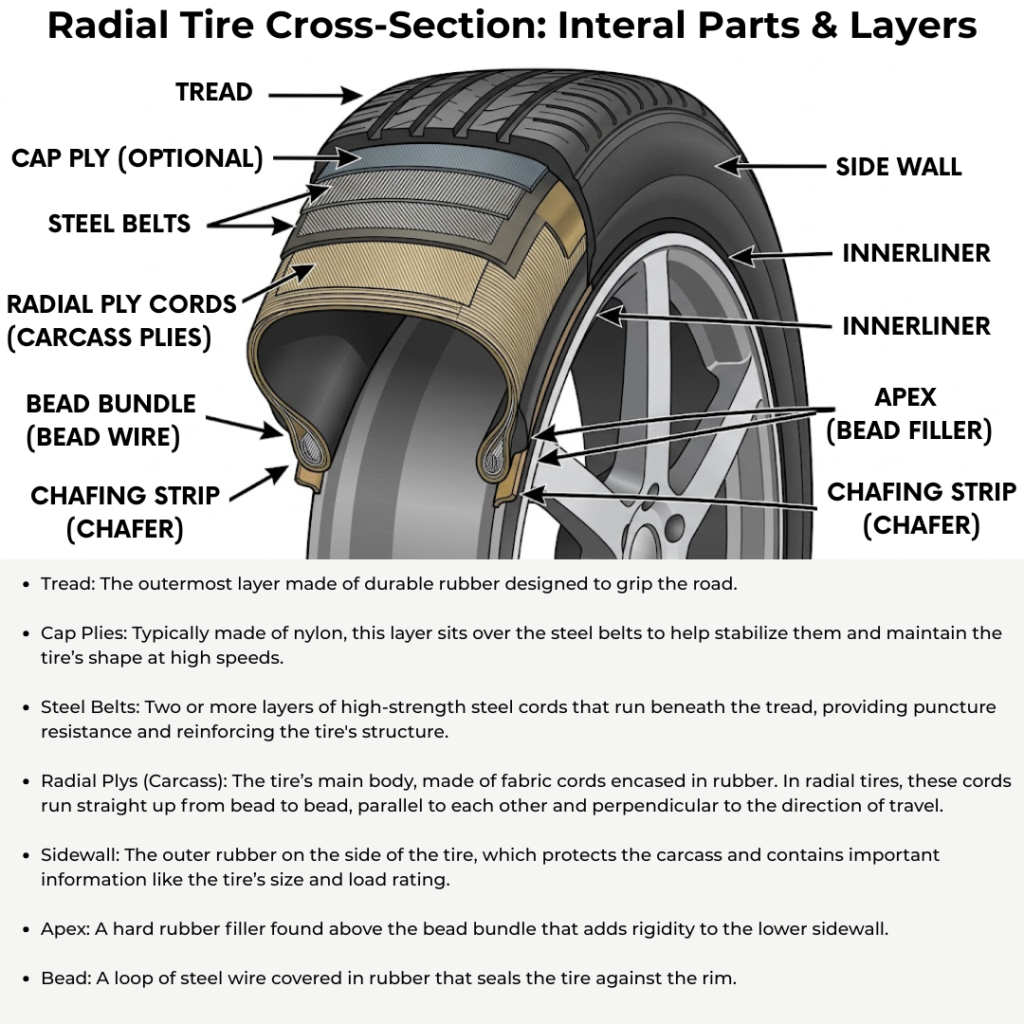
    • Cords Showing: Metal wires or fabric sticking out of the side or the tread indicates a total structural failure.
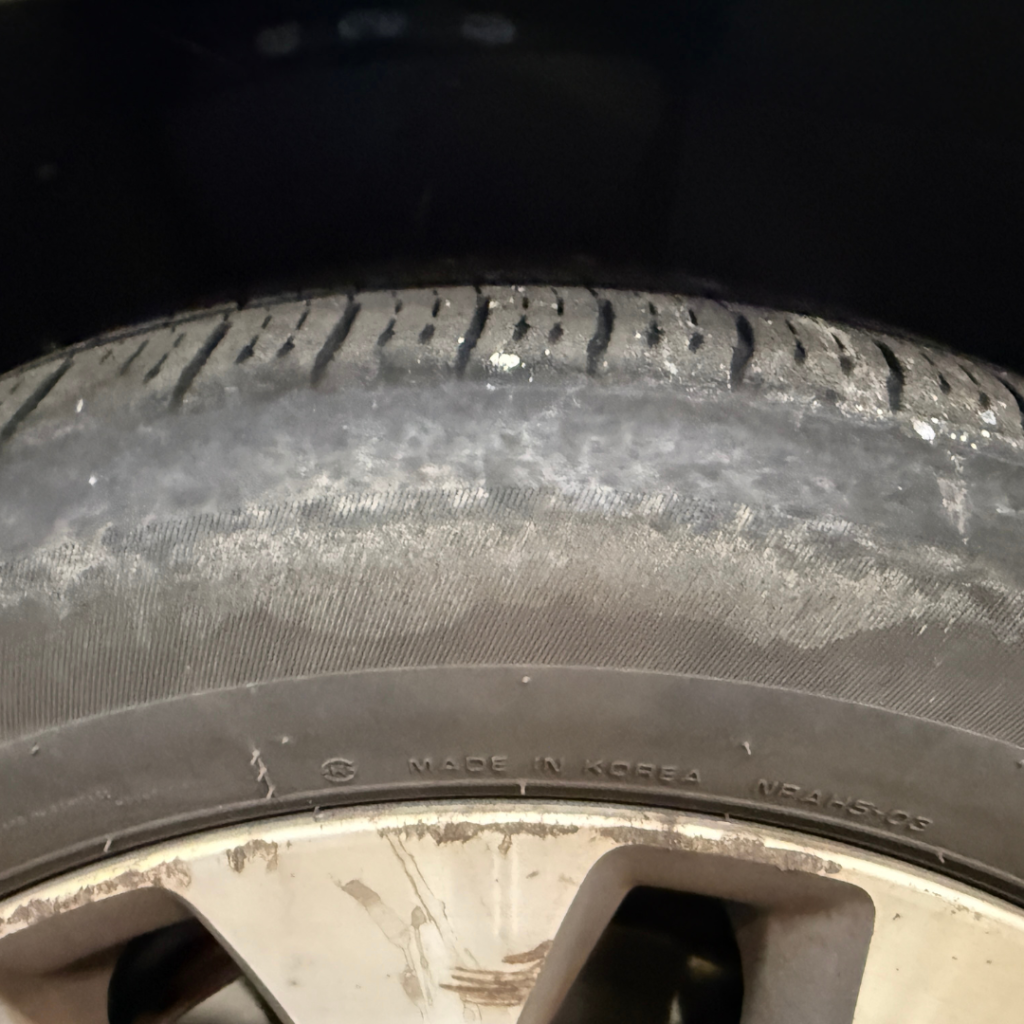
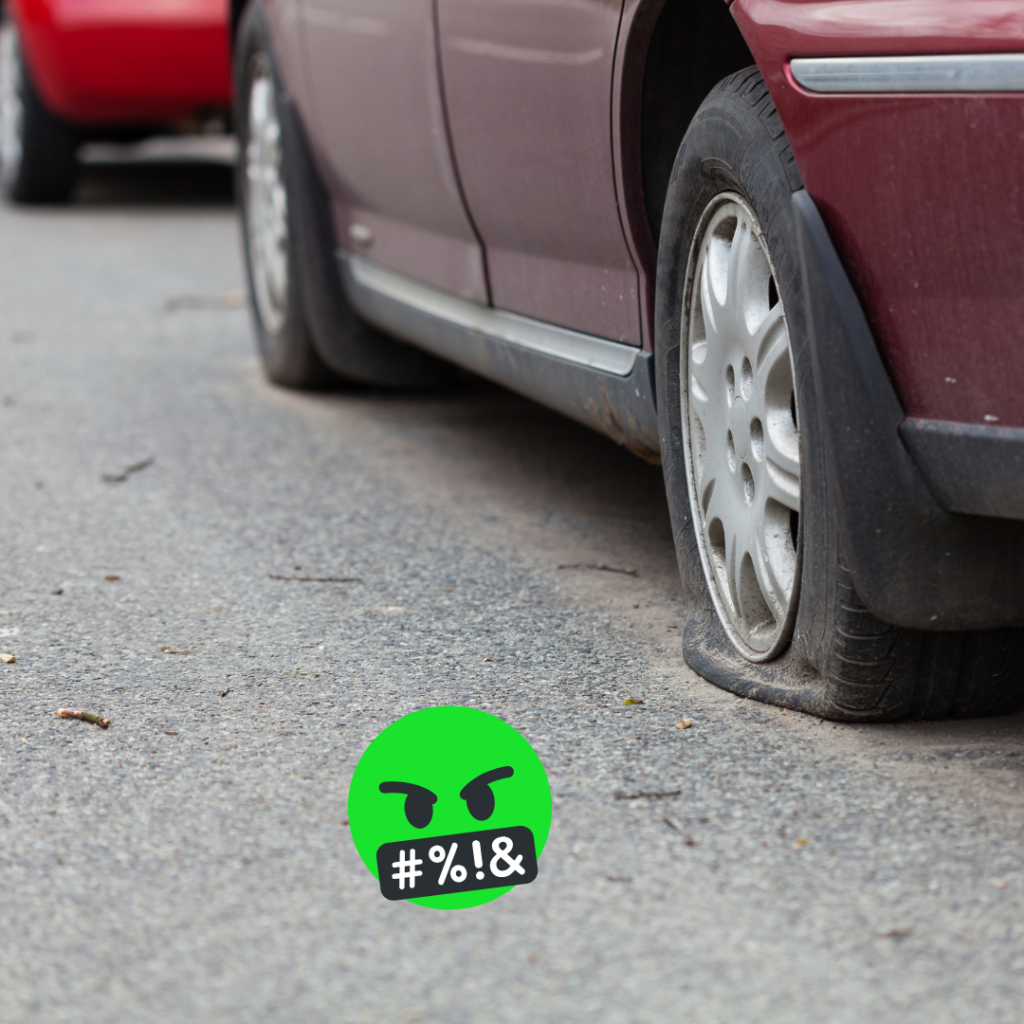
    • The “Flat-Run” Ring: If you drive even a short distance on a flat tire (right photo below driven only a couple of miles to us), the rim crushes the sidewall against the road. This creates a permanent heat ring or “crease” around the circumference. Even if the puncture is plugged, the internal structure is likely shredded.
    • Bulges and Bubbles: A “bubble” in the sidewall means the internal plys have separated. This is a ticking time bomb that requires immediate attention.


    4. Decoding the Date Code

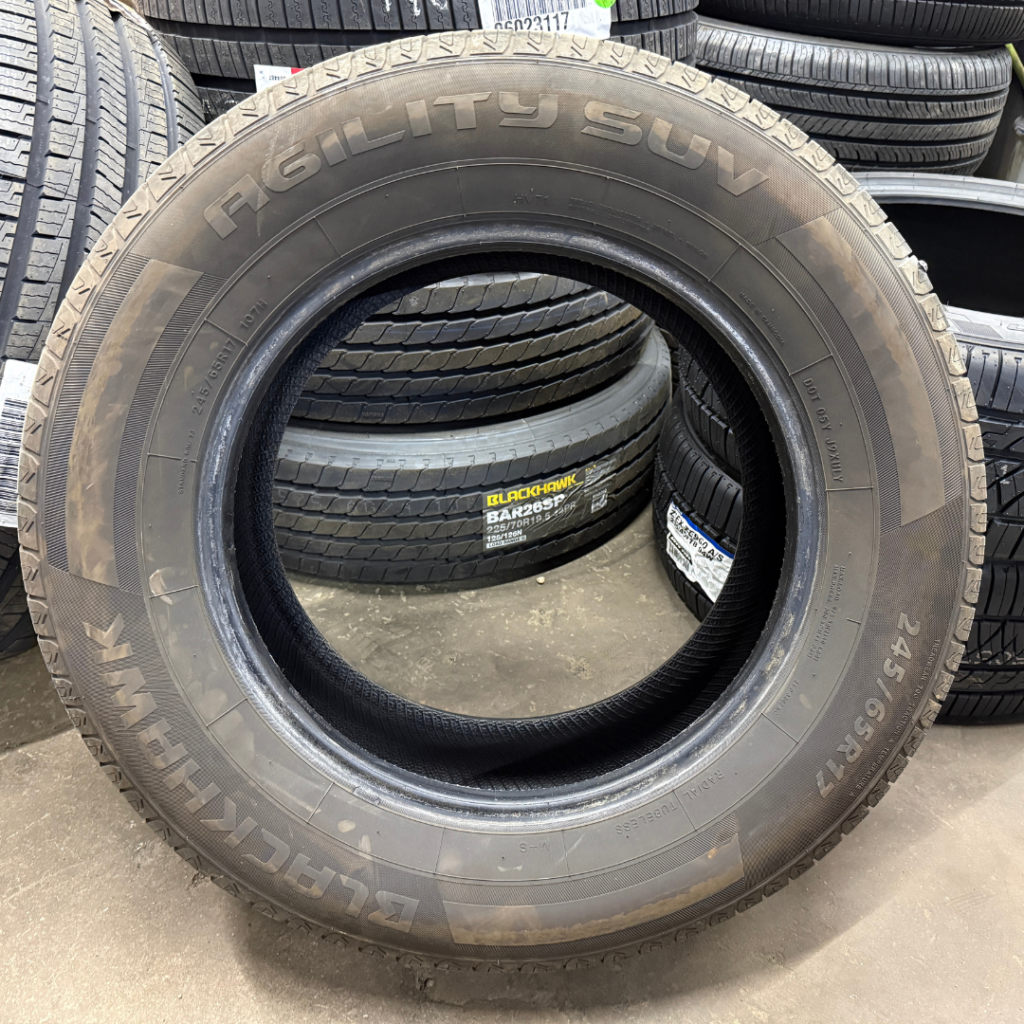
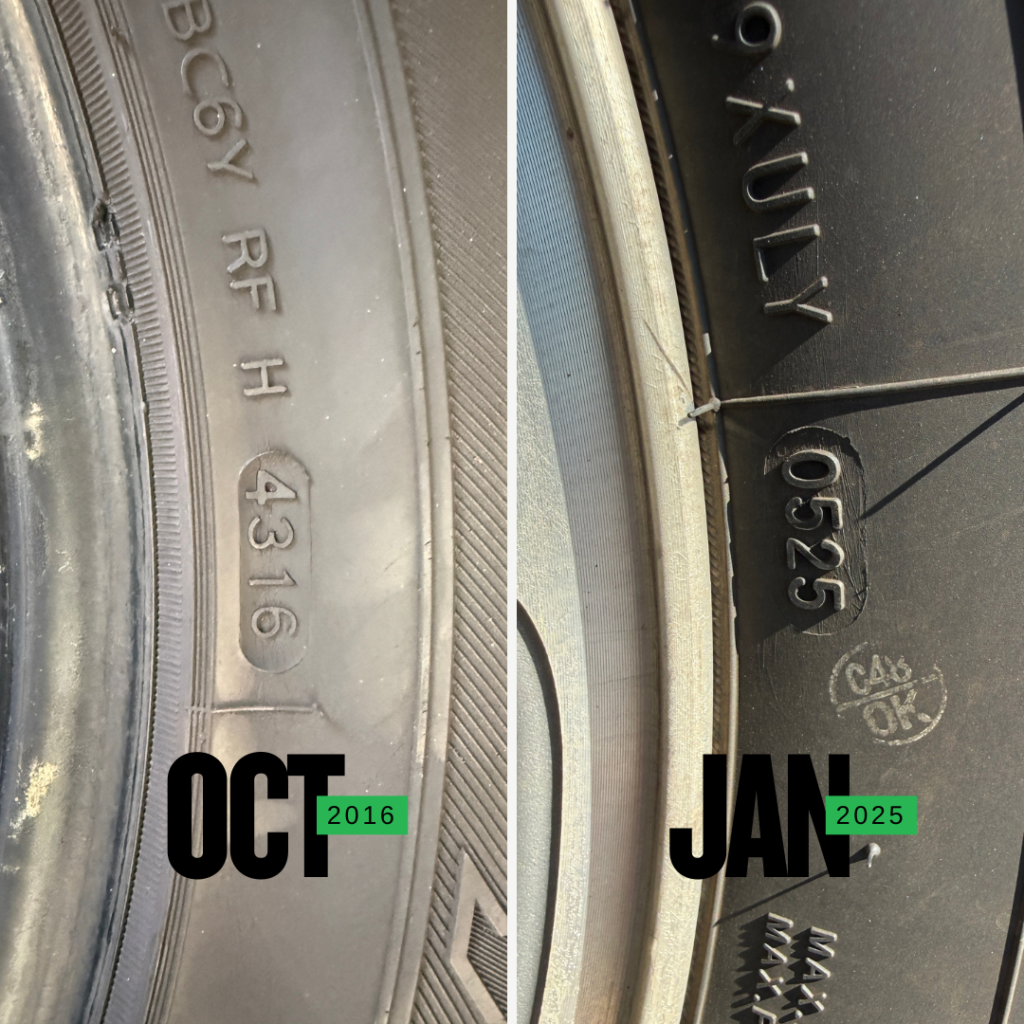
    Tires have an expiration date. Rubber becomes hard and brittle after about six years, regardless of how much tread is left. Look for the “DOT” string on the sidewall and check the last four digits:

    • The first two digits are the week of manufacture.
    • The last two digits are the year.
    • Example: 2422 means the tire was made in the 24th week of 2022.

    Most manufacturers have a 10 maximum service life, and recommend replacing at that time, regardless of tread depth or wear. Tires will show the signs of wear listed here, and need replacing, roughly around 3-5 years.


    5. Maximize Your Investment: How to Make Your Tires Last

    Tires are a significant investment. While they will eventually wear out, how you treat them determines whether you get 30,000 miles or 60,000 miles out of a set. Here is how to extend the life of your rubber:

    Air Pressure

    Proper PSI (Pounds per Square Inch) ensures even wear, better gas mileage, and responsive handling.

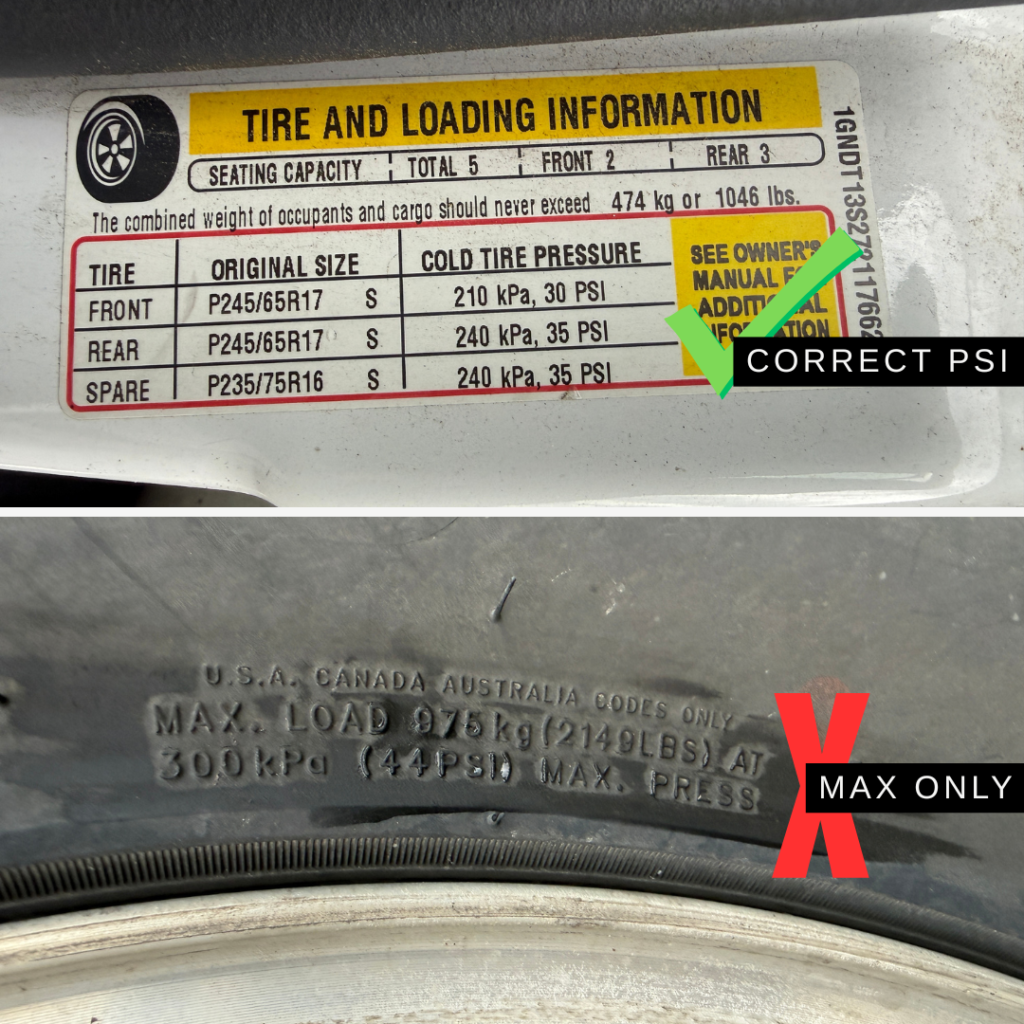
    • Find Your Number: Open your driver’s side door and look for a yellow and white sticker on the door jamb. This lists the Manufacturer’s Recommended Cold Tire Pressure.
    • Crucial Note: Do not use the “Max Pressure” printed on the tire sidewall. That is the tire’s bursting point, not the recommended setting for your specific vehicle.

    How to Add Air:

    1. Remove the Cap: Unscrew the valve cap and put it in your pocket—they’re easy to lose!
    2. Connect the Air: Press the air chuck firmly onto the valve stem until the “hissing” stops.
    3. Check & Adjust: Add air in 3–5 second bursts, re-checking with a gauge until you hit the proper PSI.
    4. Bleed if Needed: If you overfill, use the small pin on the back of your pressure gauge to press the center of the valve stem and release air.
    5. Secure: Replace the cap tightly to keep dirt and moisture out.

    Regular Rotations

    Because the front and rear tires perform different tasks (steering and braking vs. following), they wear at different rates.

    • The Rule: Rotate your tires every 5,000.
    • The Benefit: This ensures even wear across all four tires, preventing you from having to replace just the front pair prematurely.

    Keep an Eye on Alignment

    If you’ve hit a bump or pothole hard, your car “pulls” to one side or the steering wheel isn’t centered when you’re driving straight, your alignment is off.

    • The Risk: Poor alignment can scrub the tread off a tire in a matter of weeks.
    • The Fix: Have your alignment checked at least once a year or immediately after hitting a significant pothole or curb.

    *Because worn suspension components are frequently the “silent” cause of alignment drift and tire damage, we include a full suspension inspection with our alignment service. This ensures we aren’t just treating a symptom, but fixing the actual problem.

    Balanced Tires, Smooth Ride

    If you feel a vibration in the steering wheel at highway speeds, your tires may be out of balance.

    • The Fix: A technician uses a machine to ensure the weight of the tire and wheel is distributed perfectly. This prevents “spotty” wear and protects your suspension components.

    Driving Habits Matter

    Believe it or not, your right foot is a major factor in tire longevity.

    • Avoid Jackrabbit Starts: Flooring it from a stop creates friction and heat that “shaves” rubber off.
    • Take Turns Gently: Hard cornering puts immense pressure on the outer “shoulders” of the tire.
    • Check the Load: Carrying unnecessary heavy weight in your trunk or truck bed increases the heat and stress on your tires, causing them to wear faster.


    Ready for a Professional Eyes-On?

    While checking your tires at home is a great first step, some issues—like alignment-related wear or internal structural damage—require a professional touch.

    Don’t leave your safety to chance. If you noticed any unusual wear patterns, bubbles, or if your tires are nearing that 6-year mark, we’re here to help. Call to schedule an appointment and let our experts ensure your vehicle is road-ready and safe!


    Sandston Automotive

    SMALL TOWN FEEL, BIG TIME SERVICE

    804-737-7206
  • Spring Cleaning for Your Vehicle: What to Check After Winter Salt

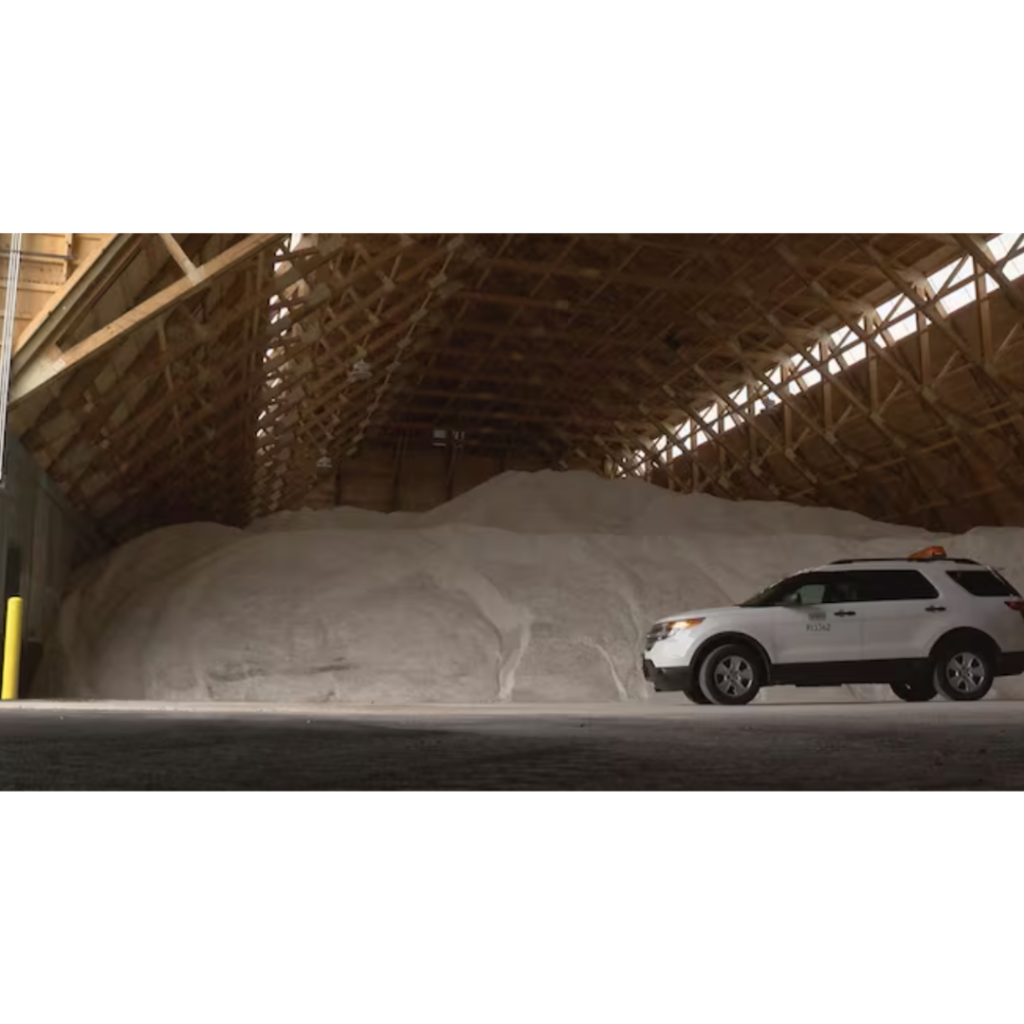
    Winter in Central Virginia isn’t always snowpocalypse-level bad—but when it does snow or ice up, VDOT doesn’t mess around with the salt.

    but when it does snow or ice up, VDOT doesn’t mess around with the salt.

    And while those minerals keep us safer on the roads, they can be brutal on your vehicle once spring rolls around.

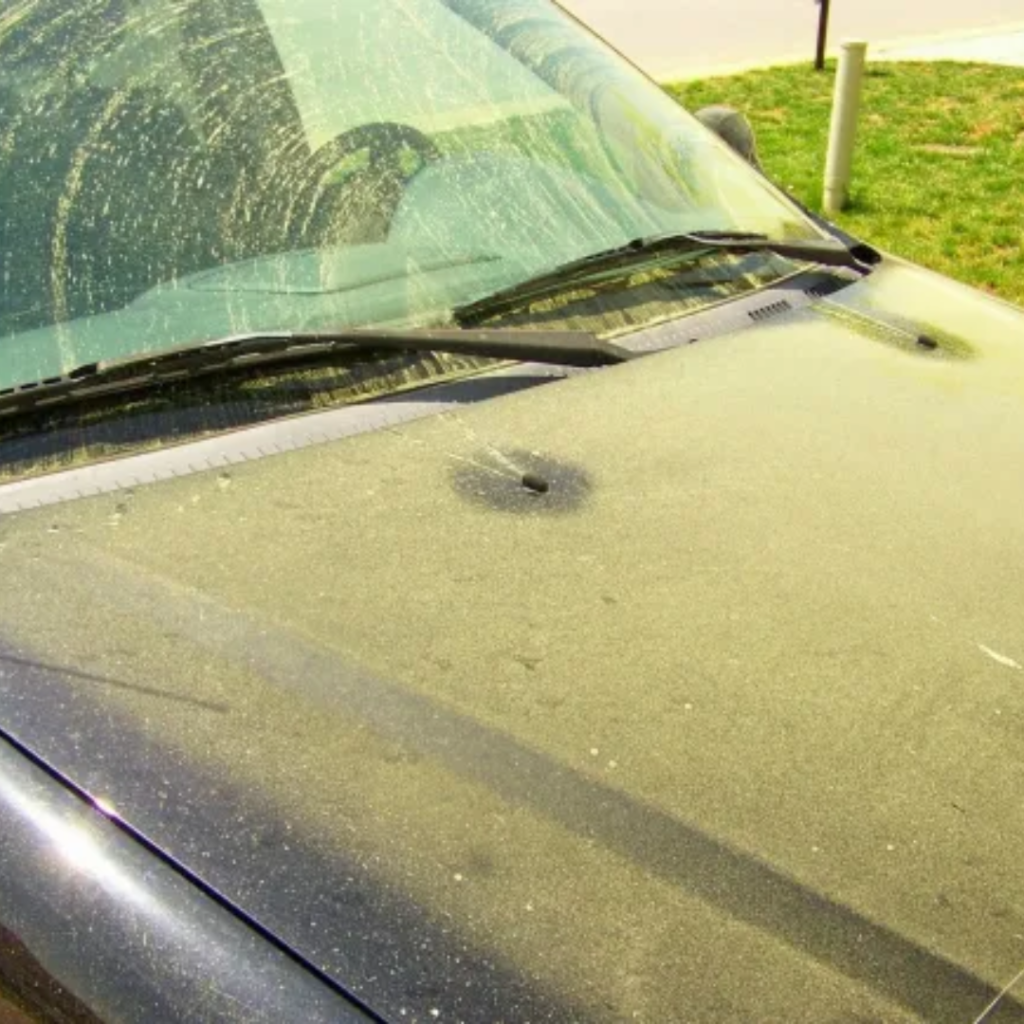
    With flowers blooming and pollen in the air, spring is a great time to give your car some love—and rinse away the salt and grime winter left behind.


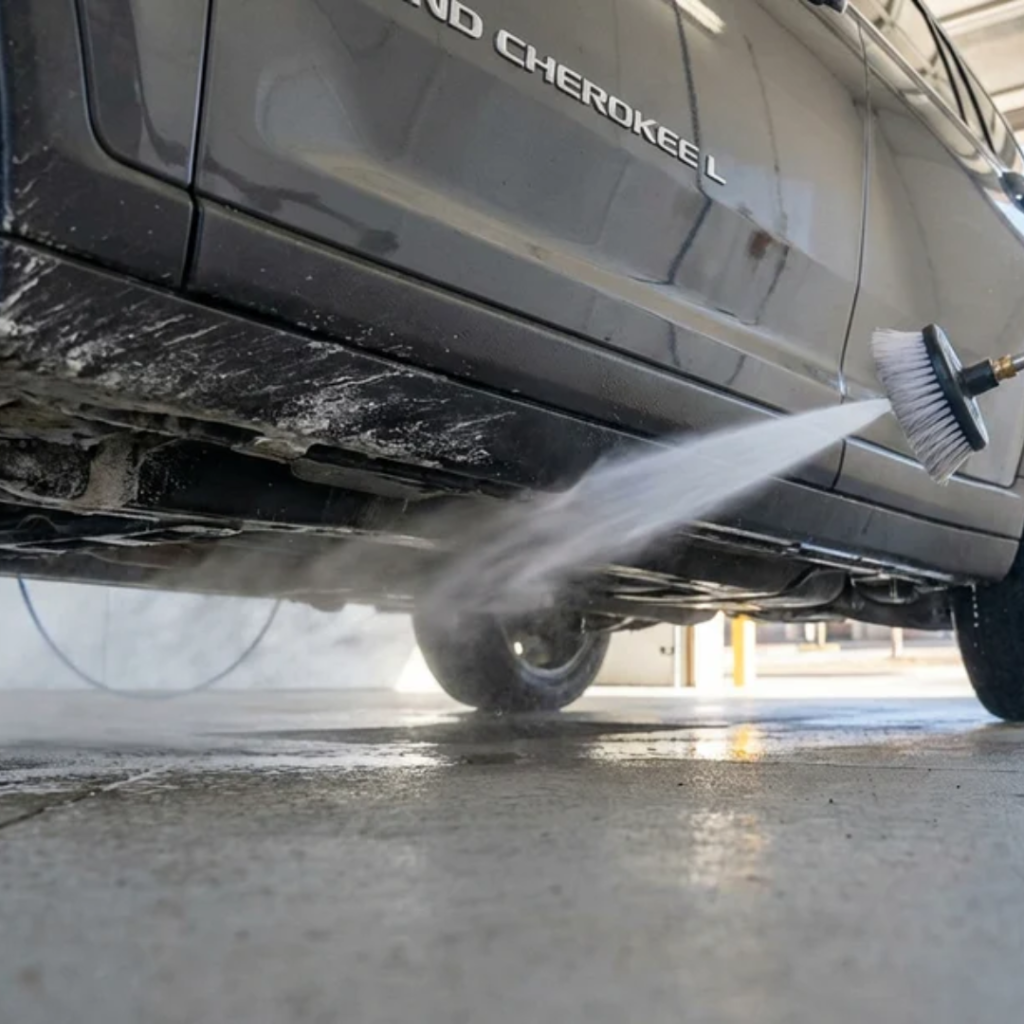
    1. Undercarriage: The Most Forgotten (and Most Important) Spot

    Road salt loves to hide where you can’t see it. Frames, suspension components, brake lines, and exhaust parts are prime targets for corrosion.

    What to do: Get a professional undercarriage wash (look for high-pressure sprayers, not just a standard drive-through rinse).

    What to look for: Flaking metal, rust spots, or persistent dampness.

    Pro-tip: Pay extra attention if you park on the street or frequently drive rural gravel roads.

    Salt left behind can cause corrosion long after winter ends—especially with our Central VA mix of humidity and spring rain.


    2. Brakes: Salt’s Favorite Victim

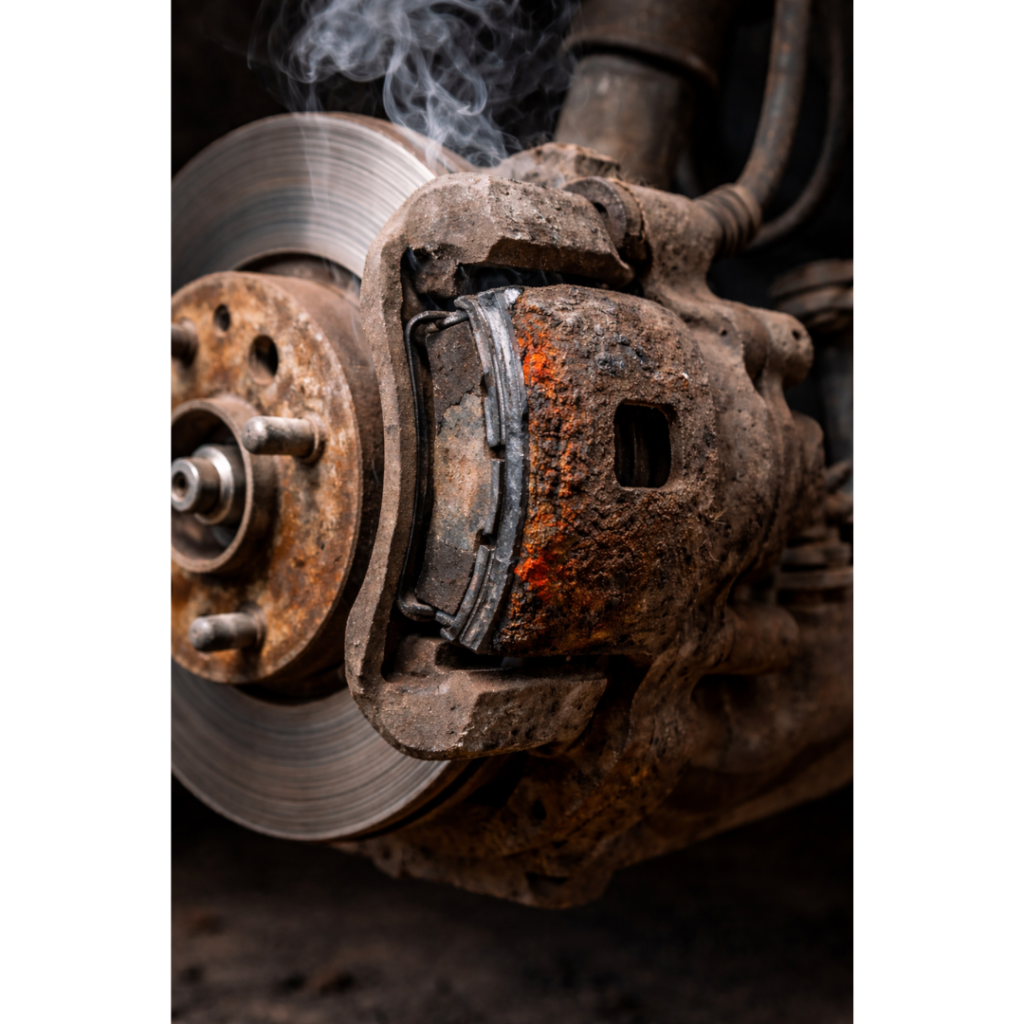
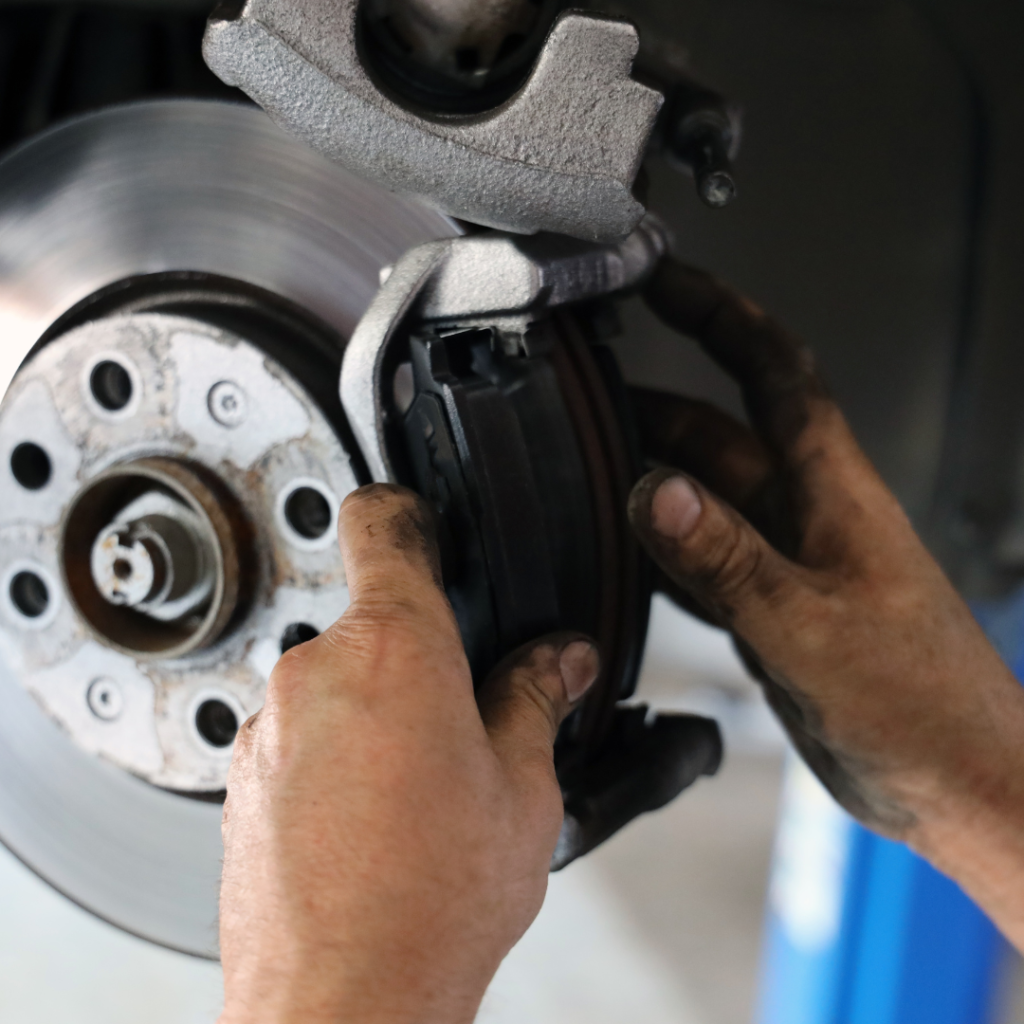
    The combination of salt and moisture is a recipe for seized parts. We often see stuck calipers and rusted rotors leading to uneven pad wear every spring.

    Signs of trouble:

    • Grinding or squealing noises
    • Pulling to one side when braking
    • A “spongy” brake pedal.

    If your brakes feel “off” after the last frost, have them inspected before summer road trip season kicks off.


    3. Suspension & Steering: Potholes Leave a Mark

    Between freezing temps and plow damage, winter roads beat up suspension parts. Even if you dodged most potholes, salt can accelerate wear on joints and bushings.

    Common signs:

    • Clunking noises over bumps
    • “Loose” steering (you turn the wheel and tires don’t respond)
    • Steering wheel that isn’t centered
    • Uneven tire wear

    Spring is a great time for a suspension inspection—especially if your daily drive includes rough county roads or construction zones around Richmond.


    4. Fluids: Winter Takes a Toll

    Cold temps and stop-and-go winter driving are hard on fluids.

    Check or service:

    • Engine Oil: Change it if you’ve been putting it off; winter idling degrades oil faster.
    • Brake Fluid: This fluid is “hygroscopic” (it absorbs moisture), which can lead to internal rusting after a wet winter.
    • Coolant: Ensure your levels and mix are correct before the Richmond humidity returns.
    • Windshield Fluid: Swap out winter de-icer for a formula designed to cut through heavy spring pollen.

    Fresh fluids help your vehicle transition smoothly into warmer weather.


    5. Battery & Electrical Connections

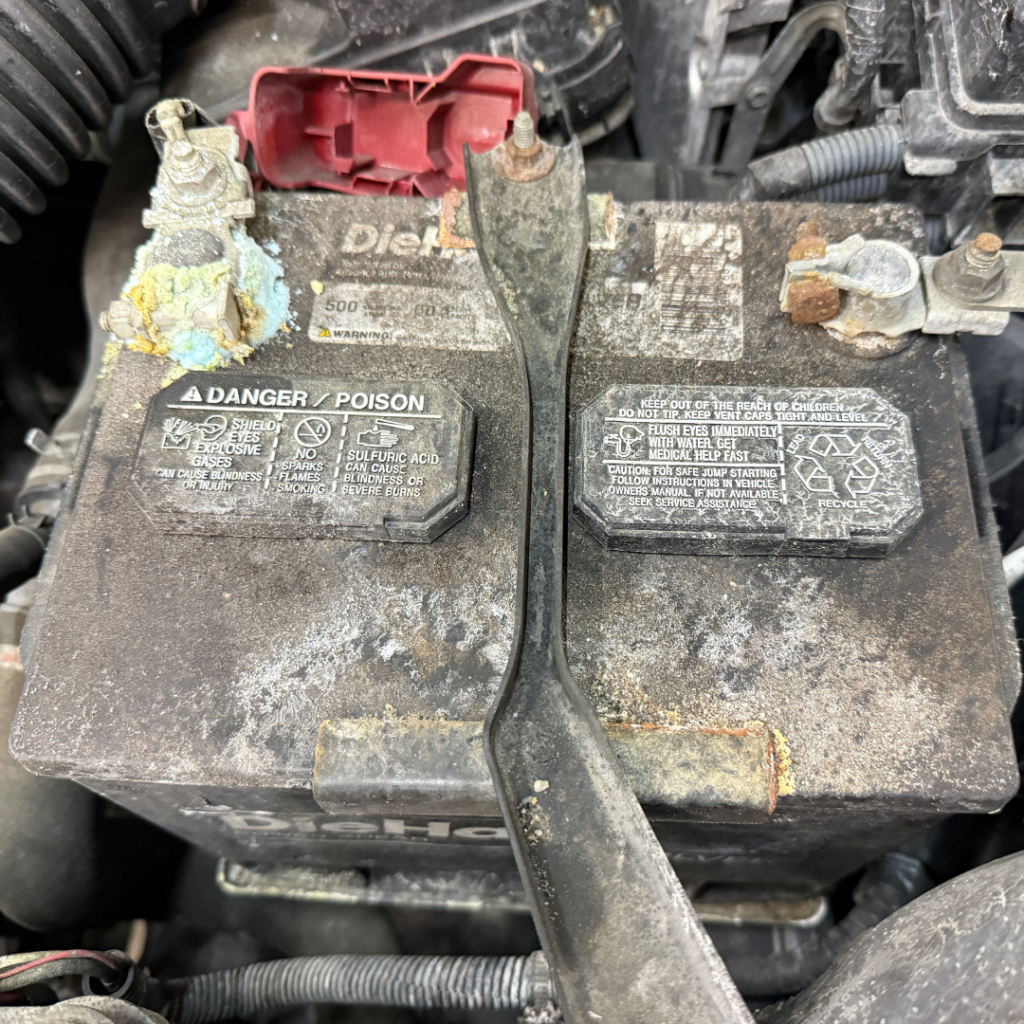
    Winter cold weakens batteries, and salt corrosion doesn’t help electrical connections.

    Look for:

    • Slow starts
    • Corroded battery terminals
    • Warning lights popping up randomly

    If your battery is 3–5 years old, spring is when many of them finally give up.

    A quick charging system test is the best way to see how your battery, alternator, and starter handled the winter. Pairing that with a professional terminal cleaning is a simple way to extend your battery’s life and avoid a ‘no-start’ Monday morning.


    6. Tires: More Than Just Tread Depth

    Winter driving and potholes can knock your alignment out and damage tires.

    Spring tire check includes:

    • Tread depth and uneven wear
    • Sidewall cracks or bubbles
    • Proper inflation
    • Alignment check if the steering wheel isn’t straight

    Bonus tip: Spring is also a great time to rotate tires(if you’re not already rotating every 5k miles 😉) and extend their life.


    7. Cabin Air Filter: Because Pollen Is Coming

    Central Virginia pollen season is no joke. If your cabin air filter survived winter, it’s probably clogged with dust, salt residue, and debris.

    Why change it?

    • Improved A/C airflow & keeps it working efficiently
    • Reduce cabin odors
    • Keep seasonal allergens out of your lungs


    Spring Reset: A Little Prevention Goes a Long Way

    Winter salt may be out of sight, but it shouldn’t be out of mind. A simple spring inspection can catch small issues before they turn into expensive repairs—especially with our mix of salt exposure, humidity, and summer heat.

    If you’re already planning spring cleaning at home, consider giving your vehicle the same attention. Your car (and your wallet) will thank you later.


    Sandston Automotive

    SMALL TOWN FEEL, BIG TIME SERVICE

    804-737-7206
  • Broken, Busted, and Burnt Up: Tales From the Shelf of Shame

    Episode: The 22,000-mile journey to disaster.


    Welcome back to the Shelf of Shame—where worn-out parts go to retire, and the rest of us go to learn from someone else’s “it’ll be fine” moment (and occasionally laugh so we don’t cry).

    Today’s featured artifact?
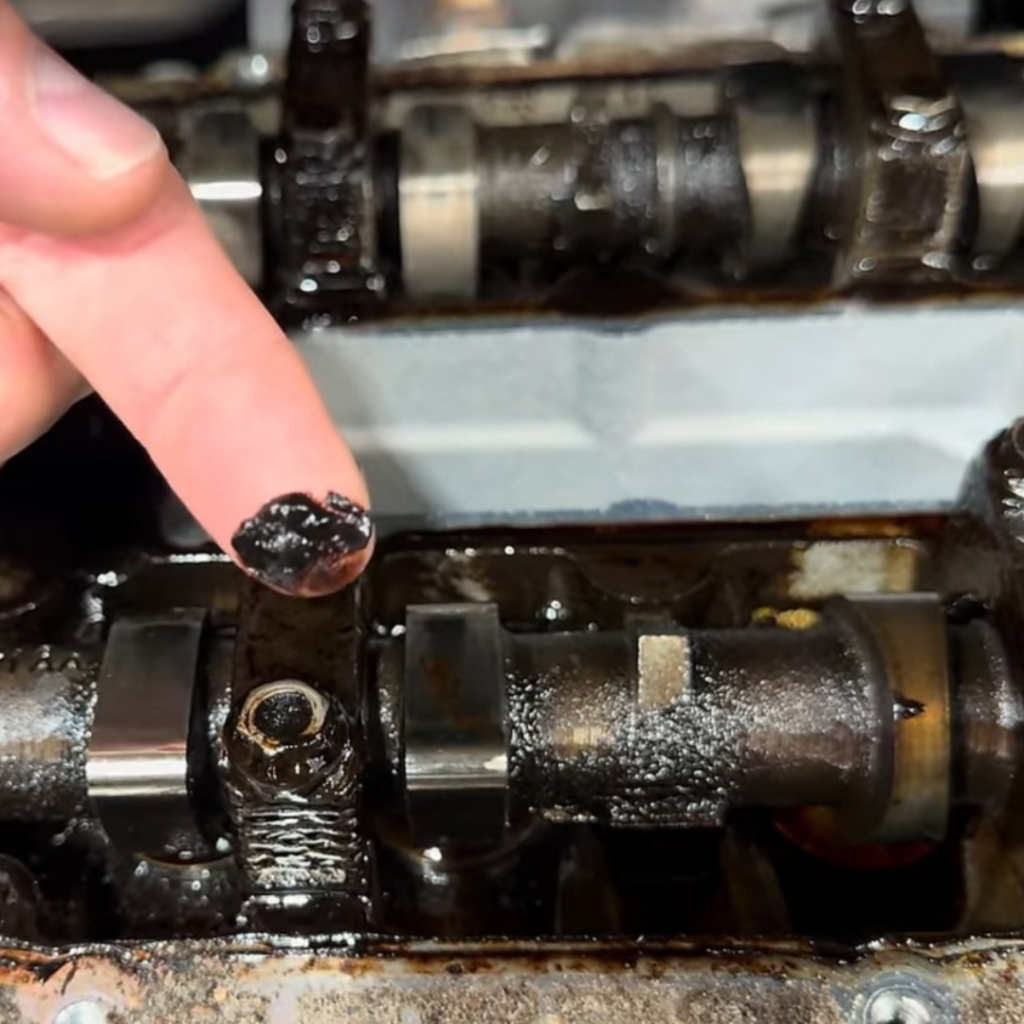
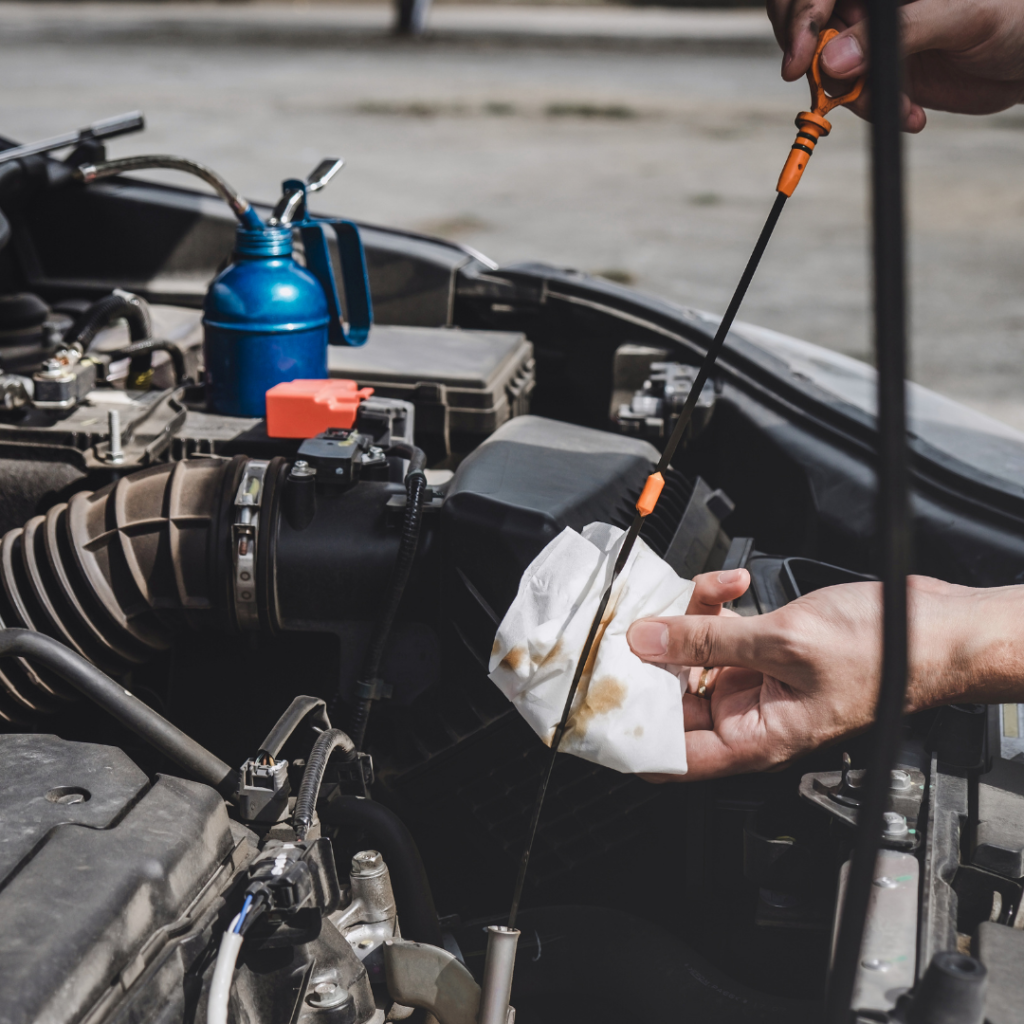
    A sample of engine oil that missed its oil change… by a lot. What once flowed smoothly has transformed into a thick, black, gritty substance that looks more like used roofing tar than lubrication. If oil could talk, this one would be begging for mercy.

    📽️ At 22K miles over (.45 in the video), you can actually see slow and thick the oil is. That’s the ‘Death Knock’ waiting to happen.

    The oil in this video doesn’t just get “dirty”—it undergoes a chemical breakdown. It moves from a translucent protector to gritty sandpaper, and eventually, into the thick black tar you see on our shelf today.

    So… what happened?

    And more importantly—how do you prevent it?


    The Artifact: Oil That’s Seen Some Things

    Fresh engine oil is amber, smooth, and ready to protect thousands of moving metal parts. This oil?

    • Jet black
    • Thick and sludgy
    • Full of contaminants
    • Smelling like regret

    Instead of reducing friction and carrying heat away, overdue oil turns into abrasive sludge. At that point, it’s not protecting your engine—it’s actively working against it.


    So, What Happened?

    Oil breaks down over time. Heat, combustion byproducts, moisture, and tiny metal particles all take their toll. When oil changes are skipped or pushed way past the recommended interval, the oil can no longer:

    • Lubricate critical engine components
    • Prevent metal-to-metal contact
    • Control engine temperature
    • Keep internal parts clean

    The result? Accelerated wear on bearings, camshafts, lifters, timing components, and piston rings. In severe cases, it leads to oil starvation, overheating, and full engine failure—the kind that makes everyone very quiet when the estimate is written.


    Common Warning Signs (That Often Get Ignored)

    This is where most Shelf of Shame items start their journey:

    • The oil change reminder has been on “for a while”
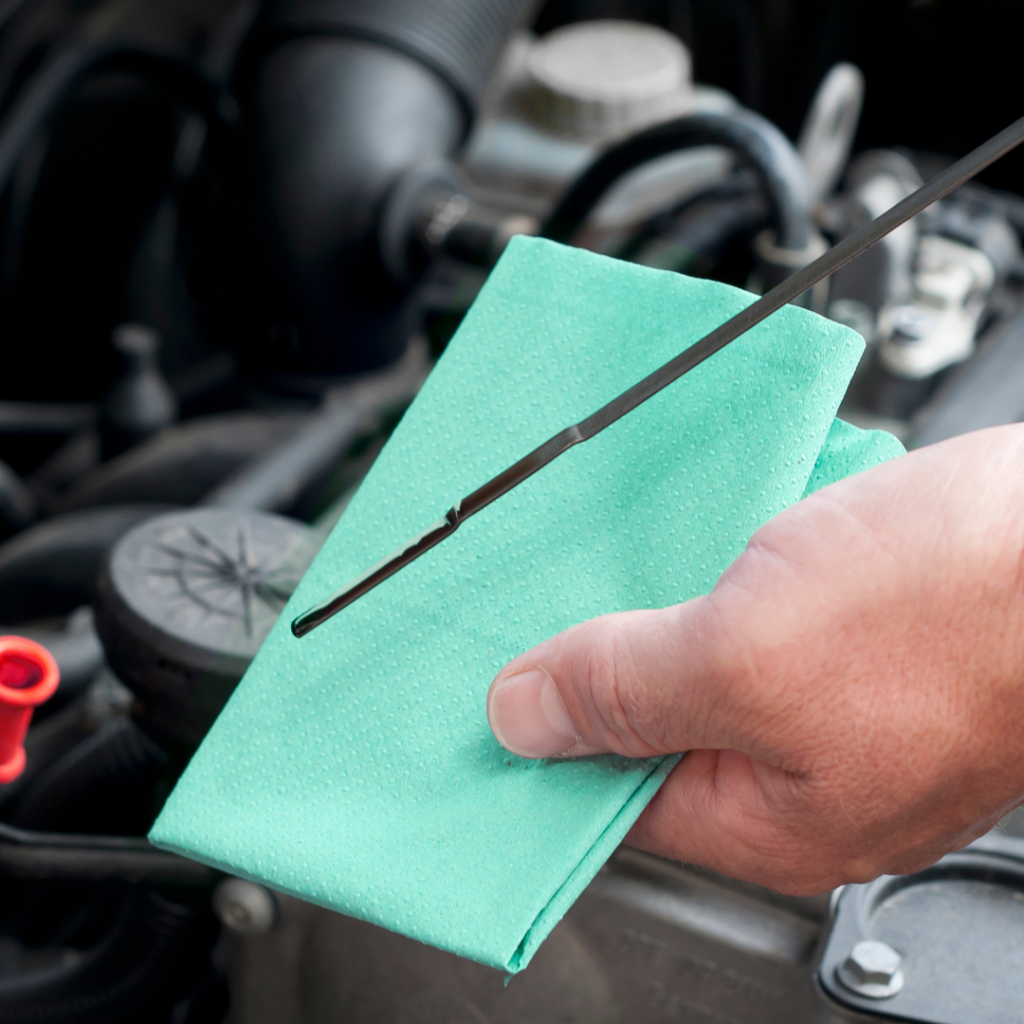
    • Oil looks dark, gritty, or thick on the dipstick
    • Burning oil smell
    • Engine noise (ticking, knocking, or rattling)
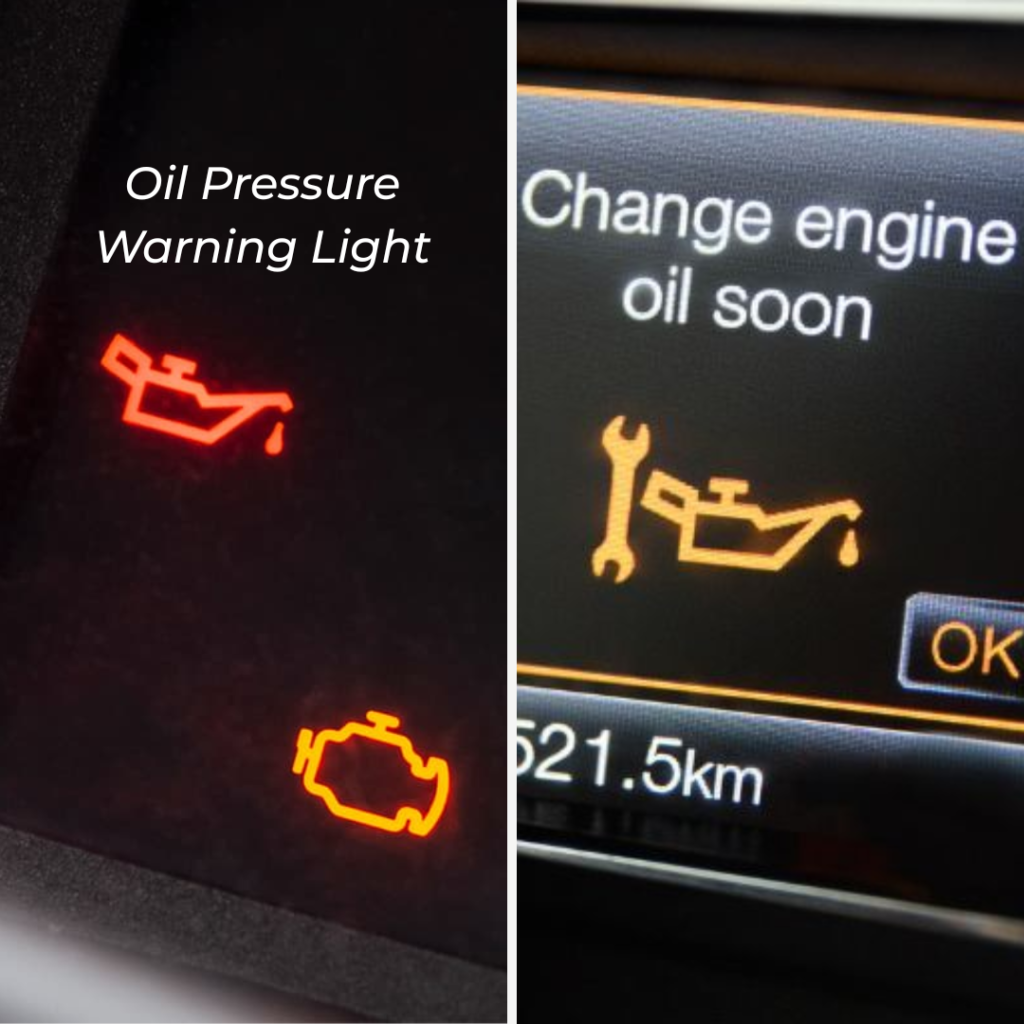
    • Oil pressure or check engine light
    • “I was just trying to make it to next month…”


    Why This One Matters

    An oil change is one of the least expensive services you can do for your vehicle. But when skipped, it can lead to:

    • Sludge buildup inside the engine
    • Restricted oil passages
    • Increased friction and heat
    • Premature engine wear
    • Repairs that cost many oil change


    We’re showing you the sludge here, hoping we don’t find it in your oil pan. Engines don’t fail overnight; they fail slowly, missed service by missed service.


    How to Keep Your Oil Off the Shelf of Shame

    ✔ Stick to the 3k-5k mile sweet spot: As the video shows, the decline happens fast once those additives flatline.
    ✔ Check your oil level and condition between services
    ✔ Don’t ignore warning lights
    ✔ If you drive short trips, tow, idle a lot, or have a high-mileage vehicle—shorter intervals matter
    ✔ When in doubt, ask. We’d rather check it than display it later


    Bottom Line from the Shelf

    This episode of the Shelf of Shame isn’t about bad luck—it’s about neglect catching up. Clean oil is cheap insurance. Bad oil is a slow, expensive lesson.

    Want to see what ends up on the Shelf next?
    Let’s just say it involves filters that haven’t filtered anything in years… 👀


    Sandston Automotive

    SMALL TOWN FEEL, BIG TIME SERVICE

    804-737-7206
  • Your Vehicle’s Fluids: What They Do and When to Change Them

    Let’s be honest—most people don’t pop the hood just to admire their vehicle’s fluids. But those fluids are doing a lot of heavy lifting behind the scenes. Think of them as your car’s lifeblood. Ignore them for too long, and things can get expensive… fast.

    Here’s a simple, no-nonsense breakdown of the most important vehicle fluids, what they do, and when you should be thinking about servicing them.


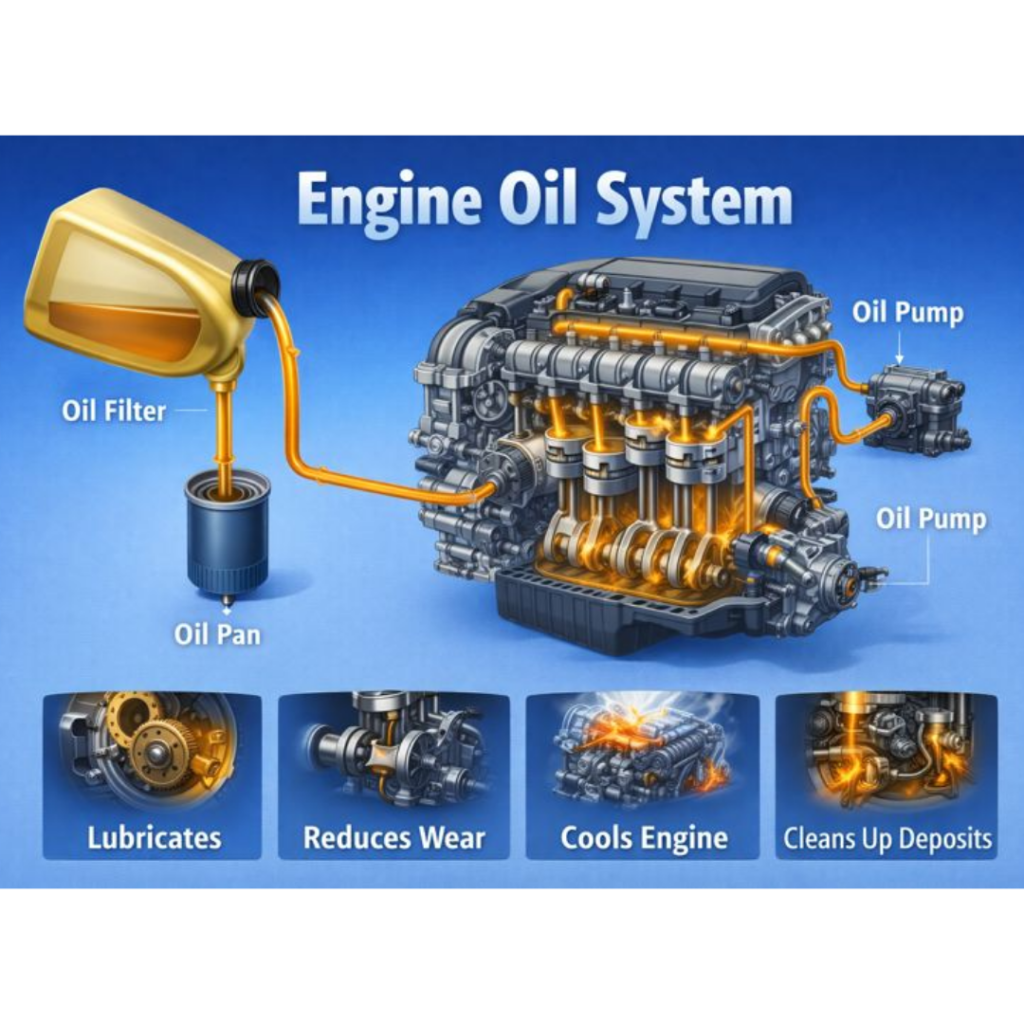
    Engine Oil

    What it does:
    Engine oil lubricates moving parts, reduces friction, helps control temperature, and keeps internal components clean.

    When to change it:
    Most manufacturers set their own oil change intervals, which can range anywhere from 3,000–7,500 miles (or more) depending on the engine design, oil type, and vehicle use.

    We set reminders at

    • 3,500 miles for conventional and blends &
    • 5,000 miles for full synthetic.

    If you’re doing a lot of short trips, towing, or stop-and-go driving, you may need it more often.

    We have found that some engines are more tolerant to longer gaps between oil changes while others are more sensitive to contaminants and perform best (while avoiding issues) with more frequent oil changes.

    What happens if you wait too long?
    Sludge buildup, poor lubrication, overheating, and in worst cases—engine failure. This one’s non-negotiable.

    Check out this shelf of shame post about way overdue oil changes


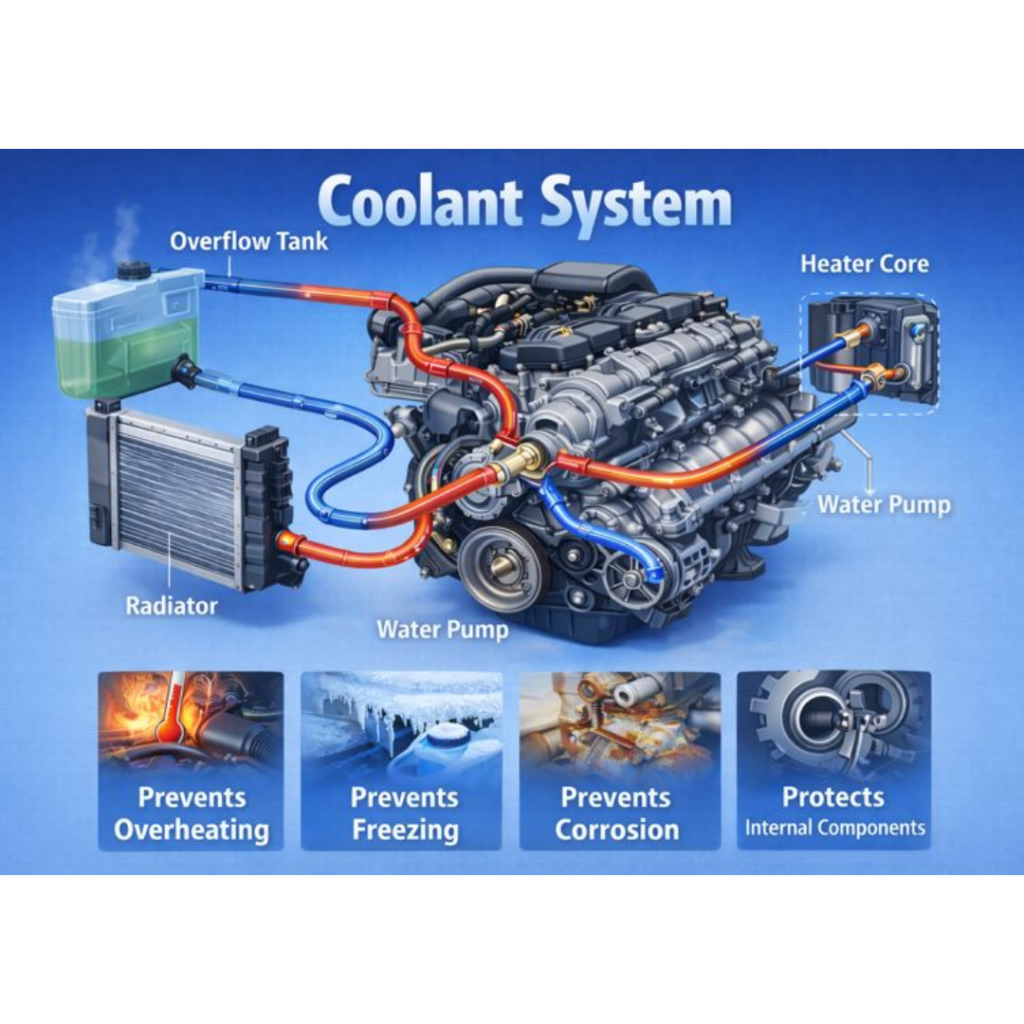
    Coolant (Antifreeze)

    What it does:
    Coolant regulates engine temperature, preventing overheating in summer and freezing in winter.

    When to change it:
    Typically every 30,000–60,000 miles, depending on the vehicle and coolant type.

    Signs it needs attention:
    Overheating, sweet smell, low coolant warning, or visible leaks.


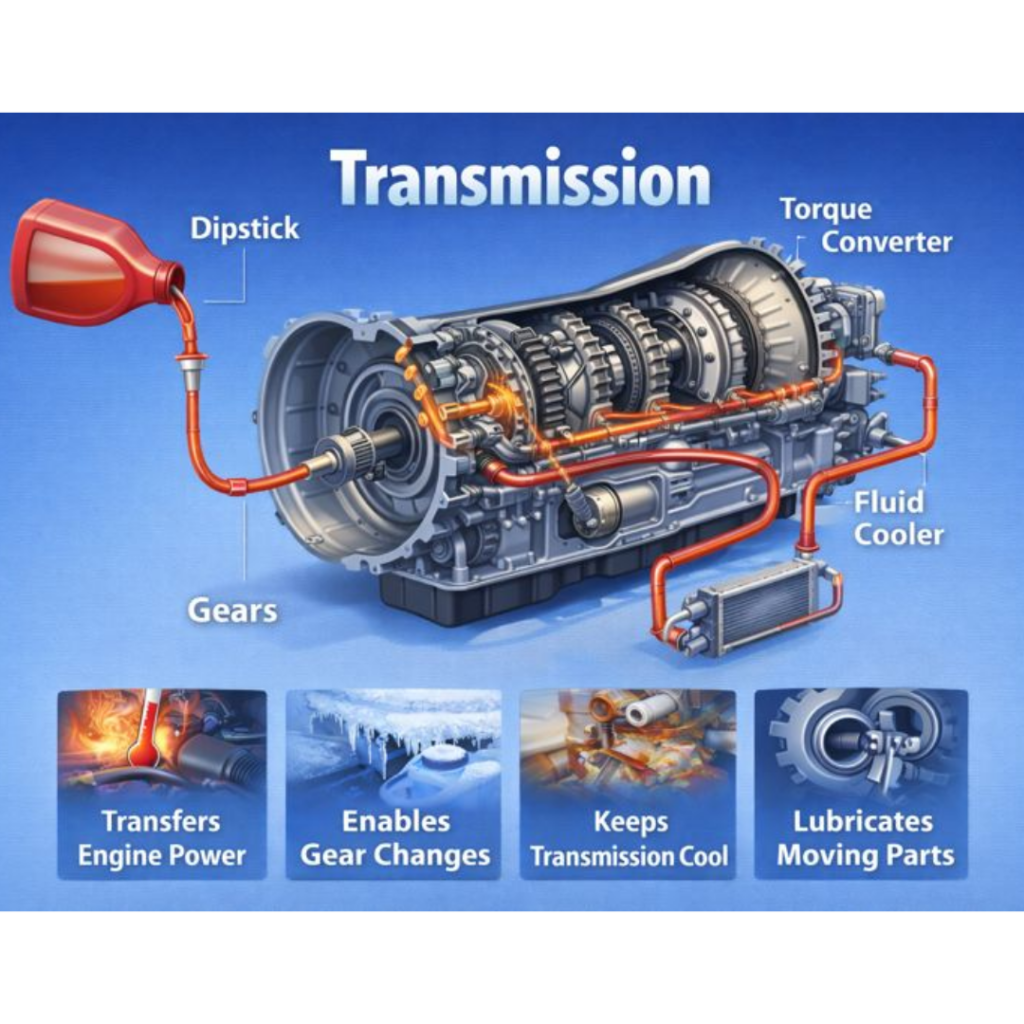
    Transmission Fluid

    What it does:
    Keeps your transmission shifting smoothly, lubricates internal components, and manages heat.

    When to change it:
    Anywhere from 30,000–100,000 miles depending on the vehicle, transmission type, and driving conditions.

    Why it matters:
    Old or contaminated transmission fluid can lead to slipping, hard shifts, and very costly repairs.


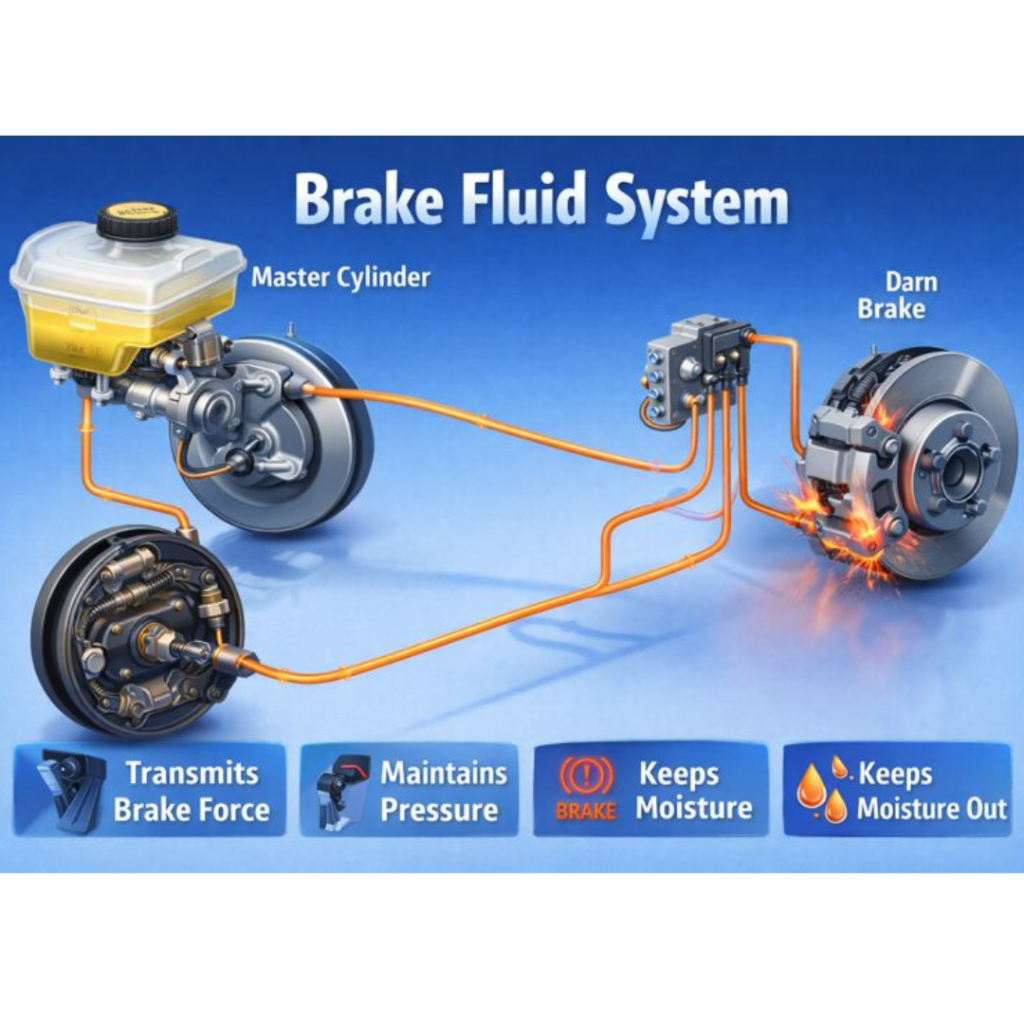
    Brake Fluid

    What it does:
    Transfers force from your brake pedal to the brakes themselves. Without it, stopping wouldn’t happen.

    When to change it:
    Usually every 2–3 years.

    Fun (but scary) fact:
    Brake fluid absorbs moisture over time, which reduces braking performance and can damage brake components.


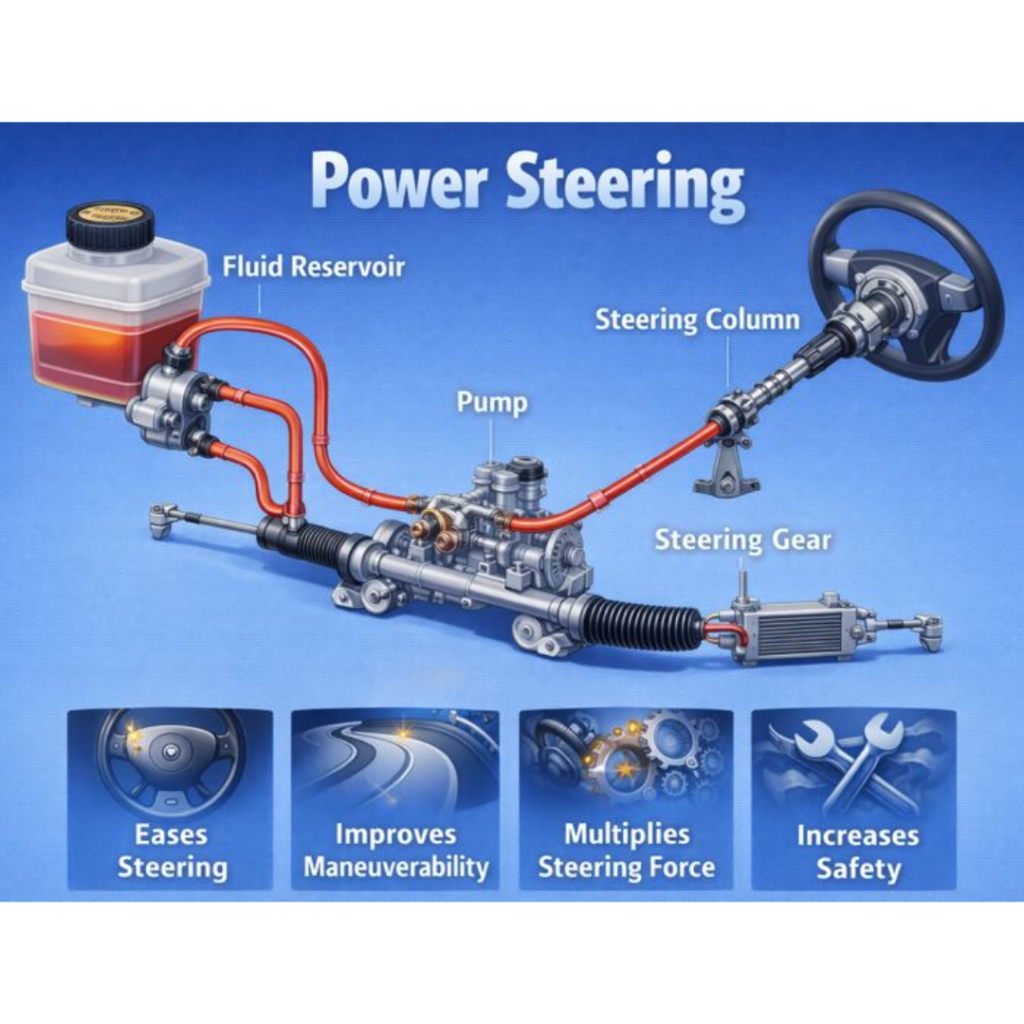
    Power Steering Fluid

    What it does:
    Helps you turn the steering wheel smoothly and easily.

    When to change it:
    Often overlooked, but typically every 50,000–75,000 miles, or if it looks dark or contaminated.

    Red flags:
    Whining noises, stiff steering, or visible leaks.


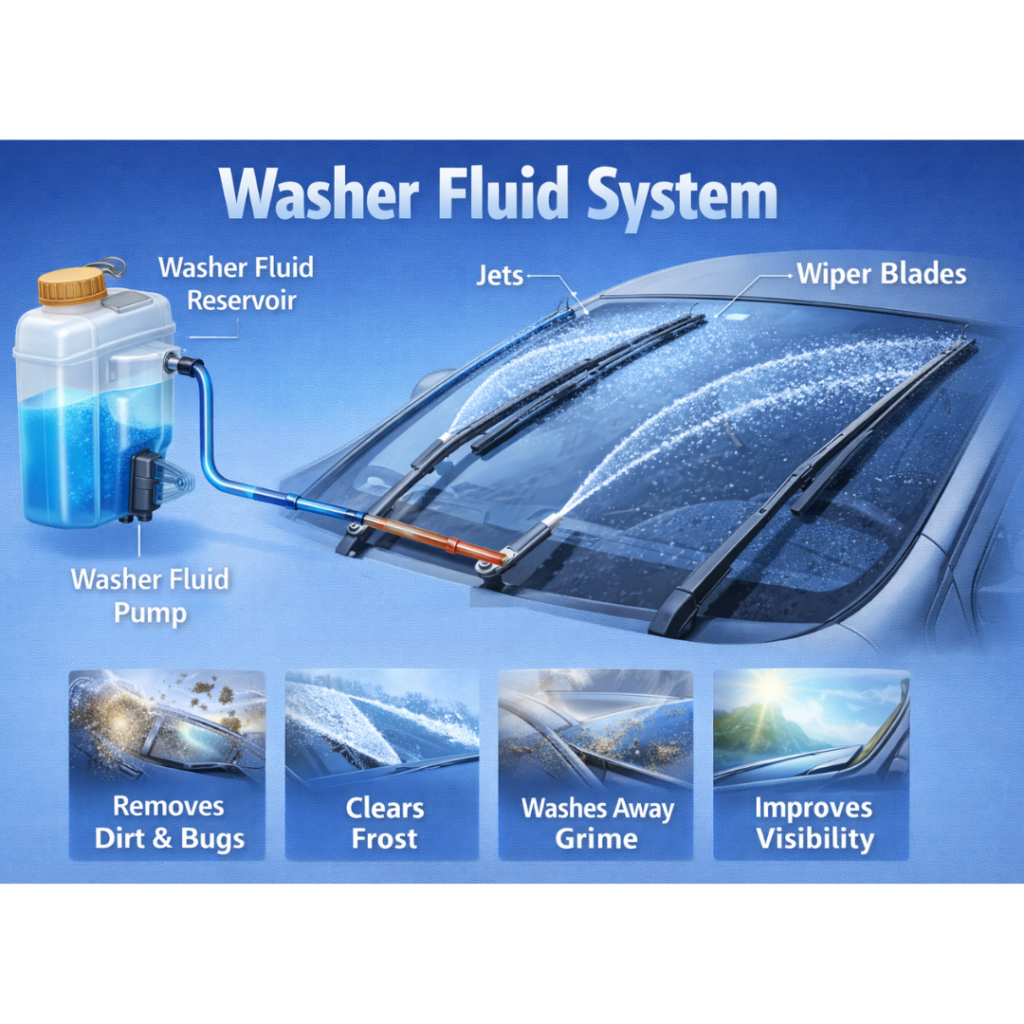
    Windshield Washer Fluid

    What it does:
    Keeps your windshield clean so you can see where you’re going (kind of important).

    When to change it:
    Top it off as needed—especially before road trips or winter weather.

    Good to know: There are many formulas on the market. To simplify you can absolutely run the blue all year long, or you can opt to switch with the seasons.


    How to Stay Ahead of Fluid Problems

    ✅ Check fluid levels regularly (or have us do it during routine service)

    ✅ Pay attention to dashboard warning lights

    ✅ Watch for leaks or puddles under your vehicle

    ✅ Follow your manufacturer’s maintenance schedule

    😉 Wearing gloves keeps your hands clean and protected from irritation


    Hydration is key (Even for cars)

    Fluids might not be flashy, but they’re critical to keeping your vehicle reliable, safe, and long-lasting. A little preventative maintenance goes a long way—and it’s always cheaper than major repairs.

    If you’re not sure when your fluids were last serviced, or you want us to take a look, stop by or give us a call. We’re always happy to help keep your vehicle running its best 🚘


    Sandston Automotive

    SMALL TOWN FEEL, BIG TIME SERVICE

    804-737-7206
  • Broken, Busted and Burnt Up: Tales From the Shelf of Shame

    Episode: The Caliper That Couldn’t (and the Pads That Paid the Price)

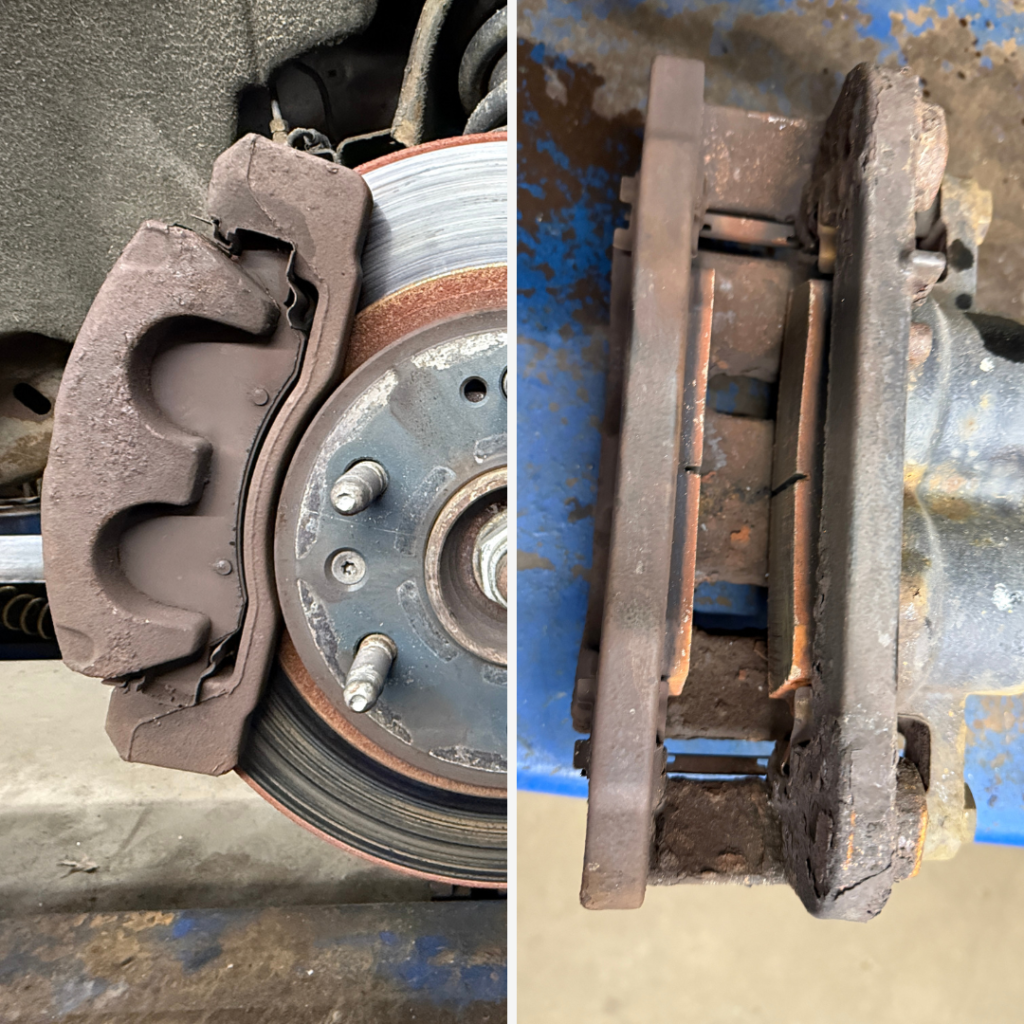
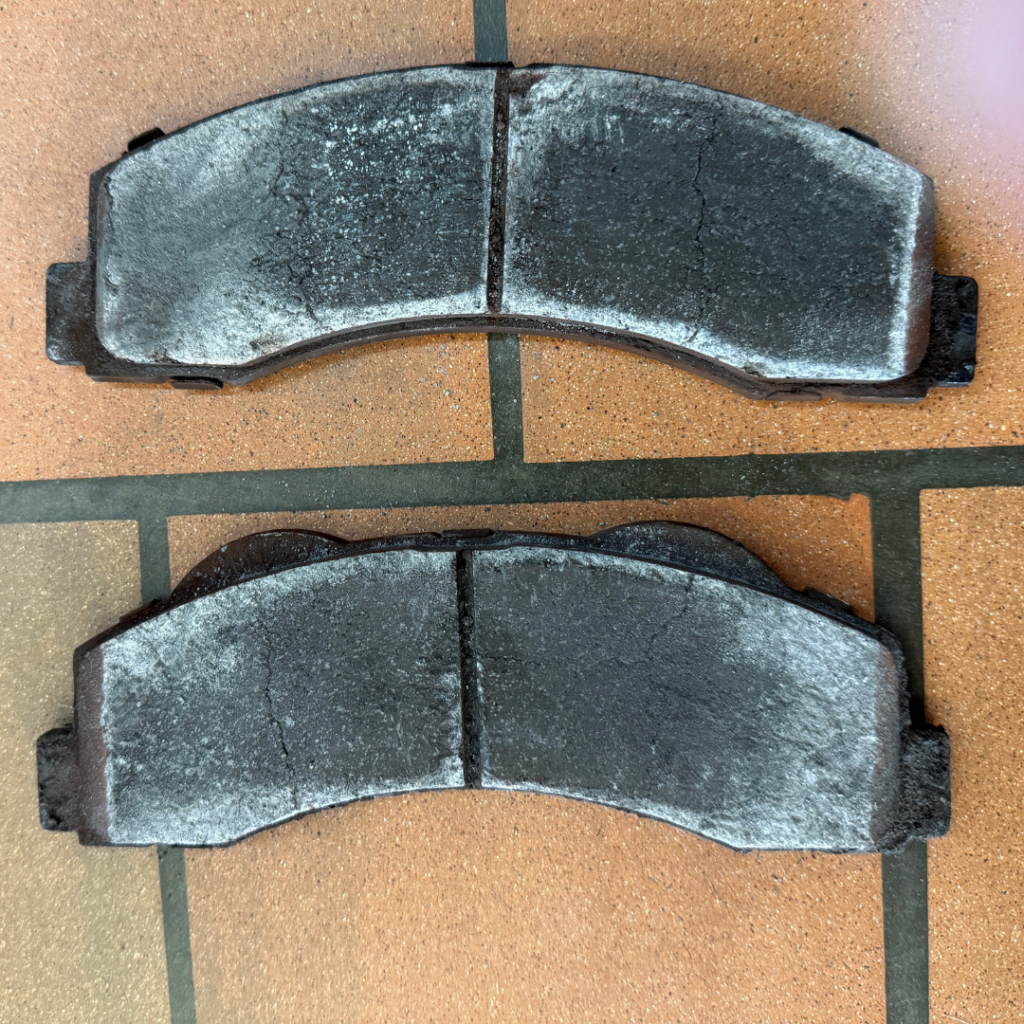
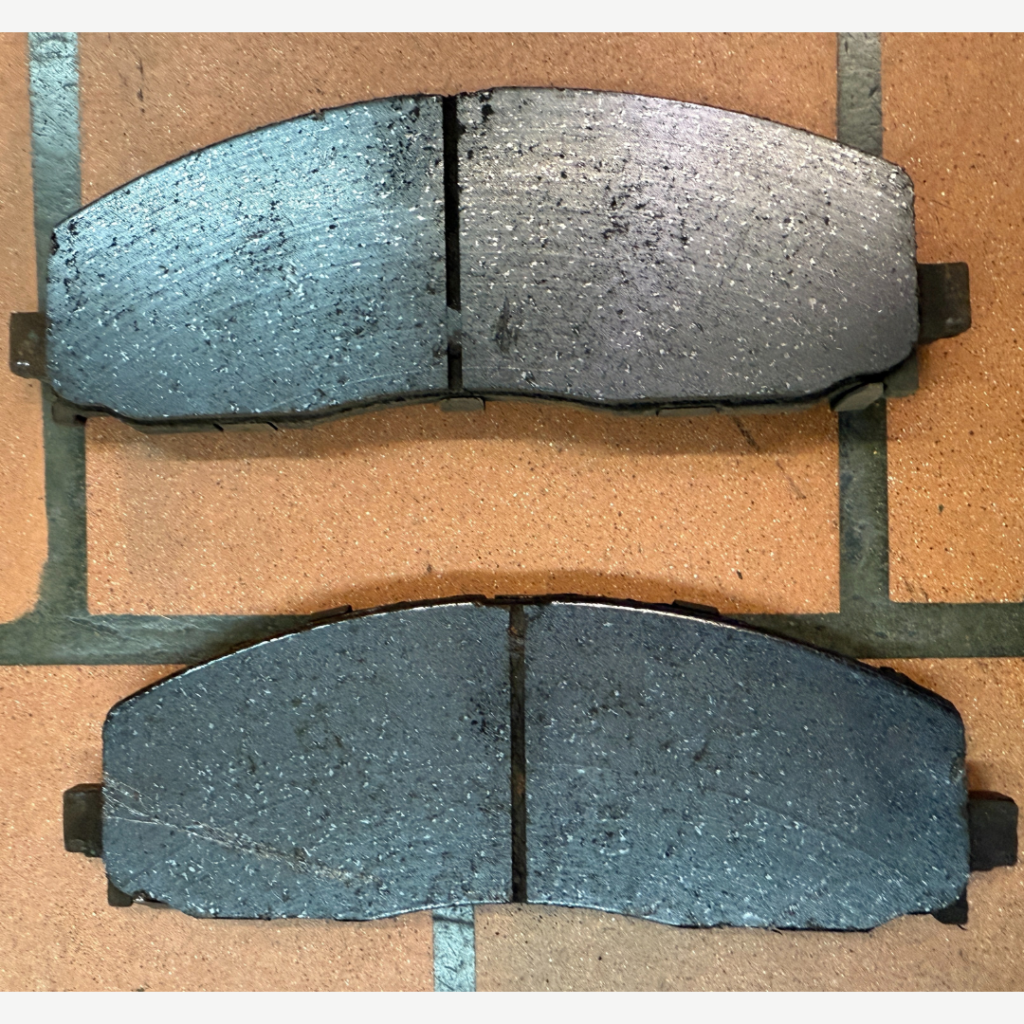
    Welcome to the Shelf of Shame, where broken parts go to retire, and the rest of us go to learn from others’ Ooops! (and occasionally laugh so we don’t cry). Today’s featured artifact? A pair of brake pads with uneven wear and enough heat damage to qualify as small, metallic pancakes fresh off a skillet.

    So, What Happened – and more importantly, How do you prevent it?


    🧱 Meet the Brake Pads

    These pads look like they’ve been through a fiery nightmare and came back with the scars to prove it. One end is worn down to paper-thin nothingness, complete with a nice bit of charring for dramatic effect.

    Now compare that to this second used set—calm, even wear, simply at the end of its life like a normal, well-adjusted brake pad.

    This dramatic difference tells us one thing for sure:
    👉 A caliper decided it was done with its responsibilities and locked up.


    🔥 So… Why the Heat Damage?

    When a caliper locks up, the affected pad is constantly pressed against the rotor. That means extreme friction. And friction means heat (and not the good kind). This heat means… well… these crispy, overheated brake pads that look like they were roasted over an open flame.

    The result?

    • Rough, jerky driving
    • Blue and purple discoloration
    • Cracking and glazing
    • A smell no human should ever have to endure
    • A rotor that probably didn’t survive either

    If brake parts could scream, these pads would be sending us complaint emails.


    🤦 What Causes a Caliper to Lock Up?

    Many things can send a caliper into early retirement, but the top culprits include:

    • Corrosion from moisture (a classic)
    • Seized slide pins that forgot how to slide
    • Old or contaminated brake fluid
    • A piston that decided “movement” was optional

    One small part failing leads to a beautiful cascade of mechanical misery.


    🚗 Could This Have Been Prevented?

    Oh yes. Absolutely. 100%.

    Regular brake inspections would have caught:

    • Uneven wear early
    • Sticking pins
    • Caliper hesitation
    • That burning smell that says, “Hey, something’s wrong!”

    We love diagnosing problems, swooping in and being your cars hero, but trust us—your wallet will love you more if we catch these issues before the pads turn into charcoal briquettes.


    🛞 What Your Brakes Want You To Know

    This set of brake pads now sits proudly on the Shelf of Shame—not to embarrass anyone, but to teach drivers what small warning signs can become if ignored.

    Don’t ignore the signs!

    • If your car pulls to one side when braking—get it checked.
    • If you smell burning—get it checked.
    • If your brakes squeal, grind, or make noises that sound like a demon trying to escape—definitely get it checked.

    And most importantly…
    Brake pads should not look like they were used for a campfire project.


    Want to see the next artifact from the Shelf of Shame? Spoiler: it involves oil changes so overdue, the engine started sending out smoke signals.

    Sandston Automotive

    SMALL TOWN FEEL, BIG TIME SERVICE

    804-737-7206
  • How We Fix a Flat Tire (AKA: Performing Minor Surgery on Your Tire—With the Right Tools)

    Flat tires never happen when you’re relaxing at home. Nope. They wait until you’re running late, it’s raining sideways, and your coffee just spilled. Perfect timing.

    But don’t worry—once your tire limps its way to our shop, we’ve got you covered!

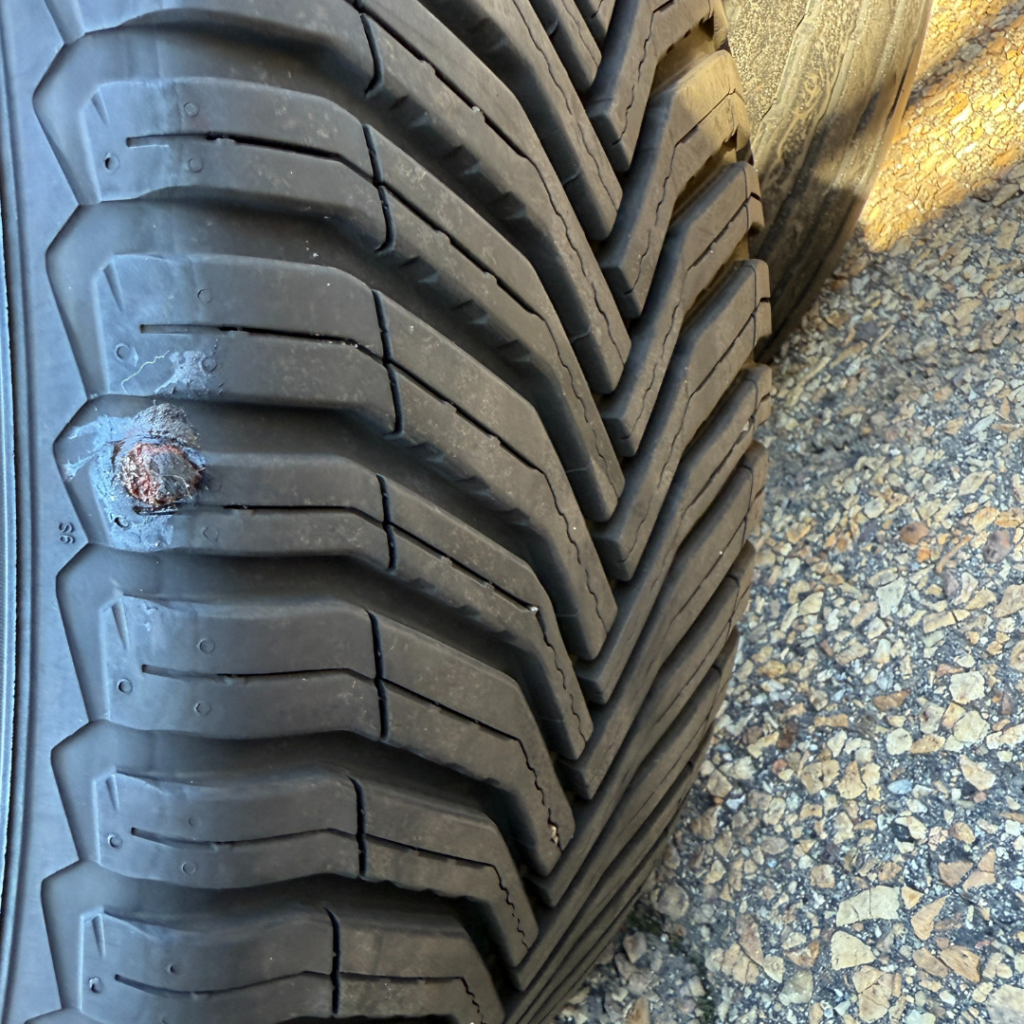
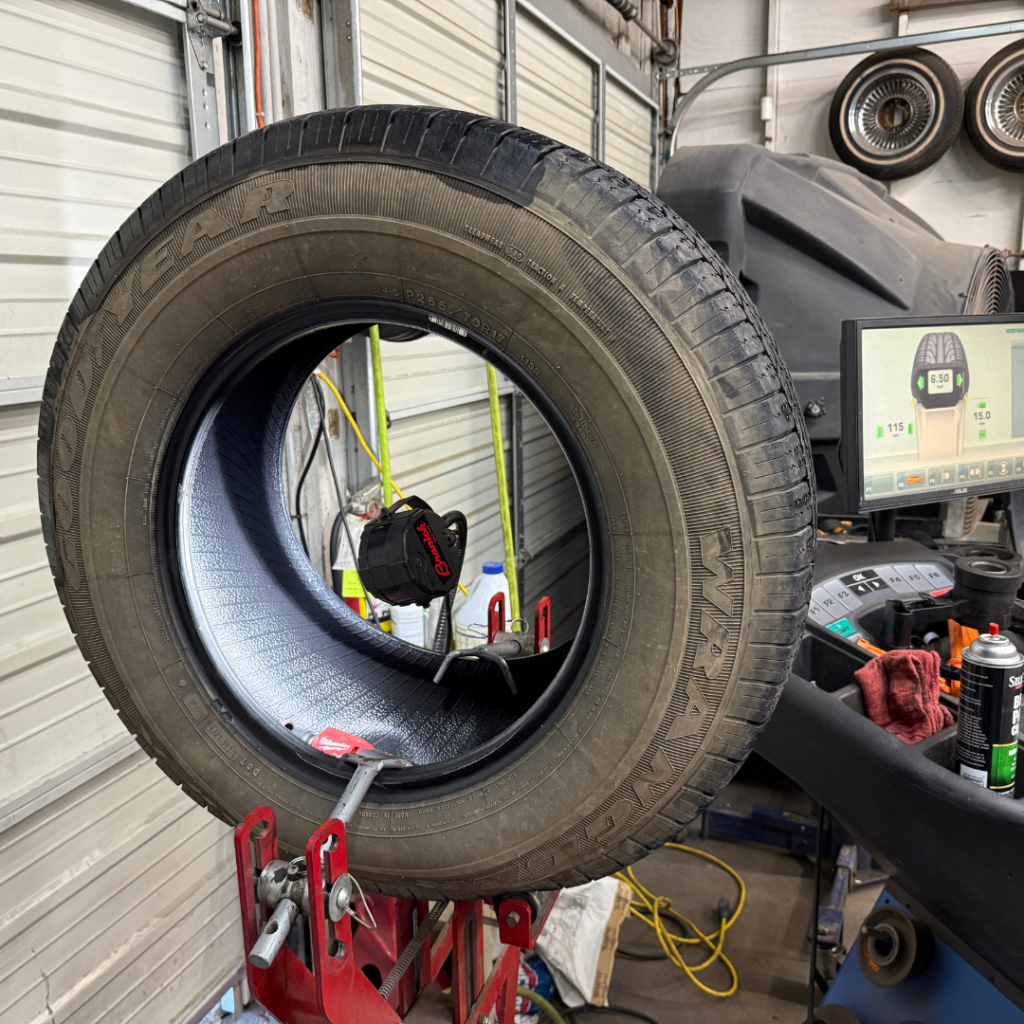
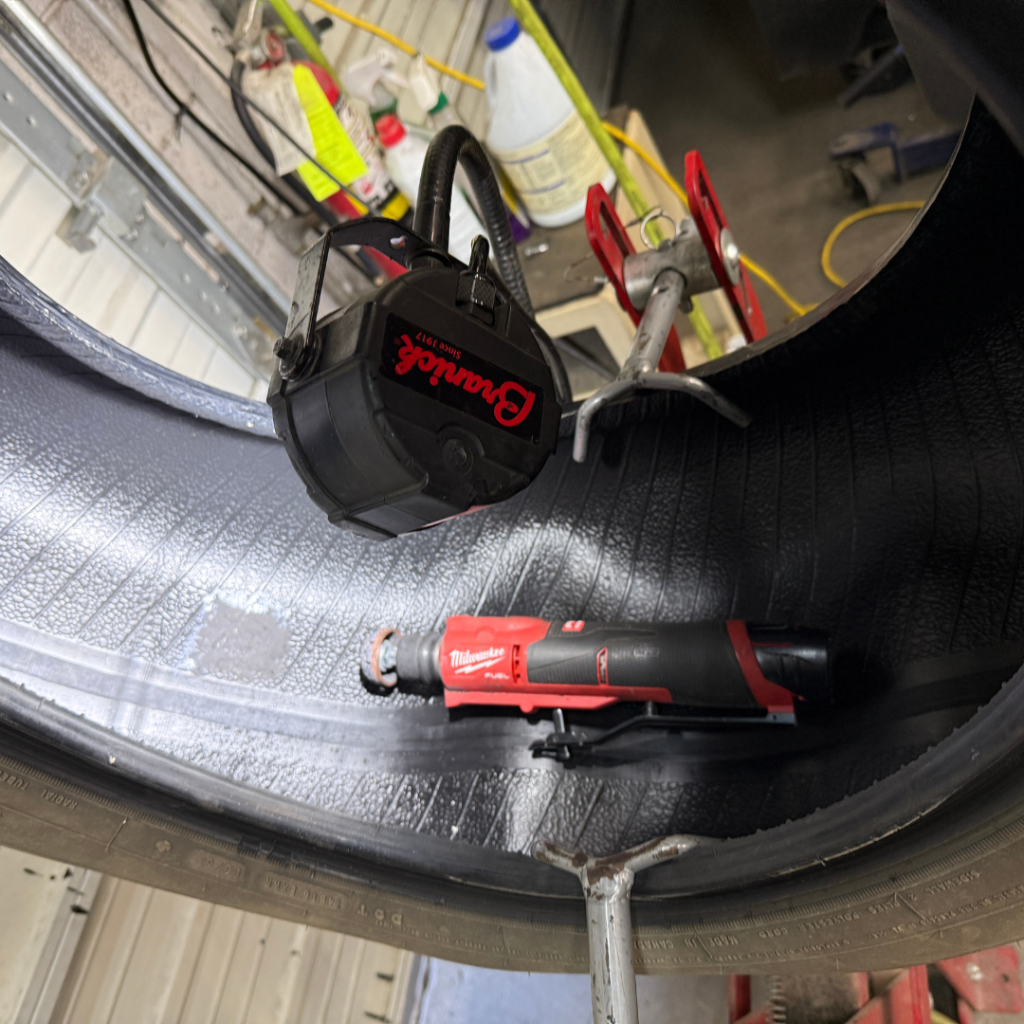
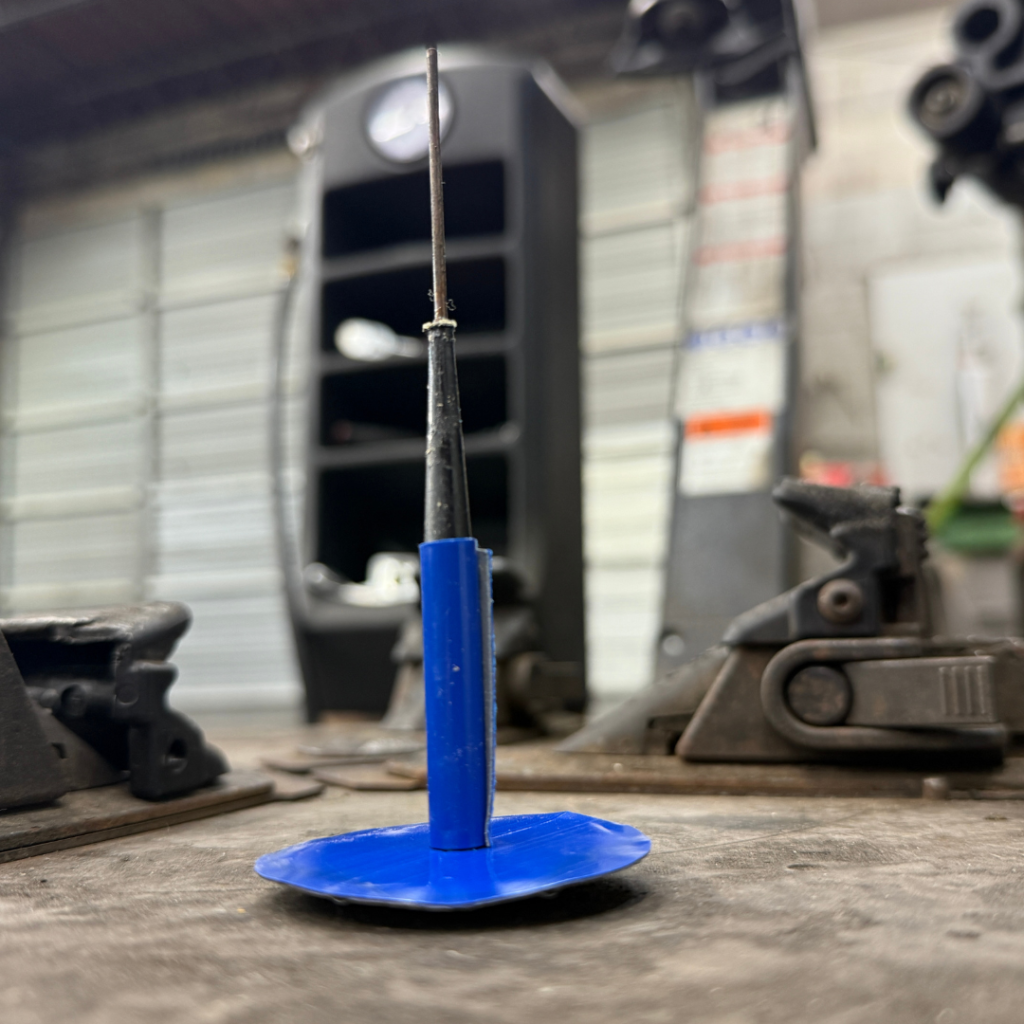
    Around here, we don’t believe in guesswork or “good enough” fixes. Every flat tire gets an internal inspection, and depending on what we find, we repair it using industry-approved internal methods—sometimes a patch-only repair, other times a combination patch-plug. Different injuries require different treatments. Think tire surgery, not duct tape.

    Let’s walk through how we bring your tire back from the dead.


    Wait—Why Not Just Pop a Plug in It?

    Because we like your wheels, your life, and our reputation.

    A quick “drive-by plug” might seem convenient, but it’s kind of like putting a Band-Aid on a cracked pipe. Sure, it covers the hole and might hold for a bit… until it doesn’t. And when it fails, it usually fails spectacularly—at highway speed.

    If we don’t open the tire up, we can’t see:

    • Whether the inside looks like a crime scene
    • If the tire was driven flat and is now emotionally (and structurally) damaged
    • If the puncture is even in a repairable zone
    • Hidden sidewall injuries that would make the tire unsafe

    So yeah—plug-only repairs? Hard pass.


    Step 1: Find the Leak (Before We Take Anything Apart)

    Before the tire ever comes off the wheel, we water-test it to pinpoint exactly where the air is escaping. This tells us what kind of damage we’re dealing with and helps determine whether the tire is even a candidate for repair.

    Once we know what we’re dealing with, we move on to the next step.


    Step 2: Take the Tire Off and Look Inside Its Soul

    We pull the wheel off, pop the tire off the rim, and inspect the inside like we’re CSI: Tire Edition.

    This is where we determine:

    • If the tire is safe to repair
    • Whether it needs a patch-only repair or a patch-plug
    • Or if it’s time to have “the talk” about replacement

    If we find something that makes the tire unsafe to fix, we’ll let you know—no surprises, no sketchy decisions.


    Step 3: Prep the Wound

    Once we find the puncture, we:

    • Clean the injury
    • Mark the repair area
    • Buff the inner liner
    • Drill out the puncture channel with a specialized tool

    This removes debris, damaged rubber, and any poor life choices the tire has been carrying since it met that nail.


    Step 4: Install the Right Repair (Patch or Patch-Plug)

    This is where the magic happens.

    Depending on the location and type of puncture, we install:

    • A patch-only repair for certain small, straight-through tread punctures, or
    • A combination patch-plug, which seals the inner liner and fills the puncture channel

    -whichever keeps the tire safest long-term.

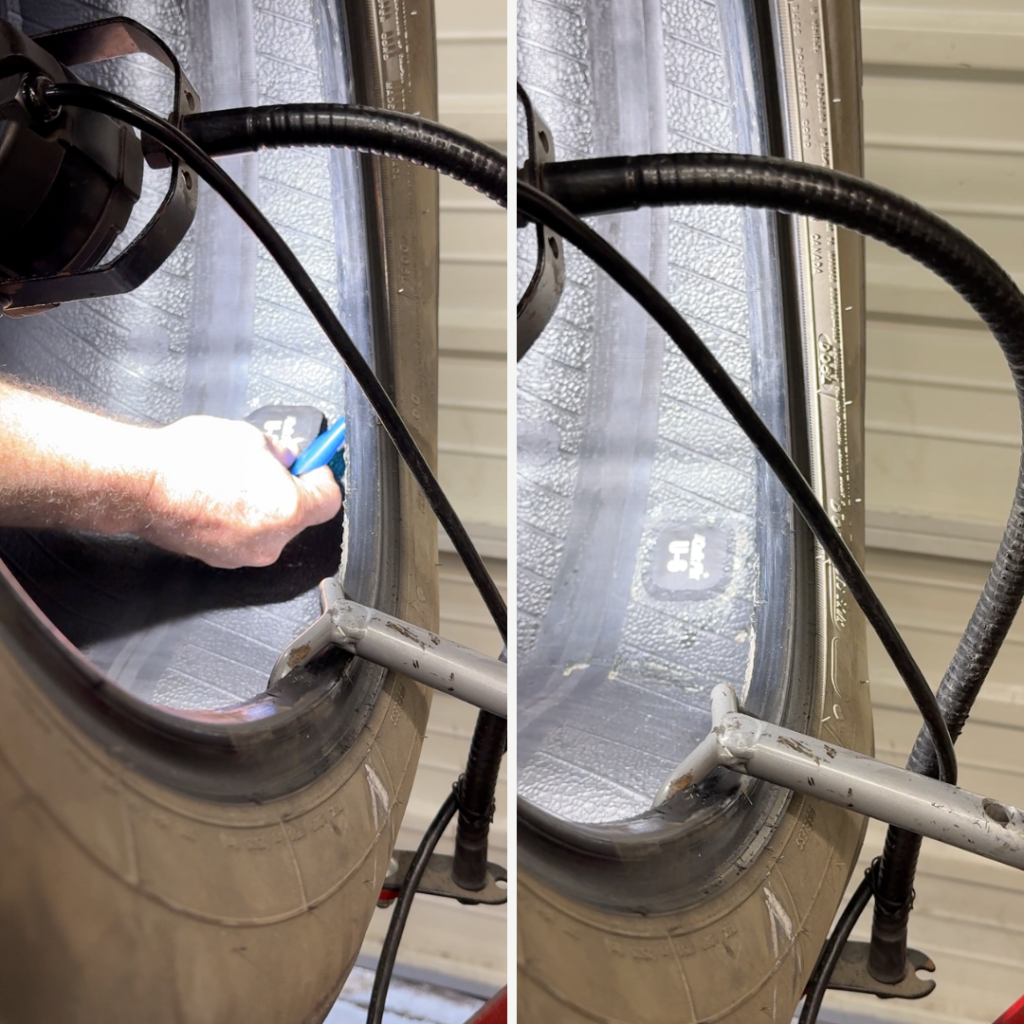
    When utilizing a patch repair, we:

    • Insert the plug from the inside out (patch plug)
    • Seat the patch against the inner liner
    • Apply vulcanizing cement (basically rubber superglue on steroids)
    • Roll it flat until it’s bonded tighter than your phone to your hand

    Both methods seal the tire internally so the tire is airtight and structurally sound.


    Step 5: Button It Up and Double-Check Everything

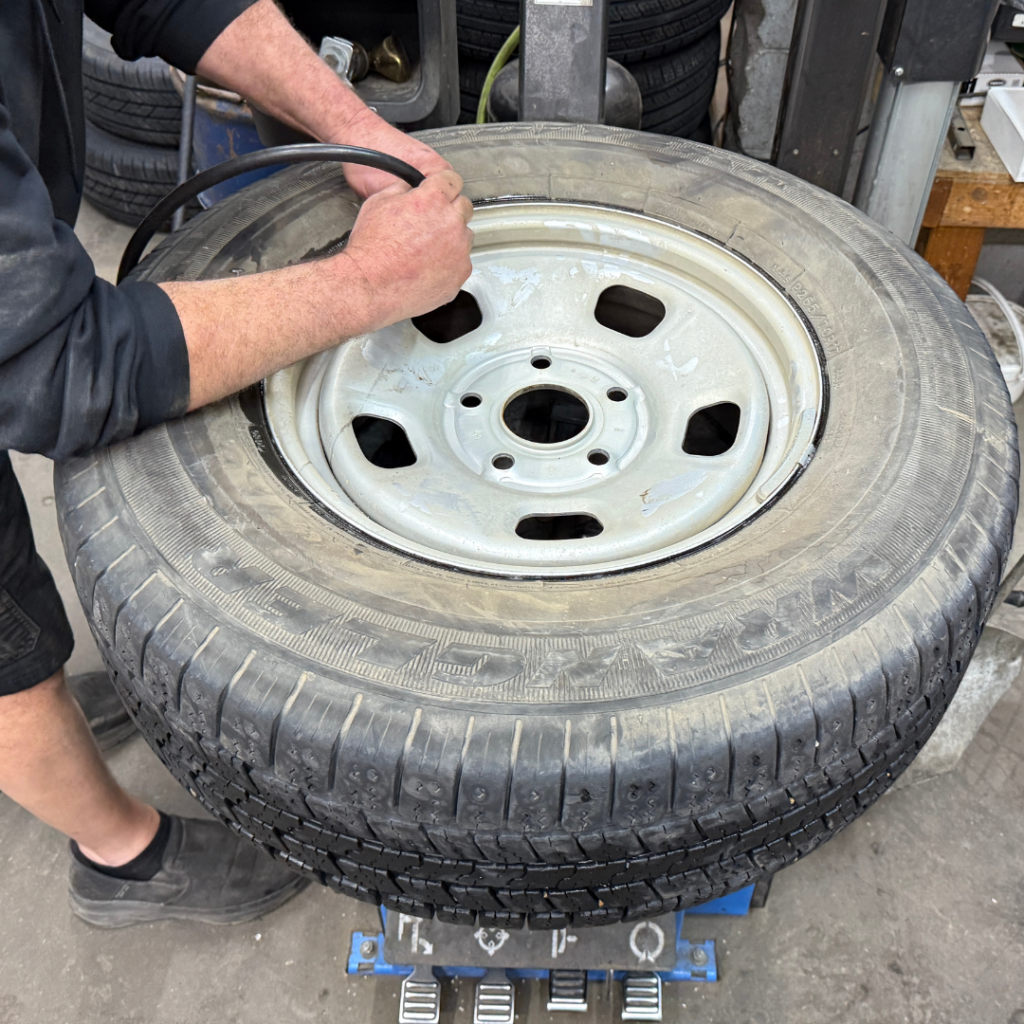
    We trim the plug (if used) flush on the outside, remount the tire, inflate it, and make sure:

    • The repair is holding
    • The bead is seated properly
    • The tire isn’t hissing like an angry cat

    Then the wheel goes back on your vehicle and gets torqued properly—not “gorilla tight,” not “barely snug,” just manufacturer-approved perfect.


    Why Internal Repairs Are the Real Superheroes

    Because they:

    • Reinforce the area
    • Seal the inner liner
    • Prevent moisture intrusion
    • AND keep the tire safe long-term

    If your tires could talk, they’d request patch-plugs by name. Probably in a deep dramatic movie-trailer voice.


    In Conclusion: Your Tire Is Safe With Us (Literally)

    A flat tire is annoying.
    A bad repair is dangerous.

    Our process fixes the flat and makes sure you don’t end up on the side of the highway questioning your life choices and yelling at inanimate objects.

    Swing by anytime you get a flat—we’ll fix it right, keep you safe, and maybe even have you laughing while you’re here.


    Sandston Automotive

    SMALL TOWN FEEL, BIG TIME SERVICE

    804-737-7206
  • Sticker Time! A Simple Guide to Virginia State Inspections

    Hey there, Virginia drivers!

    If you’ve ever glanced at that little sticker on your windshield and thought, “Wait… was it really a year ago already?” — you’re not alone. The annual Virginia State Inspection sneaks up on all of us. But don’t worry! At Sandston Automotive, we’ve got your back, your brakes, your tires… basically, all of it.


    📌 Quick Disclaimer (Because Laws Like to Change)

    Virginia inspection laws, procedures, and requirements can change from time to time. While we do our best to share accurate, helpful information, this post is meant to prepare you for your inspection and for general education only. For the most up-to-date and official requirements, always refer to the Virginia Code and the Virginia State Police Safety Inspection Manual, or speak directly with a Virginia State Inspection Officer.

    Translation: when in doubt, trust the rulebook — not just the blog 😉


    ✅ What is the Virginia State Inspection?

    In short:
    It’s a yearly safety check required by the Commonwealth of Virginia to make sure your vehicle is safe, road-worthy, and not secretly plotting to strand you on I-95 at rush hour.

    There are 24 inspection points, and while that sounds like a lot, think of it more like a thorough spa day for your car — minus the cucumber water.

    In Detail: Two Types of Inspections

    Virginia requires two main types of inspections for many vehicles:

    *If you live outside of emissions-testing areas (mainly Northern Virginia), like here in Central Virginia, (or drive an older, exempt vehicle), then you only need the safety inspection


    🛠️ What Gets Checked During Your Safety Inspection

    Inspection stations and Inspectors are certified and regulated by the Virginia State Police.  

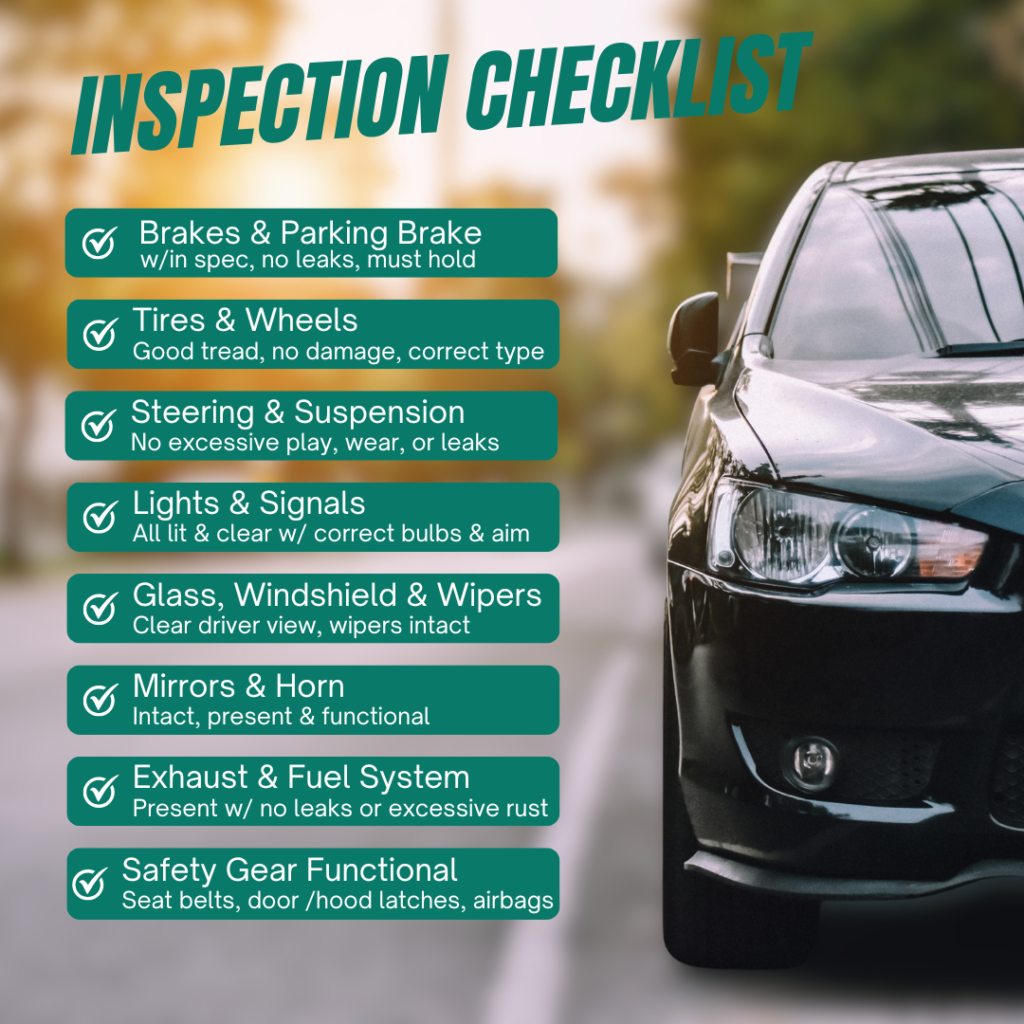
    Some of the main items include:

    • Brakes & parking brake — condition of pads/rotors or drums (minimum thickness is 2mm with no excessive pitting, grooving or glazing), fluid level, any leaks.  Parking brake must hold. 
    • Tires & wheels — tread depth (minimum depth is 2mm), damage (no cord or secondary rubber showing or other damage like missing chunks from sidewall or cracks in wheels), correct tire type. 
    • Steering & suspension — checking for play (excessive movement) in joints, worn bushings, loose steering components, shocks/struts (no leaking), and proper alignment. 
    • Lights & signals — headlights, brake lights, turn signals, reverse lamps — all lights working, correct bulbs (turn signals must be amber), lenses clear, and correct aim. 
    • Glass, windshield & wipers — no major cracks or visibility issues*; wipers must be in good working order (torn wipers are a super common failure). 
    • Mirrors — must be present (must have interior and driver side), intact, and give proper rear visibility
    • Horn — must be mounted properly and be loud enough to be heard at 200 feet
    • Exhaust & fuel system — no leaks or major rust, and proper emissions-related components intact
    • Safety gear — seat belts, door latches, hood latch, proper glass, airbags (if equipped), etc.


    📅 How Often You Need an Inspection — and What It Means for You

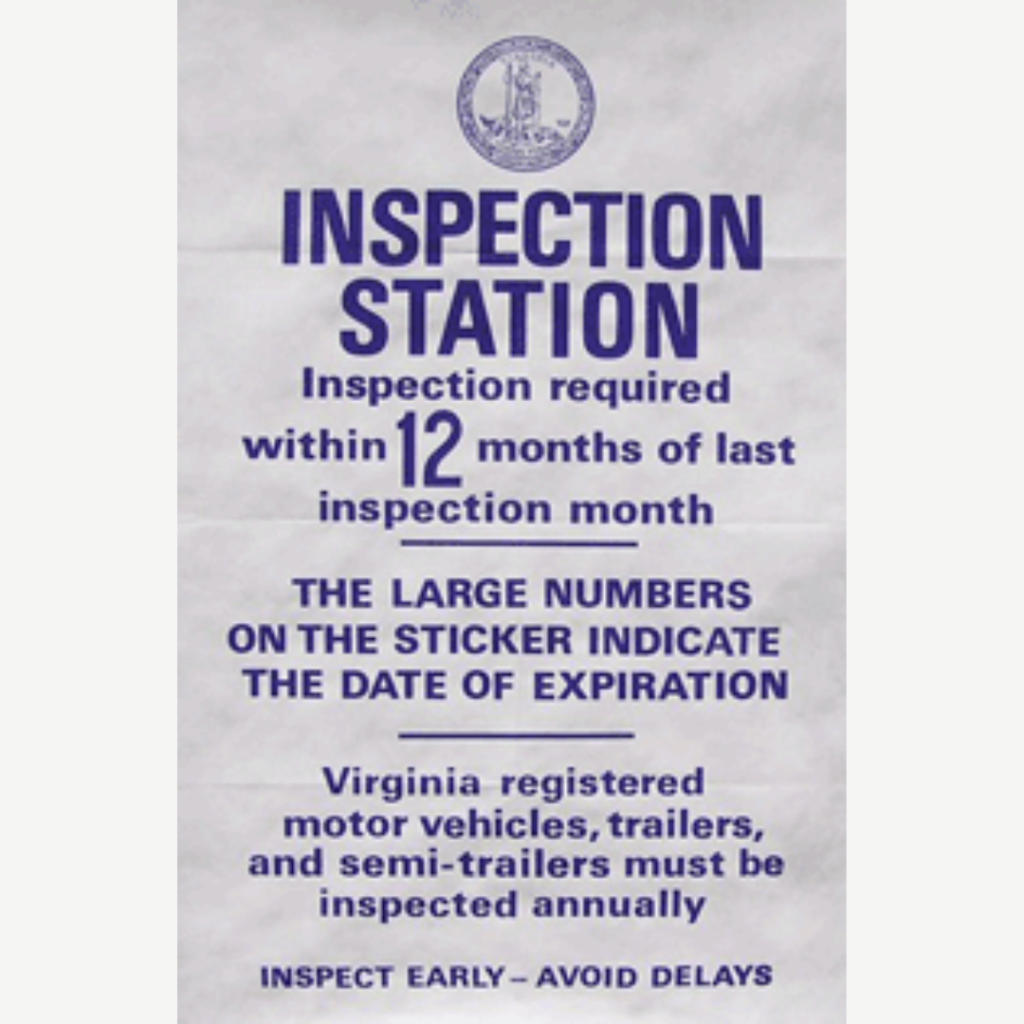
    • In Virginia, your car’s safety checkup is required once every 12 months. Think of it like an annual physical… but for your vehicle, and with fewer awkward conversations. 
    • If you live in certain parts of the state, you’ll also need an emissions inspection every two years. It’s basically your car proving it can behave itself environmentally.
    • And here’s a fun twist: the DMV doesn’t send reminders. Nope. Not a postcard. Not an email. Not even a friendly owl. It’s all on you (but hey, we’re happy to help you keep track!).

    One more important note — your inspection has to be done at a certified inspection station. Not every auto shop is officially allowed to slap that shiny sticker on your windshield, so make sure you’re visiting the real deal.

    Luckily… that’s us!


    ⏱️ How Long Does It Take?

    Typically around 45 minutes — just enough time to grab a coffee, answer a couple emails, or contemplate why all pens disappear from your cup holder.


    🚦 What If My Car Fails?

    No worries! Wear and tear happens. 

    If any of the above systems are unsafe or visibly defective, the car fails the inspection.
    We’ll walk you through what needs fixing, give you honest recommendations, complete the repairs and help you get back on the road safely. 

    If you choose to complete the repairs yourself or elsewhere (totally an option!), your car is issued a rejection sticker.  

    You have a 15-day grace period to handle any repairs and return for a re-inspection of the failed items.


    ✅ Smooth Inspection Checklist

    1. Check your windshield for the current inspection sticker to see the expiration ate
    2. Don’t wait until the last minute. Book your inspection a few weeks early (especially if your car might need repairs).
    3. Bring your registration and payment — $20 for passenger cars ($12 for motorcycles).
    4. If your car fails, get the necessary repairs. We can take care of you in one trip, or arrange the repairs and return for a follow-up inspection. You’ll need to fix only the failed items if you return within the rejection sticker window.
    5. Keep your receipts and certificate handy — especially if you’re moving or buying/selling a car.


    🛞 Looking Out for You and Your Ride

    At Sandston Automotive, we believe state inspections are more than just stickers — they represent a basic safety check that helps keep you, your family, and your community safer on Virginia roads. Think of it like an annual “tune-up” for your car’s safety systems.

    If you’re due for an inspection (or have questions about what’s required), bring your car by — we’re certified and ready to help you pass with flying colors.

    Sandston Automotive

    SMALL TOWN FEEL, BIG TIME SERVICE

    804-737-7206