Tag: brakes

  • Broken, Busted and Burnt Up: Tales From the Shelf of Shame

    Episode: The Caliper That Couldn’t (and the Pads That Paid the Price)

    Welcome to the Shelf of Shame, where broken parts go to retire, and the rest of us go to learn from others’ Ooops! (and occasionally laugh so we don’t cry). Today’s featured artifact? A pair of brake pads with uneven wear and enough heat damage to qualify as small, metallic pancakes fresh off a skillet.

    So, What Happened – and more importantly, How do you prevent it?


    🧱 Meet the Brake Pads

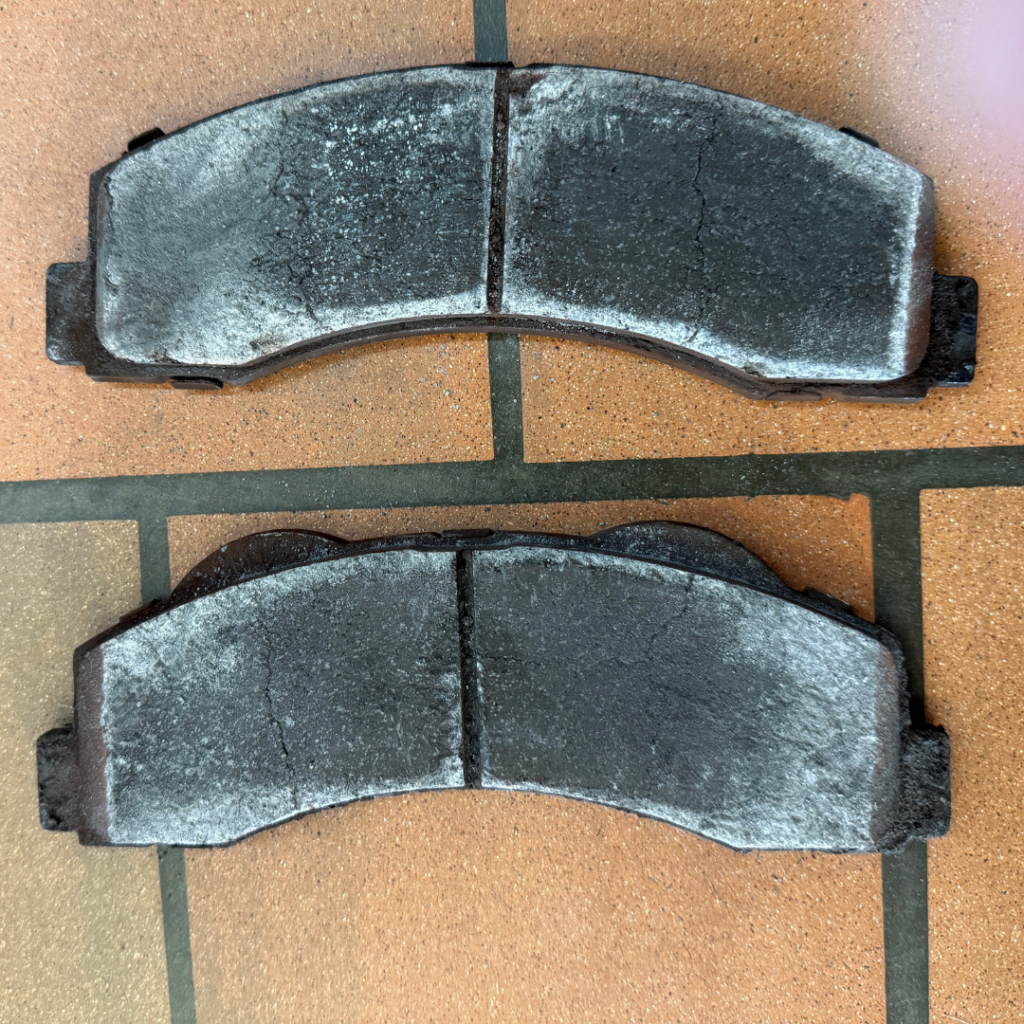
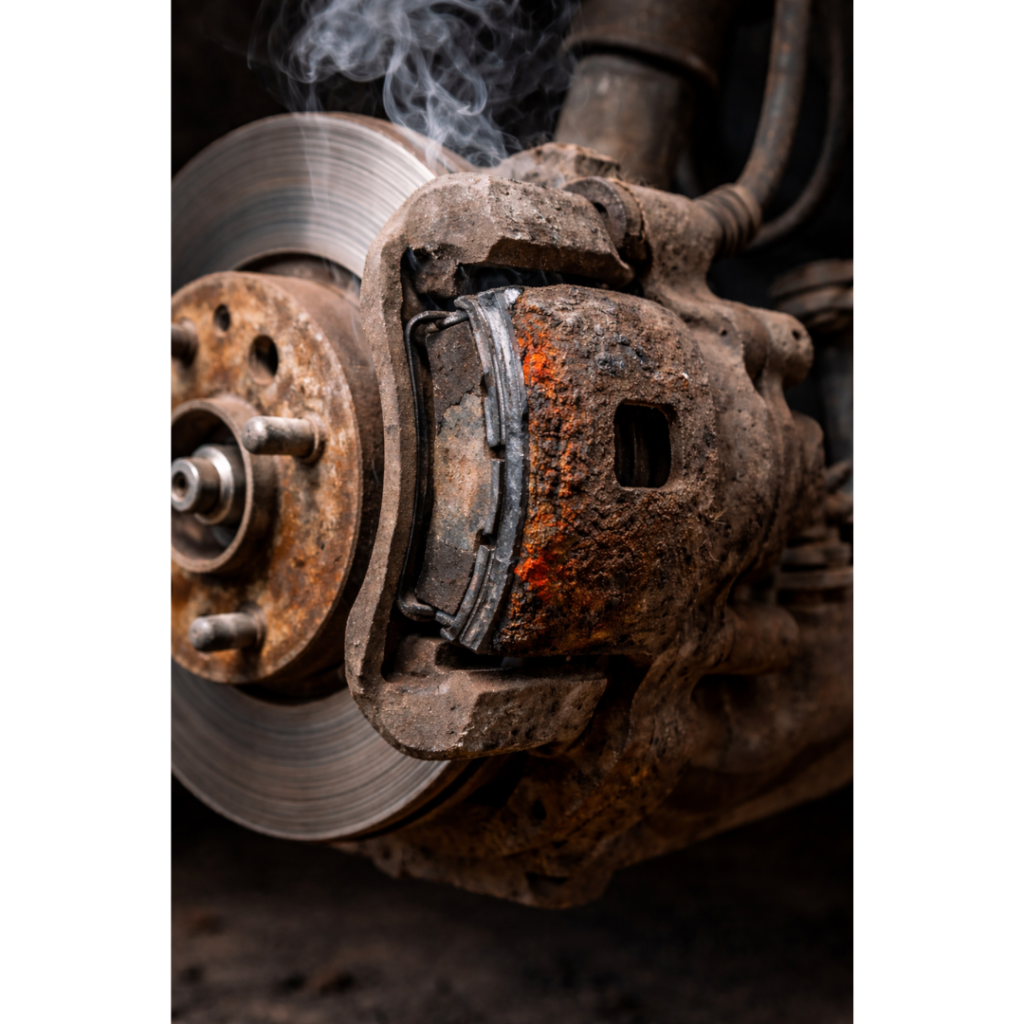
    These pads look like they’ve been through a fiery nightmare and came back with the scars to prove it. One end is worn down to paper-thin nothingness, complete with a nice bit of charring for dramatic effect.

    Now compare that to this second used set—calm, even wear, simply at the end of its life like a normal, well-adjusted brake pad.

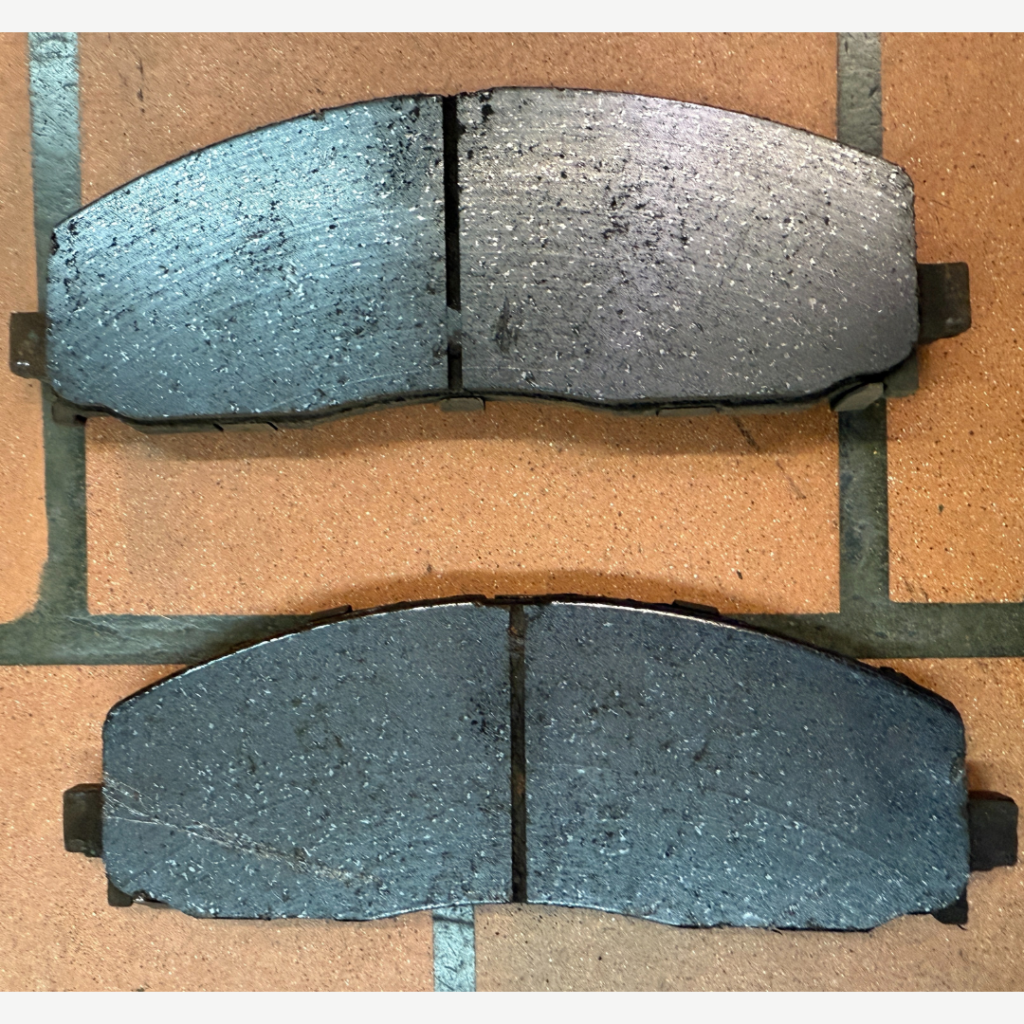
    This dramatic difference tells us one thing for sure:
    👉 A caliper decided it was done with its responsibilities and locked up.


    🔥 So… Why the Heat Damage?

    When a caliper locks up, the affected pad is constantly pressed against the rotor. That means extreme friction. And friction means heat (and not the good kind). This heat means… well… these crispy, overheated brake pads that look like they were roasted over an open flame.

    The result?

    • Rough, jerky driving
    • Blue and purple discoloration
    • Cracking and glazing
    • A smell no human should ever have to endure
    • A rotor that probably didn’t survive either

    If brake parts could scream, these pads would be sending us complaint emails.


    🤦 What Causes a Caliper to Lock Up?

    Many things can send a caliper into early retirement, but the top culprits include:

    • Corrosion from moisture (a classic)
    • Seized slide pins that forgot how to slide
    • Old or contaminated brake fluid
    • A piston that decided “movement” was optional

    One small part failing leads to a beautiful cascade of mechanical misery.


    🚗 Could This Have Been Prevented?

    Oh yes. Absolutely. 100%.

    Regular brake inspections would have caught:

    • Uneven wear early
    • Sticking pins
    • Caliper hesitation
    • That burning smell that says, “Hey, something’s wrong!”

    We love diagnosing problems, swooping in and being your cars hero, but trust us—your wallet will love you more if we catch these issues before the pads turn into charcoal briquettes.


    🛞 What Your Brakes Want You To Know

    This set of brake pads now sits proudly on the Shelf of Shame—not to embarrass anyone, but to teach drivers what small warning signs can become if ignored.

    Don’t ignore the signs!

    • If your car pulls to one side when braking—get it checked.
    • If you smell burning—get it checked.
    • If your brakes squeal, grind, or make noises that sound like a demon trying to escape—definitely get it checked.

    And most importantly…
    Brake pads should not look like they were used for a campfire project.


    Want to see the next artifact from the Shelf of Shame? Spoiler: it involves oil changes so overdue, the engine started sending out smoke signals.

    Sandston Automotive

    SMALL TOWN FEEL, BIG TIME SERVICE

    804-737-7206

  • How We Fix a Flat Tire (AKA: Performing Minor Surgery on Your Tire—With the Right Tools)

    Flat tires never happen when you’re relaxing at home. Nope. They wait until you’re running late, it’s raining sideways, and your coffee just spilled. Perfect timing.

    But don’t worry—once your tire limps its way to our shop, we’ve got you covered!

    Around here, we don’t believe in guesswork or “good enough” fixes. Every flat tire gets an internal inspection, and depending on what we find, we repair it using industry-approved internal methods—sometimes a patch-only repair, other times a combination patch-plug. Different injuries require different treatments. Think tire surgery, not duct tape.

    Let’s walk through how we bring your tire back from the dead.


    Wait—Why Not Just Pop a Plug in It?

    Because we like your wheels, your life, and our reputation.

    A quick “drive-by plug” might seem convenient, but it’s kind of like putting a Band-Aid on a cracked pipe. Sure, it covers the hole and might hold for a bit… until it doesn’t. And when it fails, it usually fails spectacularly—at highway speed.

    If we don’t open the tire up, we can’t see:

    • Whether the inside looks like a crime scene
    • If the tire was driven flat and is now emotionally (and structurally) damaged
    • If the puncture is even in a repairable zone
    • Hidden sidewall injuries that would make the tire unsafe

    So yeah—plug-only repairs? Hard pass.


    Step 1: Find the Leak (Before We Take Anything Apart)

    Before the tire ever comes off the wheel, we water-test it to pinpoint exactly where the air is escaping. This tells us what kind of damage we’re dealing with and helps determine whether the tire is even a candidate for repair.

    Once we know what we’re dealing with, we move on to the next step.


    Step 2: Take the Tire Off and Look Inside Its Soul

    We pull the wheel off, pop the tire off the rim, and inspect the inside like we’re CSI: Tire Edition.

    This is where we determine:

    • If the tire is safe to repair
    • Whether it needs a patch-only repair or a patch-plug
    • Or if it’s time to have “the talk” about replacement

    If we find something that makes the tire unsafe to fix, we’ll let you know—no surprises, no sketchy decisions.


    Step 3: Prep the Wound

    Once we find the puncture, we:

    • Clean the injury
    • Mark the repair area
    • Buff the inner liner
    • Drill out the puncture channel with a specialized tool

    This removes debris, damaged rubber, and any poor life choices the tire has been carrying since it met that nail.


    Step 4: Install the Right Repair (Patch or Patch-Plug)

    This is where the magic happens.

    Depending on the location and type of puncture, we install:

    • A patch-only repair for certain small, straight-through tread punctures, or
    • A combination patch-plug, which seals the inner liner and fills the puncture channel

    -whichever keeps the tire safest long-term.

    When utilizing a patch repair, we:

    • Insert the plug from the inside out (patch plug)
    • Seat the patch against the inner liner
    • Apply vulcanizing cement (basically rubber superglue on steroids)
    • Roll it flat until it’s bonded tighter than your phone to your hand

    Both methods seal the tire internally so the tire is airtight and structurally sound.


    Step 5: Button It Up and Double-Check Everything

    We trim the plug (if used) flush on the outside, remount the tire, inflate it, and make sure:

    • The repair is holding
    • The bead is seated properly
    • The tire isn’t hissing like an angry cat

    Then the wheel goes back on your vehicle and gets torqued properly—not “gorilla tight,” not “barely snug,” just manufacturer-approved perfect.


    Why Internal Repairs Are the Real Superheroes

    Because they:

    • Reinforce the area
    • Seal the inner liner
    • Prevent moisture intrusion
    • AND keep the tire safe long-term

    If your tires could talk, they’d request patch-plugs by name. Probably in a deep dramatic movie-trailer voice.


    In Conclusion: Your Tire Is Safe With Us (Literally)

    A flat tire is annoying.
    A bad repair is dangerous.

    Our process fixes the flat and makes sure you don’t end up on the side of the highway questioning your life choices and yelling at inanimate objects.

    Swing by anytime you get a flat—we’ll fix it right, keep you safe, and maybe even have you laughing while you’re here.


    Sandston Automotive

    SMALL TOWN FEEL, BIG TIME SERVICE

    804-737-7206