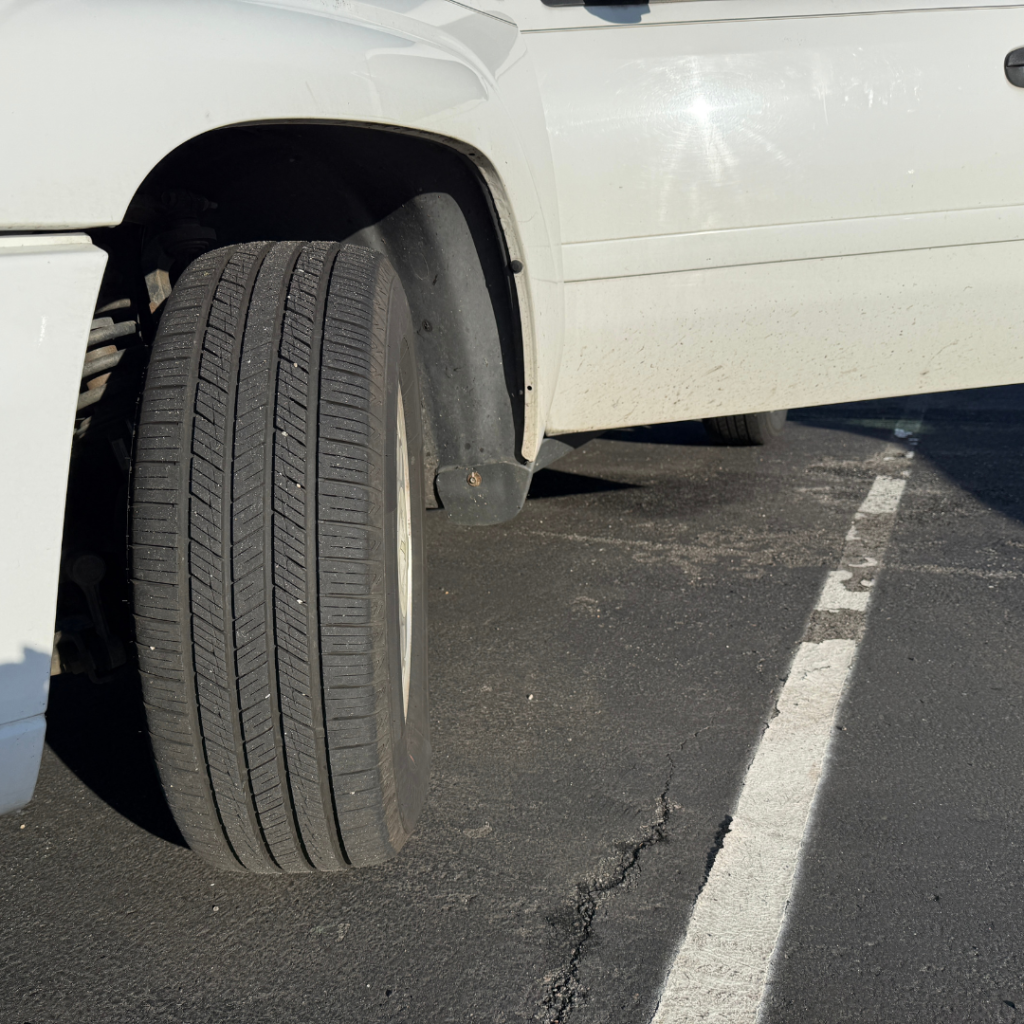
Tires are the only point of contact between your vehicle and the road. Whether you’re commuting to work or heading out on a road trip, knowing how to “read” your rubber is essential for both your safety and your wallet. Being able to spot potential issues early is a valuable skill that provides peace of mind and ensures you aren’t left stranded.
Here is everything you need to know to inspect your tires with confidence.
1. The Tread: More Than Just Grooves
Tread is designed to divert water away so your tires can maintain grip. When the tread disappears, so does your control in the rain.
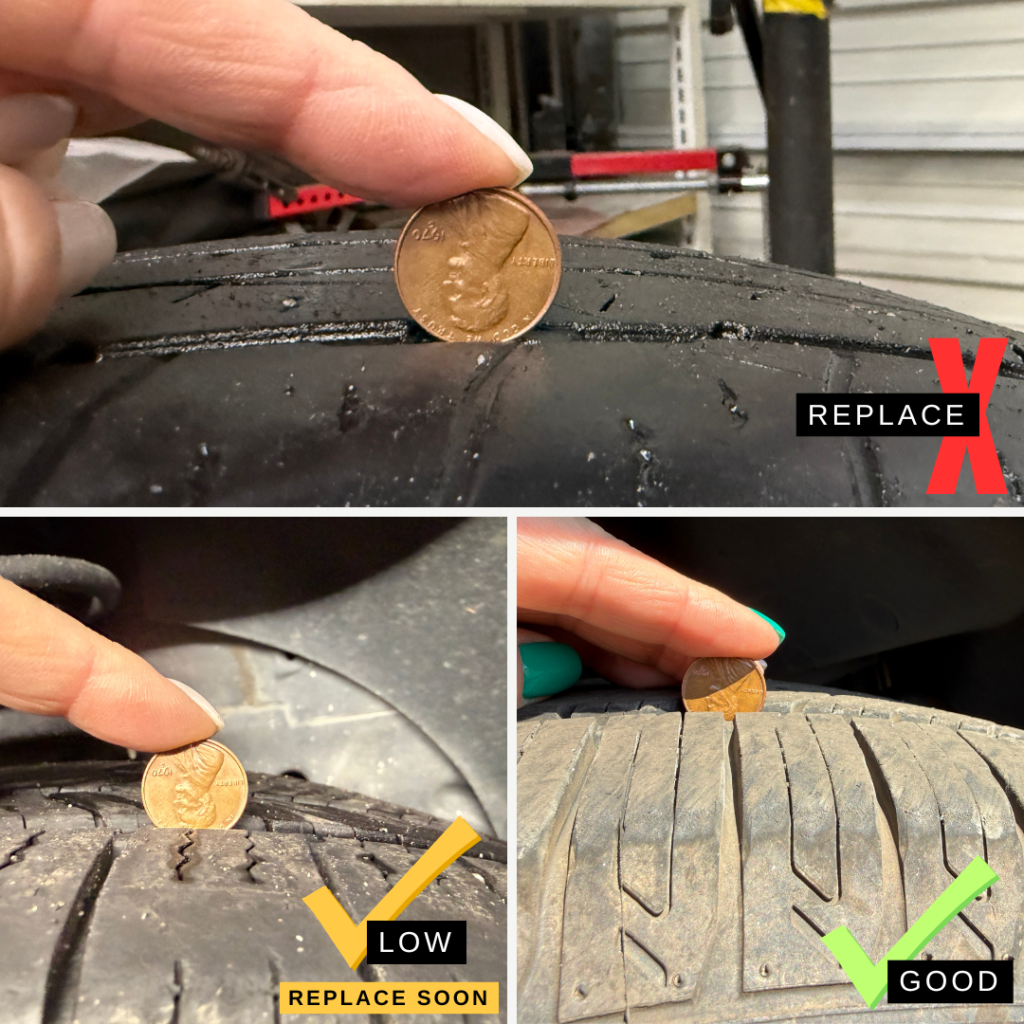
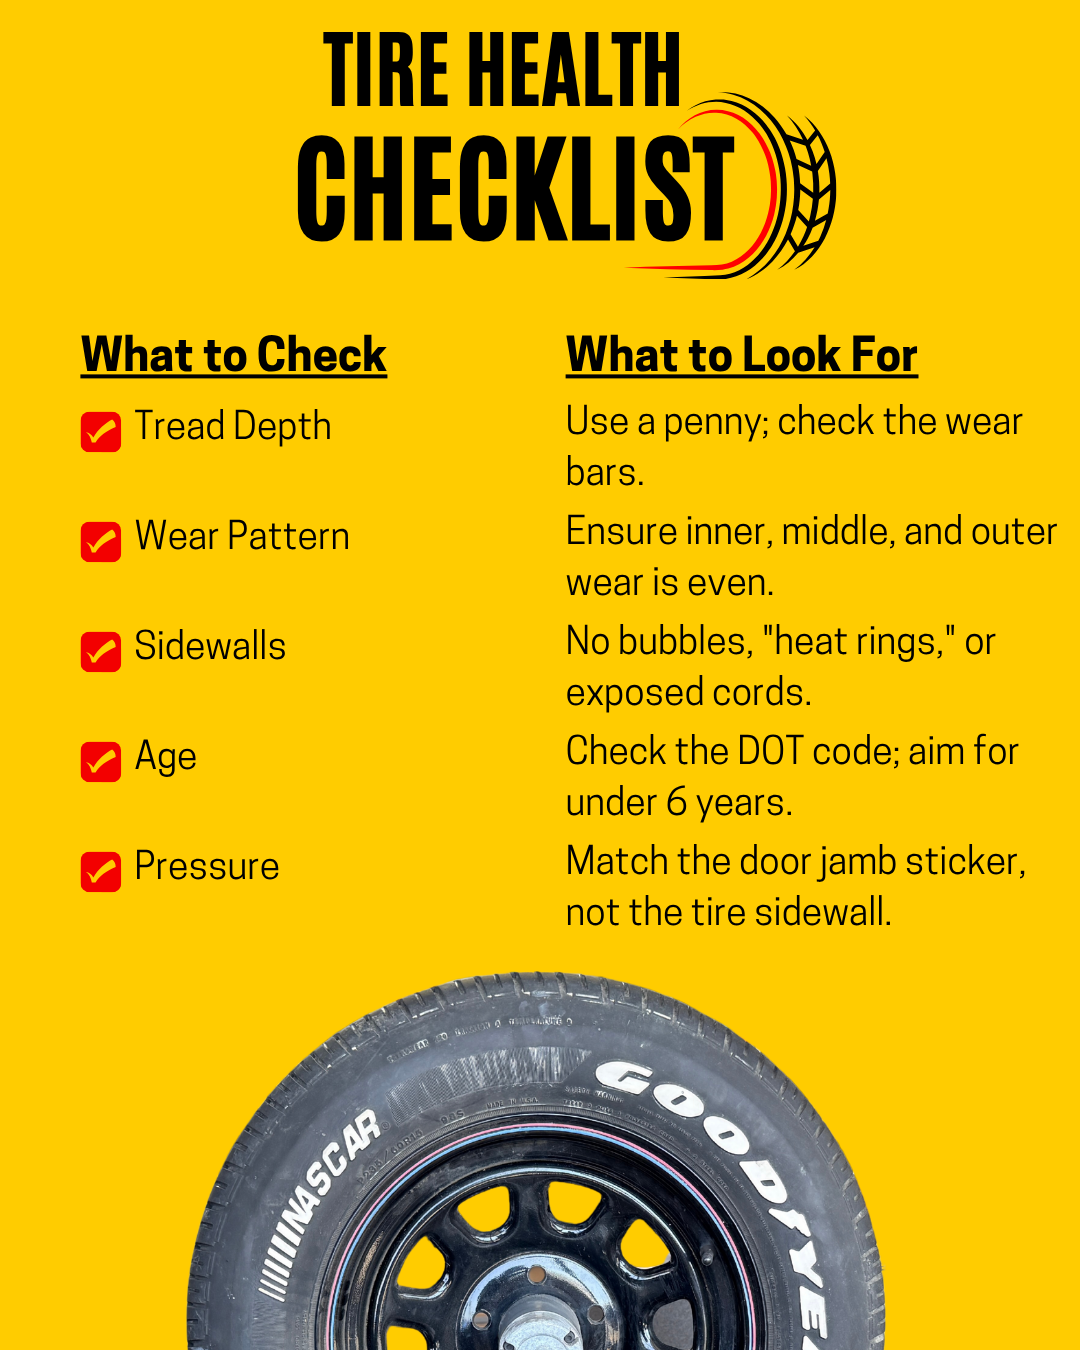
- Tread Depth: New tires typically start at 10/32″ to 12/32″. Once you hit 2/32″, the tire is legally bald and a serious safety risk.
- The Stopping Gap: Physics doesn’t lie. On wet pavement, a car with 2/32″ of tread can take up to 100 feet longer to stop from 60 mph than a car with 10/32″. That is nearly seven car lengths—often the difference between a close call and a collision.
- Wear Bars: Look deep inside the grooves for small, raised bridges of rubber running across the tread. If the tread is flush with these bars, your tires have reached their legal limit and need immediate replacement.
- The Full Scan: Don’t just look at the outside edge! Turn your steering wheel all the way to one side so you can see the inner, middle, and outer tread. Tires often wear unevenly due to alignment or suspension issues.
- The DIY Penny Test: Insert a penny into the tread with Lincoln’s head upside down. If you can see the top of his head, your tread is below 2/32″ and you need a replacement.
Pro Tip: Temperature Matters
Your tire pressure changes about 1 PSI for every 10°F change in temperature. When the first cold snap hits, your “Low Tire Pressure” light may come on as the air inside compresses. Conversely, tires gain pressure on blistering summer days. Checking your levels at the start of every season is a great habit to form.
2. Spotting Unusual Wear Patterns
Tires tell a story about your car’s suspension and alignment.
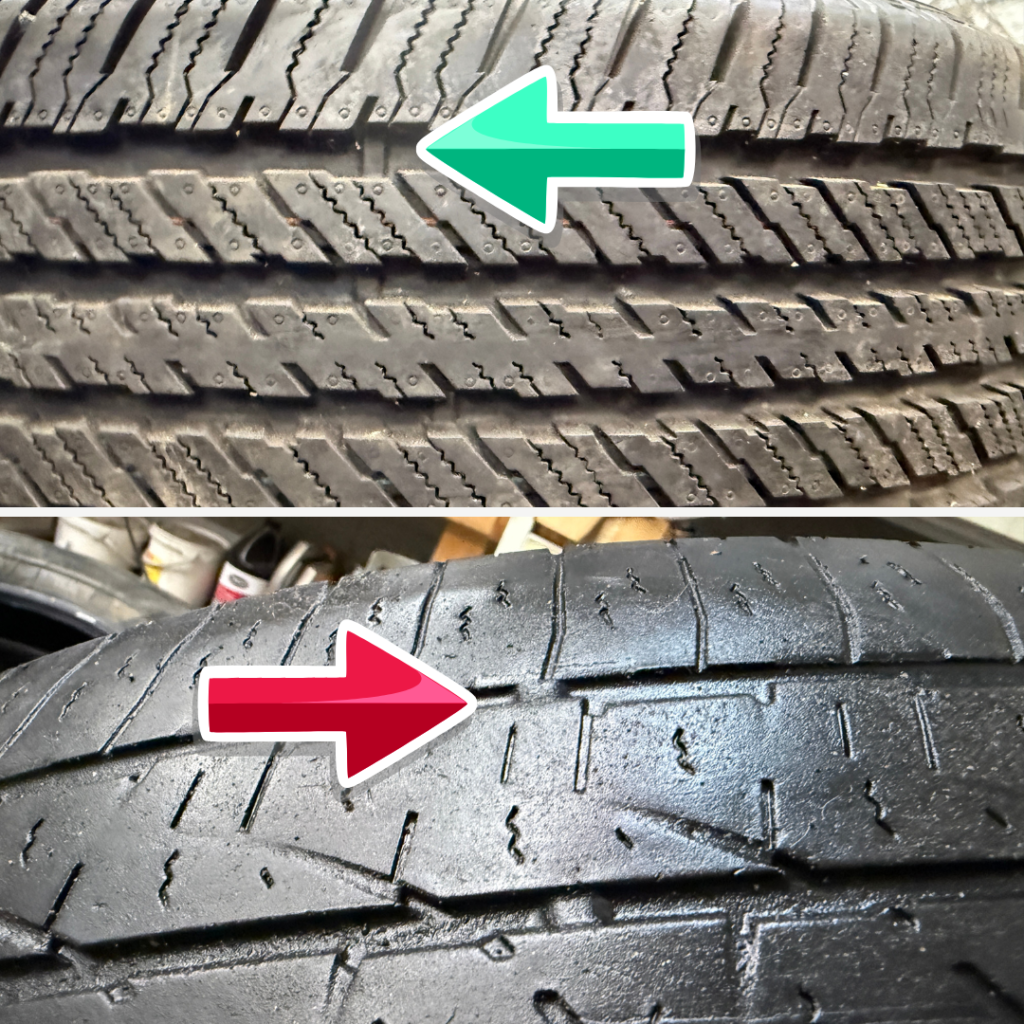
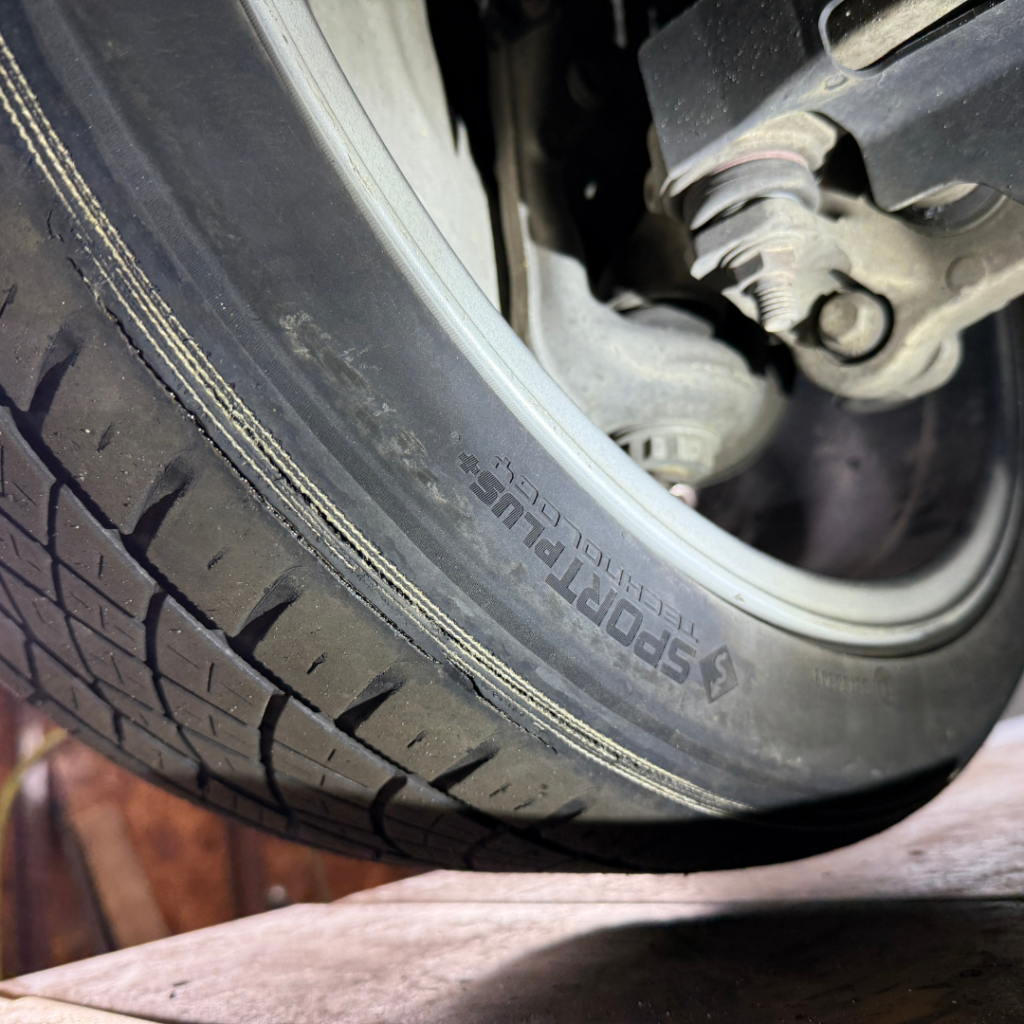
- Chopping (Cupping): If the tread feels “wavy” or like a saw blade when you run your hand over it, your shocks or struts might be worn out.
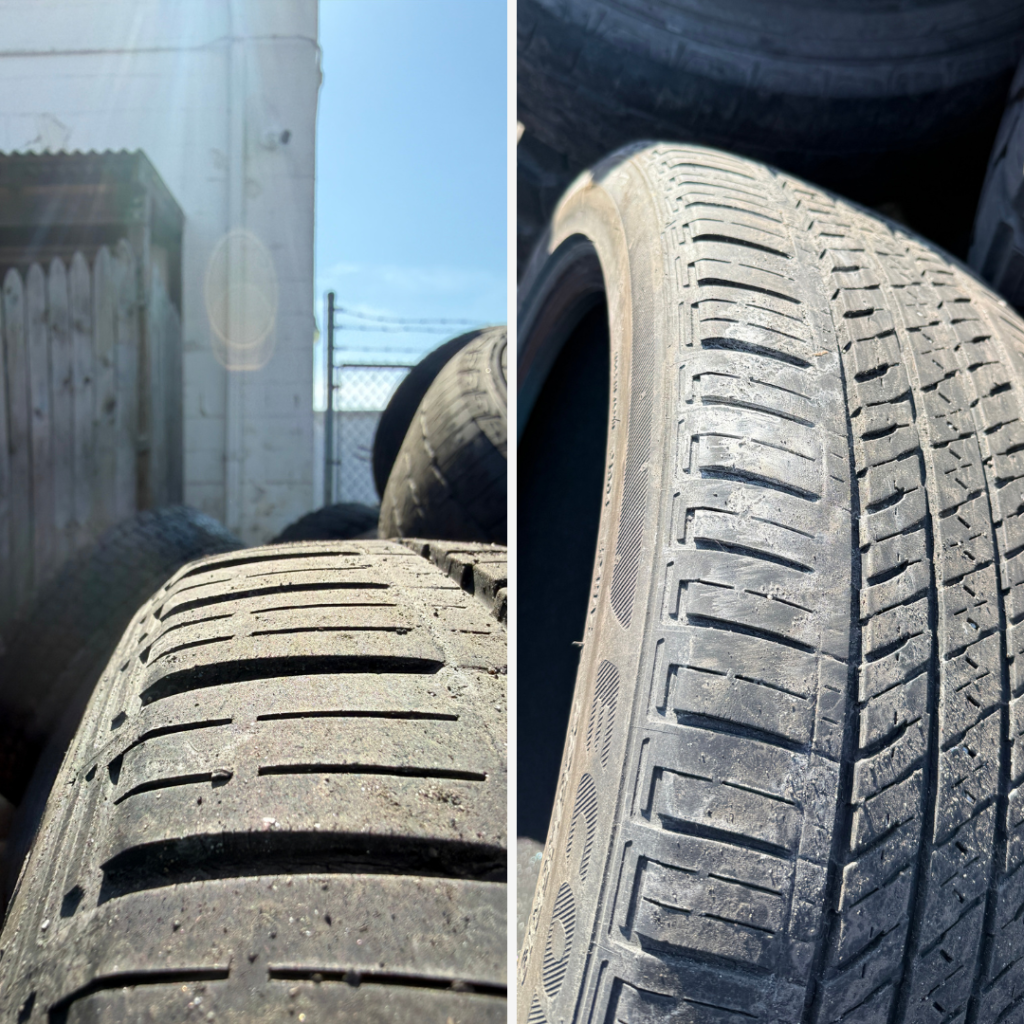
*Harder to see than feel; Look at the outer tread to see the height difference on every other tread, and the difference between the outer tread and middle tread on the left photo.
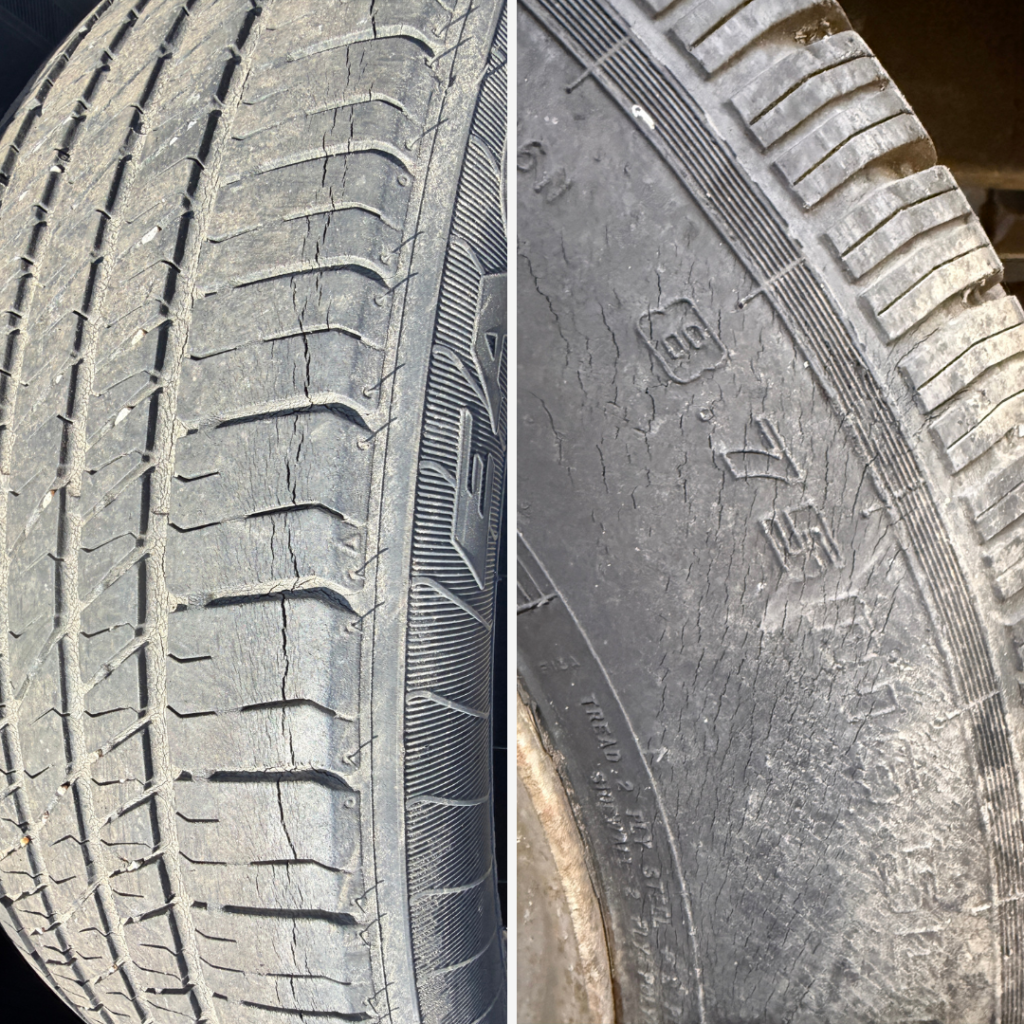
- Dry Rotting: Look for tiny cracks in the sidewall or between the tread blocks. This happens as rubber compounds break down over time. If these cracks are deep, the tire is at risk of a blowout.
3. Sidewall Damage: The Danger Zone
The sidewall supports the weight of your vehicle. Unlike the tread, it cannot be patched or repaired.
Tires at this stage are unsafe to drive on and should be replaced asap.
- Cords Showing: Metal wires or fabric sticking out of the side or the tread indicates a total structural failure.
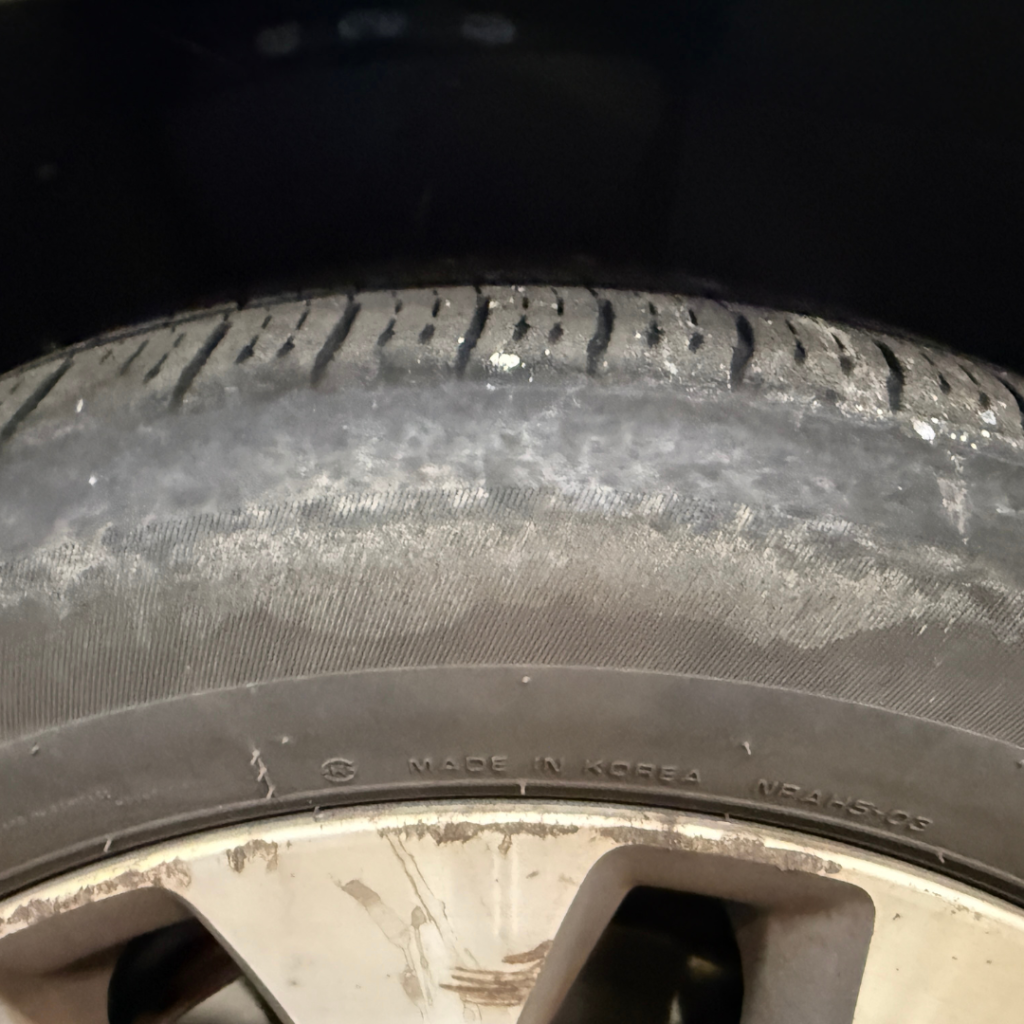
- The “Flat-Run” Ring: If you drive even a short distance on a flat tire (right photo below driven only a couple of miles to us), the rim crushes the sidewall against the road. This creates a permanent heat ring or “crease” around the circumference. Even if the puncture is plugged, the internal structure is likely shredded.
- Bulges and Bubbles: A “bubble” in the sidewall means the internal plys have separated. This is a ticking time bomb that requires immediate attention.
4. Decoding the Date Code
Tires have an expiration date. Rubber becomes hard and brittle after about six years, regardless of how much tread is left. Look for the “DOT” string on the sidewall and check the last four digits:
- The first two digits are the week of manufacture.
- The last two digits are the year.
- Example: 2422 means the tire was made in the 24th week of 2022.
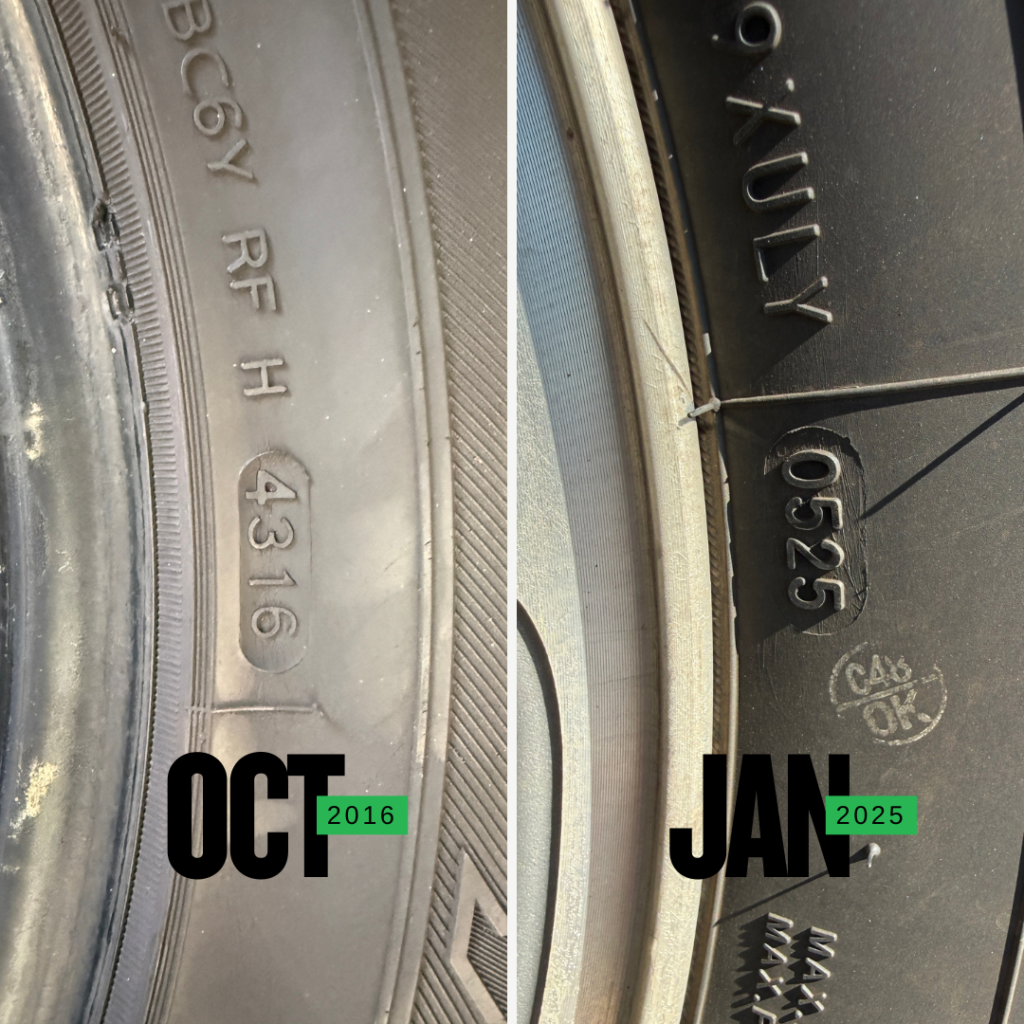
Most manufacturers have a 10 maximum service life, and recommend replacing at that time, regardless of tread depth or wear. Tires will show the signs of wear listed here, and need replacing, roughly around 3-5 years.
5. Maximize Your Investment: How to Make Your Tires Last
Tires are a significant investment. While they will eventually wear out, how you treat them determines whether you get 30,000 miles or 60,000 miles out of a set. Here is how to extend the life of your rubber:
Air Pressure
Proper PSI (Pounds per Square Inch) ensures even wear, better gas mileage, and responsive handling.
- Find Your Number: Open your driver’s side door and look for a yellow and white sticker on the door jamb. This lists the Manufacturer’s Recommended Cold Tire Pressure.

- Crucial Note: Do not use the “Max Pressure” printed on the tire sidewall. That is the tire’s bursting point, not the recommended setting for your specific vehicle.
How to Add Air:
- Remove the Cap: Unscrew the valve cap and put it in your pocket—they’re easy to lose!
- Connect the Air: Press the air chuck firmly onto the valve stem until the “hissing” stops.
- Check & Adjust: Add air in 3–5 second bursts, re-checking with a gauge until you hit the proper PSI.
- Bleed if Needed: If you overfill, use the small pin on the back of your pressure gauge to press the center of the valve stem and release air.
- Secure: Replace the cap tightly to keep dirt and moisture out.
Regular Rotations
Because the front and rear tires perform different tasks (steering and braking vs. following), they wear at different rates.
- The Rule: Rotate your tires every 5,000.
- The Benefit: This ensures even wear across all four tires, preventing you from having to replace just the front pair prematurely.
Keep an Eye on Alignment
If you’ve hit a bump or pothole hard, your car “pulls” to one side or the steering wheel isn’t centered when you’re driving straight, your alignment is off.
- The Risk: Poor alignment can scrub the tread off a tire in a matter of weeks.
- The Fix: Have your alignment checked at least once a year or immediately after hitting a significant pothole or curb.
*Because worn suspension components are frequently the “silent” cause of alignment drift and tire damage, we include a full suspension inspection with our alignment service. This ensures we aren’t just treating a symptom, but fixing the actual problem.
Balanced Tires, Smooth Ride
If you feel a vibration in the steering wheel at highway speeds, your tires may be out of balance.
- The Fix: A technician uses a machine to ensure the weight of the tire and wheel is distributed perfectly. This prevents “spotty” wear and protects your suspension components.
Driving Habits Matter
Believe it or not, your right foot is a major factor in tire longevity.
- Avoid Jackrabbit Starts: Flooring it from a stop creates friction and heat that “shaves” rubber off.
- Take Turns Gently: Hard cornering puts immense pressure on the outer “shoulders” of the tire.
- Check the Load: Carrying unnecessary heavy weight in your trunk or truck bed increases the heat and stress on your tires, causing them to wear faster.
Ready for a Professional Eyes-On?
While checking your tires at home is a great first step, some issues—like alignment-related wear or internal structural damage—require a professional touch.
Don’t leave your safety to chance. If you noticed any unusual wear patterns, bubbles, or if your tires are nearing that 6-year mark, we’re here to help. Call to schedule an appointment and let our experts ensure your vehicle is road-ready and safe!
Sandston Automotive
SMALL TOWN FEEL, BIG TIME SERVICE
804-737-7206